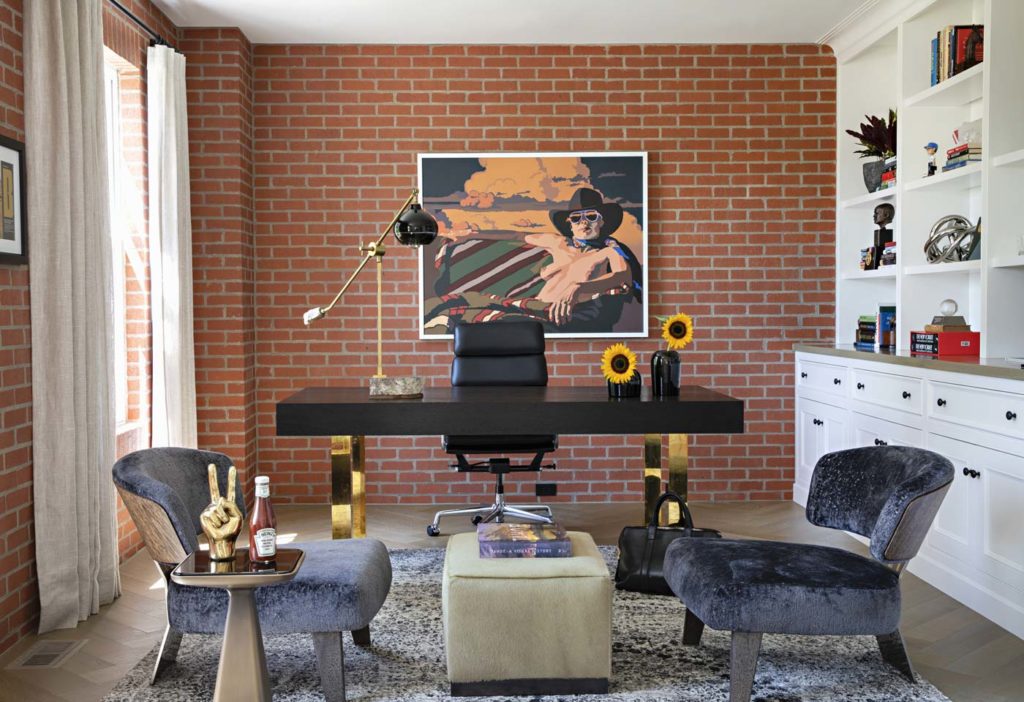
Top Five Mistakes to Avoid in Home Office Decor

In the last few years, homes everywhere have evolved to accommodate nifty workstations and efficient home offices. But working from home – where your personal life is just a head-turn away – has its own unique set of challenges, including how to design your home office for maximum productivity. To help you work from home efficiently and thrive in style, this blog brings you the top five mistakes to avoid in your home office decor. Let’s dig in!
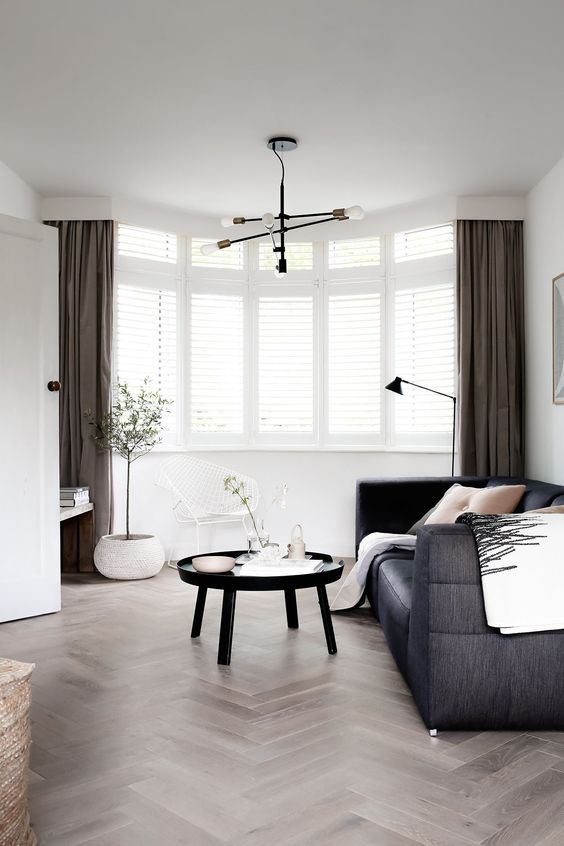
Separate for Sanity: Draw A Line Between Home & Office
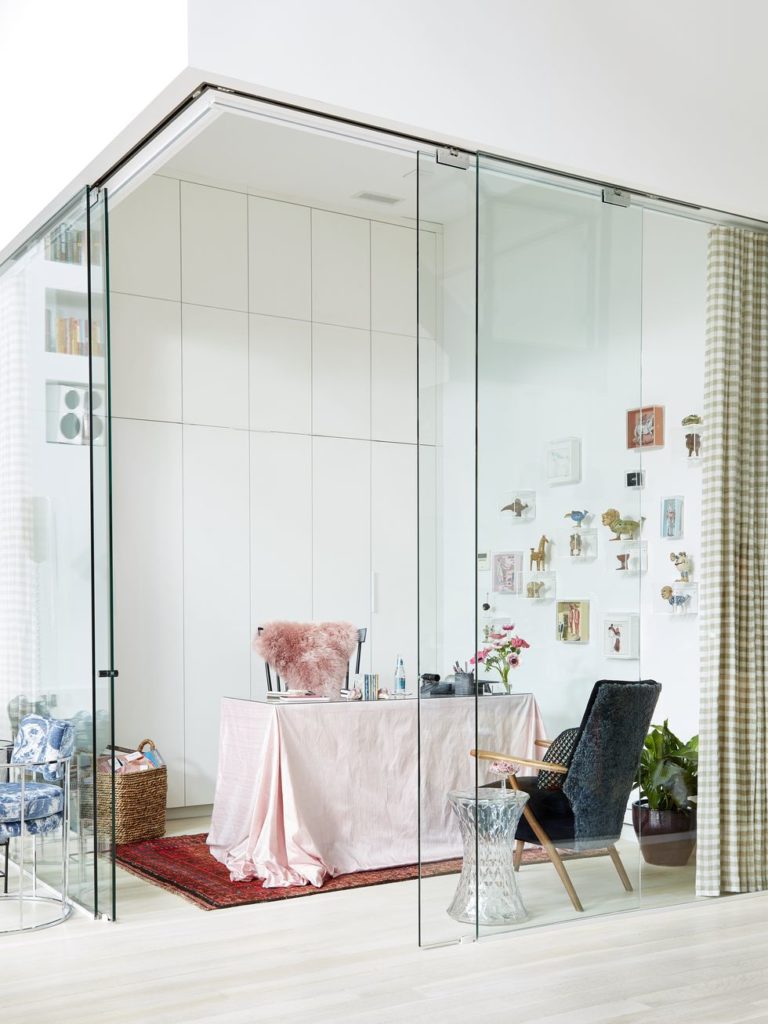
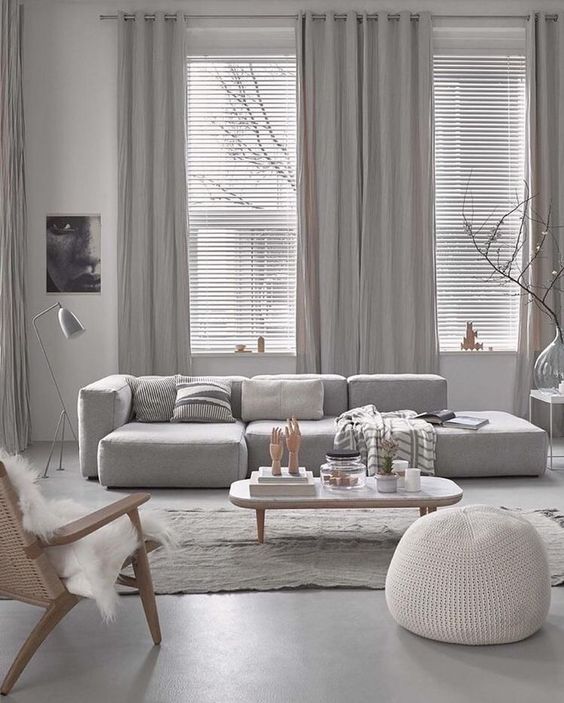
When home meets office, the boundaries between the two start to blur, and getting down to business or winding down after a long day can both become a challenge. It’s often because many make the mistake of placing their office in the same room where the TV plays their favorite show, or choosing makeshift offices near busy areas like the kitchen.
To maintain the sanctity of both your professional and personal life, establish clear physical boundaries between the two. If you’re blessed with a spare room that can function as your office, you’re golden. But if this isn’t the case, pick a quiet, low-traffic area that is relatively free from distractions.
To further carve out and define your work area, employ room dividers like solid screens or glass walls. If you don’t want to make permanent structural changes, use foldable screens or room-dividing curtains that can be drawn apart to unify the space whenever needed.
READ MORE: ROOM DIVIDER CURTAINS: IDEAS & TIPS
To Shine in Success, Deploy Good Lighting
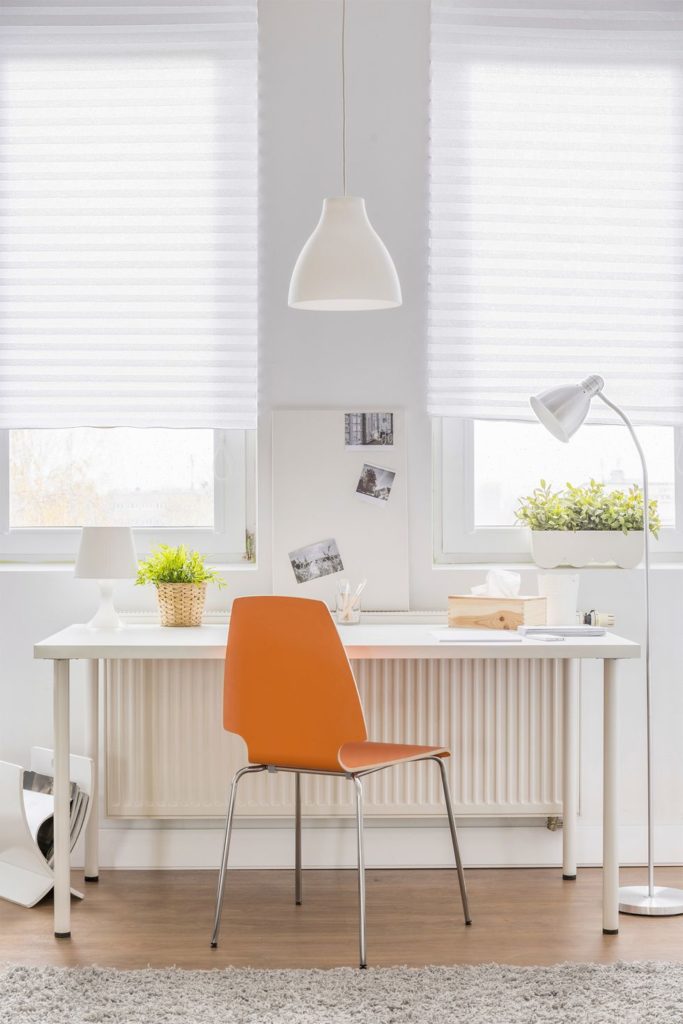
If you want your work to steal the spotlight, how can you ignore the importance of good lighting in your workspace? A badly-lit, dark office will not only have you struggling to stay awake after lunch, but may also affect your vision in the long term.
An ideal lighting setup should strike a balance between ambient and focused lighting to help you stay alert and engaged at work.
Start by choosing a well-lit area of the house and maximize natural light by keeping your windows/curtains open. To further enhance lighting, opt for good LEDs that mimic daylight. Make sure the light is softly diffused across the room, avoiding any harsh glares. Lastly, employ task lights that focus the light on your desk where you are getting most of your work done.
If you have no option other than a dark corner of your home, use these simple hacks to brighten up a dark room/ home office.
To Avoid Workspace Woes, Invest in Ergonomic Furniture

Ergonomic furniture isn’t just a buzzword – it’s a lifestyle upgrade to ensure that your workspace doesn’t double up as a torture chamber for your back, neck and wrists. Yet, many of us decide to make do with less-than-optimal, available home furniture or – on the other end of the spectrum – choose form over function.
Truth is, neither the kitchen bar stool nor a designer dining chair can fulfill the requirements of an office chair. The right chair will feel as good as it looks with a deep seat and adjustable lumbar support. It’ll help you follow the 90:90 rule while sitting – 90 degrees at the knees and 90 degrees at the waist, which according to experts is the best sitting posture for long hours of work.
And don’t forget the desk. Kitchen islands and dining tables are rarely eligible for heavy-duty office work. Invest in a desk with optimal height that suits your own height. It should allow you to work without having to slouch or stretch. Your mouse and keyboard should be at the same height as the elbows and forearms, so your shoulders can fall relaxed by your side. All this can only be ensured if your desk is ergonomically sound.
Tidy Up to Level Up: Prioritize Storage & Decluttering
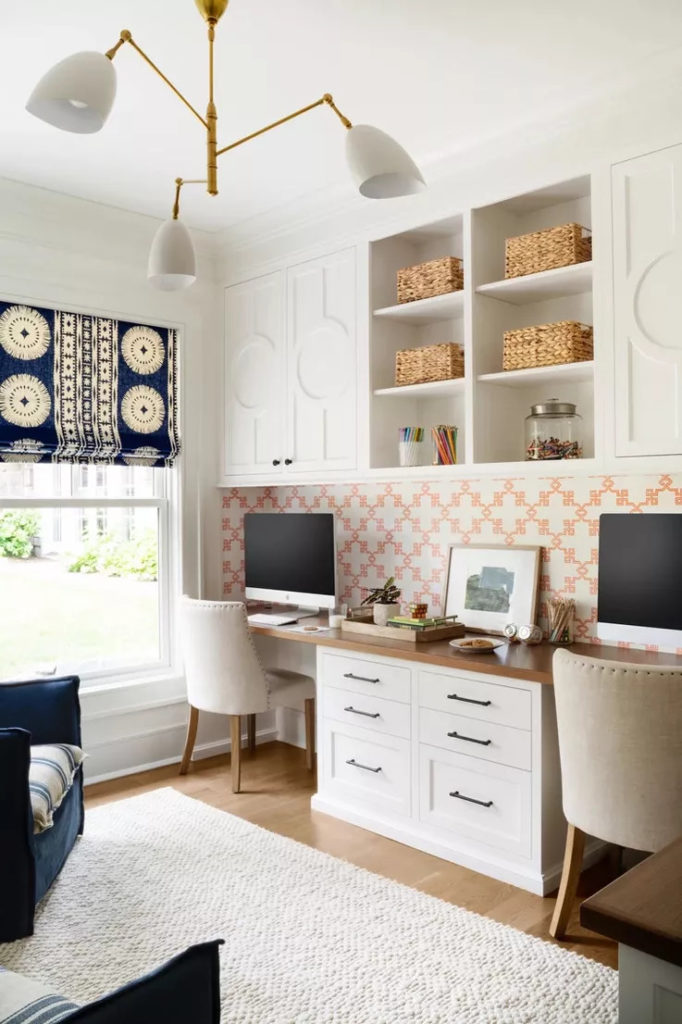
If you find yourself dedicating five minutes every day looking for your stapler, you likely are guilty of keeping a cluttered home office with zero storage space, while your productivity and sanity both take a serious hit.
The solution starts with committing to one dedicated – instead of ‘roaming’ – workspace which is regularly cleaned, decluttered, and organized. Empty and allocate a drawer (or closet if you need) only for your work-related stuff so your desk stays tidy. Invest in a sturdy desk organizer for stationery items. Untangle the wild wires laid all over your space with a well-considered cable management system. You can also get a small file drawer that is movable so you may keep it near your desk while working and then move it to a different location for storage once you’re done with work.
Remember, a tidy office is key to a tidy mind. So ensure that your home office is equipped with dedicated storage and office organization tools to get you on track for maximum efficiency.
Reduce Noise, Amplify Productivity
Most home offices are within the vicinity of sounds of life. From honking street cars outside to arguing siblings inside, a lot stands between you and the quietude you need to end your workday. But worry not, we’re here with some sound advice (pun intended) to stop you from making the grave mistake of skipping sound insulation for your home office.
Start by choosing a quiet space for your office. It can be a loft, a sparsely used guest bedroom, or your basement. Next, layer up on soft furnishings because these tend to absorb sound waves, instead of bouncing them off, thereby reducing noise considerably.
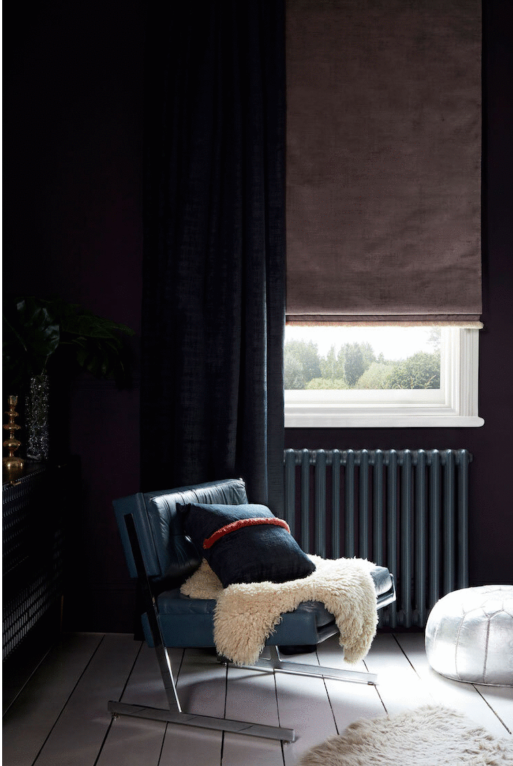
If you are using single-layered window treatments, choose tight-knit fabrics instead of loosely woven ones. If you are layering your window treatments, sheers with opaque/ blackout curtains are a popular choice. You can close the blackout curtains during the noisiest hours of the day and draw them aside on early mornings or late afternoons to let soft diffused light flood in through the sheer roman shades/ curtains. You can also consider floor-to-ceiling curtains to create an accent wall in your office that adds an eye-catching dimension to your space and also significantly adds to the sound insulation of your home office.
Place a thick rug on the floor, or jump in on the hanging rug trend. If you happen to have a knack for curating and displaying art, you can add another decorative yet functional layer with canvas paintings to muffle noise. You can also design and print your logo to add a professional feel to the home office. Bring in a few cozy throws and cushions to further enhance sound insulation and make sure to wash and clean the decorative pillows periodically so they look clean and fresh. If you want to completely drown out background noises, invest in a white noise machine for office spaces to help you concentrate.
READ MORE: MASTERING THE ART OF LAYERING: ENHANCING DEPTH AND TEXTURE IN YOUR HOME
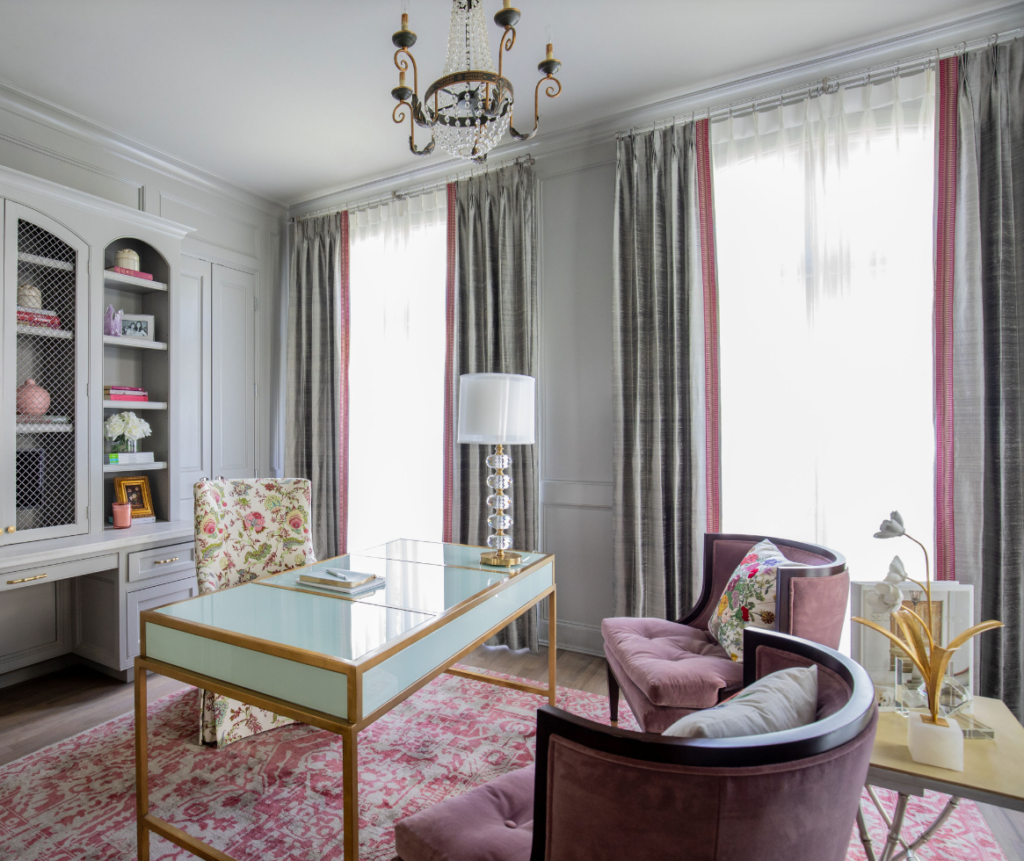
Inspiration Corner for Home Office Window Treatments
Soft furnishings – especially window treatments – play a key role in making home offices visually pleasing as well as functionally optimal. To help you get started on your shopping spree for the perfect dressings for your home office, let us introduce you to a few of our favorite picks:
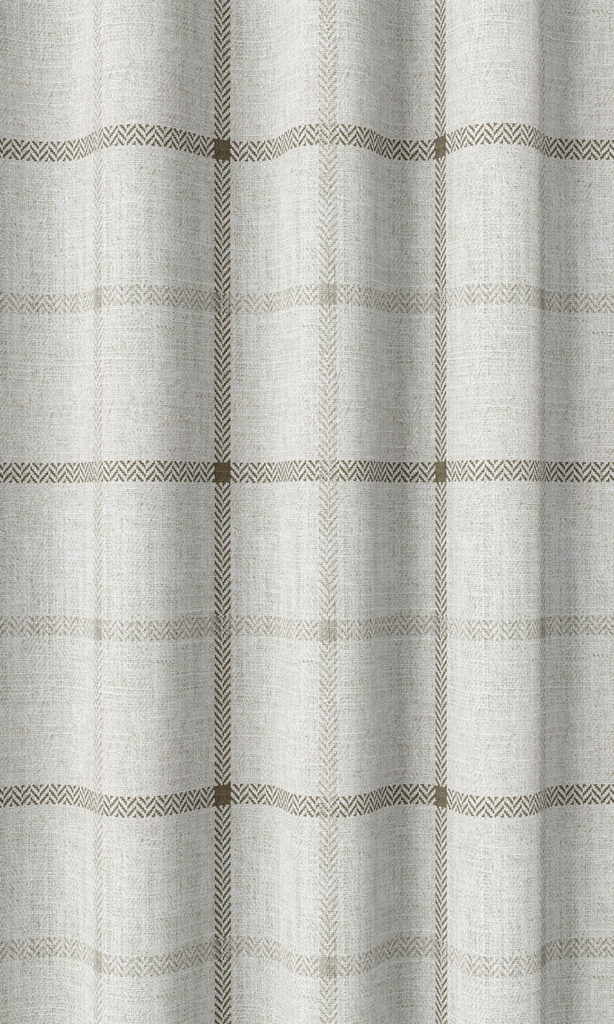
Featuring a big-block plaid pattern of pale beige and mocha brown on a crisp linen white – hues that lend a contemporary twist to the otherwise traditional pattern, this roman shade is sure to add a serene sophistication to your home office.
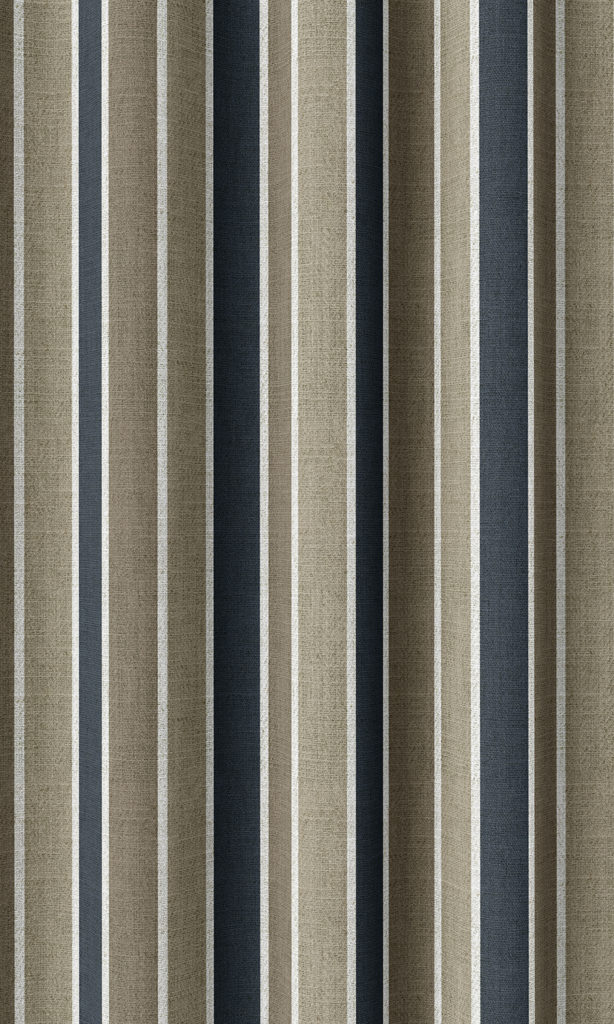
Add sanctuary style to your office with this alluring fabric. Krimson Lake is printed on a texturally rich, herringbone weave base and features a soothing color palette in navy blue and soft shades of brown. Its repeating stripes enliven its look to balance with its calming tones.
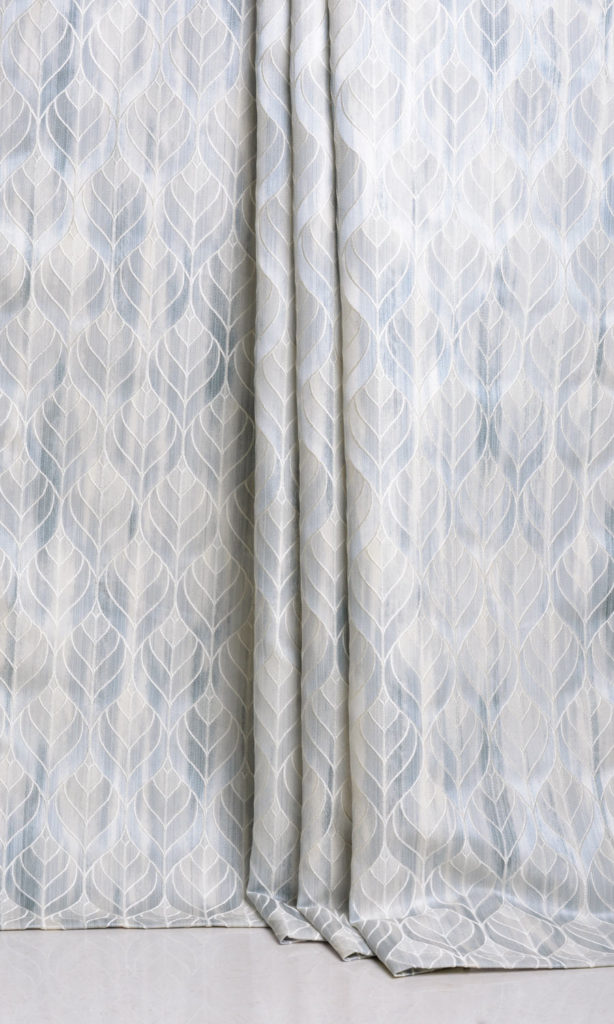
Muted blues and leaf ribs all over – a still from a nostalgic cloudy evening sidewalk! This understated beauty that taps the coolness of bluish-gray in foggy shapes offers a contrast of forms with the neatly outlined leaf motif layered on top. With a vast capacity to mingle with varied decor styles, curtains in this lovely fabric are a timeless addition to your home office.
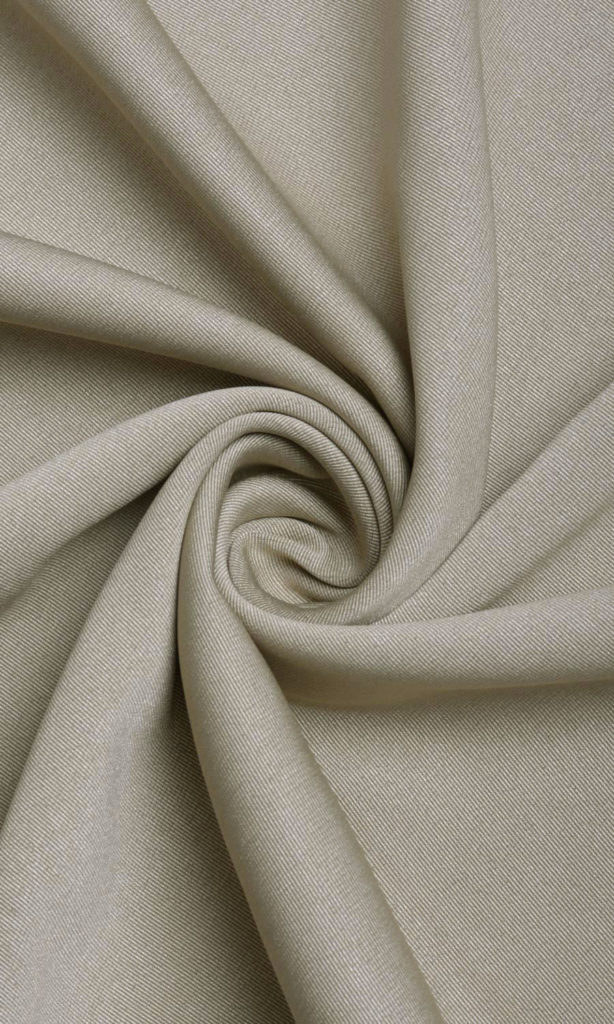
Introduce a power note in your office with this gray blackout fabric. Very lightly textured to show a faint check weave, it looks unfussy, sophisticated, and subtle. It cuts down on irritating external noises. Pair this curtain with one of our sheers for a perfect blend of looks and light control.
Spotlight On: POSTA
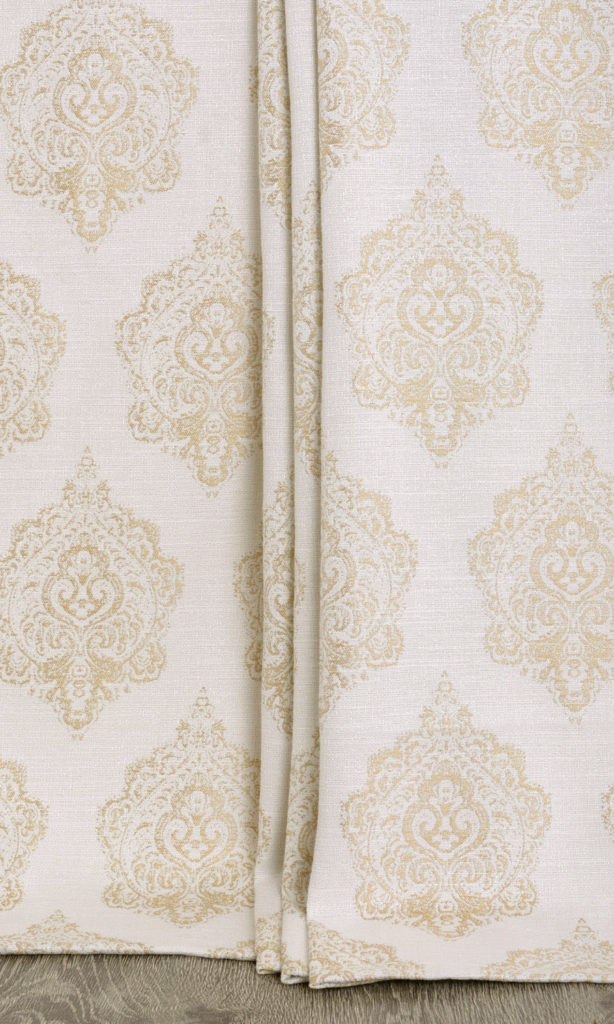
Posta stands out with its ‘traditional pattern meets modern treatment’ look. The base off-white fabric with pale beige detailing gives a texturally rich woven feel. The oversized botanical motif with buds, tendrils, and decorative elements is reminiscent of French palaces and Moroccan mansions. Its slightly smudged look and diagonal placement add an interesting dimension to it. Very sober yet very stylish.
Calling It a Day
While you meticulously tick through the above list, don’t forget to add your own personal touch to the decor. Small but meaningful knick-knacks, bits curated during travels, and other prized possessions can all contribute towards making your workspace feel more ‘you’. Use your soft furnishings and window treatments from Spiffy Spools to bring in your favorite color and enliven the space with a splash of patterns. On that note, happy shopping and happier decorating!
READ MORE: STUDY ROOM TIPS TO BOOST PRODUCTIVITY
TOP TIPS TO BRIGHTEN UP A DARK ROOM

A ‘light and bright’ home is the aesthetic goal and ultimate dream of many homeowners and interior designers. But what do you do if you find yourself stuck in an under-ventilated house with little to no light in most areas? How does one reconcile these two extremes of dream and reality?
Well, there are some obvious ways and clever design hacks to transform your room from gloomy dark to soothing bright. Here are some of them:
Opt for a Light Room Palette
In a room with very little access to natural light like basements, the goal should be to make the most of the little. The color scheme of the room should therefore be oriented towards brightening up the space. While dark surfaces absorb the light that falls on them, lighter-hued surfaces reflect it and accentuate its effect. So fill your room’s palette with whites, creams and light pastel-y shades. From your wall (and ceiling) paint and wallpaper to bed linens and upholstery – go for these lighter tones so the light can bounce around in the room.
Choose the Paint Finishes Wisely
When picking paint colors for a dark room, not just the palette, even the textures and finishes should have a say. The matte finish is relatively coarse and tends to absorb some of the light that falls on it. Whereas glossy finishes reflect more light in the specular direction which makes it work almost like a mirror. To maximize the effect of the incoming light, go for semi-gloss or high-gloss finishes. Notice how lacquered walls shine bright even with a dark palette, so how much more reflective they will be with a bright color scheme!
Make Strategic Use of Mirrors
The light that enters your home can be doubled by reflecting it at its full intensity with the help of mirrors. This is a tried-and-tested, age-old method used to bounce light. Unlike other objects of decor, mirrors don’t absorb any light, rather they offer the spitting image of anything that faces them. So, place them opposite windows and double the natural light. And you don’t have to limit yourself to one oversized mirror, rather use multiple mirrors of varied sizes at various points in the room such that they bounce each other’s reflected light.
Introduce Metallic Accents
Prefer materials with reflective quality over those with light absorbent quality. So, for example, prefer polished nickel or steel hardware to wooden ones. Wallpapers with golden or silver details can reflect light that falls on them from various directions and angles. Instead of a painted canvas, consider a metal wall sculpture. Even a detail as small as door handles and drawer knobs matter. Switch over from matte black to brushed gold, for example, to bounce the light instead of absorbing it. The metallic sheen adds to the reflective quality of the space.
Install Light Window Treatments
If your house has not been updated in terms of decor for a few years, your windows may be sporting heavy draperies topped by bulky valances. They must go if you want more light. Replace the heavier drapes with lighter sheer panels stitched with streamlined heading styles such as flat panel tops or grommet tops. Keep window treatments light and airy to let in maximum light even when they are closed for privacy. Or go for window treatments such as roller shades that clear the window totally when they are closed. In rooms where privacy is not even a concern and you have small windows, you may even do without window treatments.
SHOP NOW: CUSTOM SHEER CURTAINS & WINDOW DRAPES FROM SPIFFY SPOOLS
Do Away with Storm Windows

Sometimes, a blessing comes with a cost, and storm windows are a great example. They protect you from a disaster and insulate your house better for immunity to harsh temperatures, but they admit lesser light into the room. If you think your home can do without storm windows, better remove them. And the good news is that you can always put them back later when you feel the need.
Clear Obstructions to Natural Light

If your room’s darkness is an unusual event, inspect your house’s surroundings. Perhaps there are overgrown vines on the facade or surrounding trees bending with heavy boughs that are begging desperately for a trim. Or, there might be an umbrella canopy that you had spread out for summer and never bothered later to retract. Perhaps there are no obstructions to be cleared but the window is not ‘clear’ enough to admit unadulterated light. Call it a ‘deep cleaning day’ or take up the pruning shears and settle the issue.
Rearrange the Room

A faulty layout may sometimes be to blame for at least some of the darkness in the room. Why let the couch block the light pouring in through a window when it can be made to face it instead? Or, why keep a bulky wingback chair at the corner below the window where a low-seat chair could have provided the same function without blocking the light? And what about that gargantuan chandelier that verily illuminates the room at night but obstructs all the natural light during the day? Wouldn’t it do better in a room that justifies its size and sculptural quality rather than a small dark room that needs the sleekest of light fittings? Rethink the layout of the room and you may find genius ways of making the room brighter without spending a dime.
Go For Layered Lighting
Adding light sources might sound like a no-brainer but strategically arranging multiple light sources at different points and levels to make a dark room bright does need some brains. At the moment the room may be lit by only the bare minimum overhead ambient lighting. Now throw in some task lights and accent lights to the mix to light up any dark pockets in the room.
Making a well-considered combination of light sources that are directed to the walls, ceiling and floors is key to layering a space with lights. Light up a reading corner with an overhanging pendant light or extendable sconce. The ceiling can be lit up with an oversized torchiere lamp or LED light strips lined on exposed beams. Light up alcoves, glass cabinets and gallery walls with wall-mounted accent lights. Or place good old tapered shade lamps of various heights in different nooks. Make sure that every part of the room receives some sort of light – natural or artificial.
If it rings with your aesthetic preferences and the nature of the room, consider introducing decorative lights to the space. They not only add a source of light but also cheer up the heart. A neon sign voicing your favorite life mantra can light up not just the space, but also your mind. A string of fairy lights will not just exude a lambent glow but also warm up the heart with infectious joy. A desk tree lamp or a bottle lamp lifting a boring side table to an effervescent vigor besides brightening an uneventful nook is just the right kind of decor for a room gone too dark.
Use Translucent Light Accessories
Multiplying the sources of light is helpful, but watching the opacity levels and finishes of these light fixtures is also important. If the light fixture is meant to highlight a decor item or a specified area, it should be made of opaque materials. If the light that a semi-transparent light fixture provides is not sufficient to brighten a dark corner, check its palette and finish. If it’s a dark-hued tapered lampshade with a linen-like finish, for example, there’s no surprise that the light is so dim. Swap it for a white smooth-surfaced lampshade and see the difference. As regards ambient lights, translucent materials will help to spread the rays in all directions. So, prefer clear glass for overhead light fixtures such as chandeliers and other ceiling-mounted and wall-mounted lamps. And, maintain them fresh and clean to make the most of their potential for light diffusion.
Go For Light Flooring Or Rugs
The floor, though below eye level, needs the most careful palette choice because a dark floor can make a room seem immensely dark even if all other elements are bright-hued. Light-colored floors will reflect natural light and the light generated by overhead fixtures. But changing the flooring just to have control over the palette is a far-fetched idea. If you’re having a dark-colored floor, layer it with a light-colored rug. If you’re worried about maintaining them spot free, consider low-maintenance stain-resistant jute rugs.
Choose Furniture That Allows Light Flow
If the room is dark, we recommend picking furniture with low profiles, less height and minimum contact with the floor. Ensure ergonomic design so you don’t miss the comfort factor. Compactly designed furniture with clean-lined contours let light move around and under with ease.
Not just shape and size, the palette of the furniture can also be a strategic choice. Going for a light palette helps immensely as furniture usually takes up much visual space in the room. Also, consider reflective materials like glass instead of wood for a table surface so it can throw back the light that hits it. Try transparent furniture like those made of glass, lucite, or see-through acrylic as they let light pass through them, providing little scope for shadowed regions behind/below them.
Keep Embellishments To A Minimum
The more the space is layered with objects, the less light it will bounce. If your walls, windows, and floors are all completely decked with decor accessories, the flow of light gets obstructed at multiple levels, leaving many areas of the room shadowed. So, fall back on minimalist styles like mid-century modern or Japandi to keep furnishings and embellishments to a minimum, and let the light have smooth surfaces to fall on and be bounced back.
Winding Up On A Bright Note
Whether it be an basement or a non-ventilated powder room or a living room saddened by tiny windows, you have most of the tricks up your sleeve now to brighten it up. And remember that brightening a dark space is not just about bringing in light literally, it’s also about making it ‘feel’ bright and cheerful.
A large painting or art installation with bright colors that pop out of the muted backdrop can really anchor the room on a cheery palette. Or look out for pillows and throws in sunny hues like red, orange, and yellow that remind of the April blooms or a winter campfire – happy memories and cozy pastimes. Or, go the cool way with refreshing your bed’s linens in pale blues and greens reminiscent of summer skies and verdant countrysides. These hues elevate the mood to a springtime joy besides topping up an already bright palette.
Depending on the particular situation you face, choose a combination of the above-elaborated tips to solve the problem. And, for any other design anomaly that you face, make use of our blogs for a handy reference. It’s our pleasure to assist you in designing your spaces and for all your fabric window treatments, we’ve got you fully covered at Spiffy Spools.
READ MORE: THE BEST SHEER CURTAINS MONEY CAN BUY
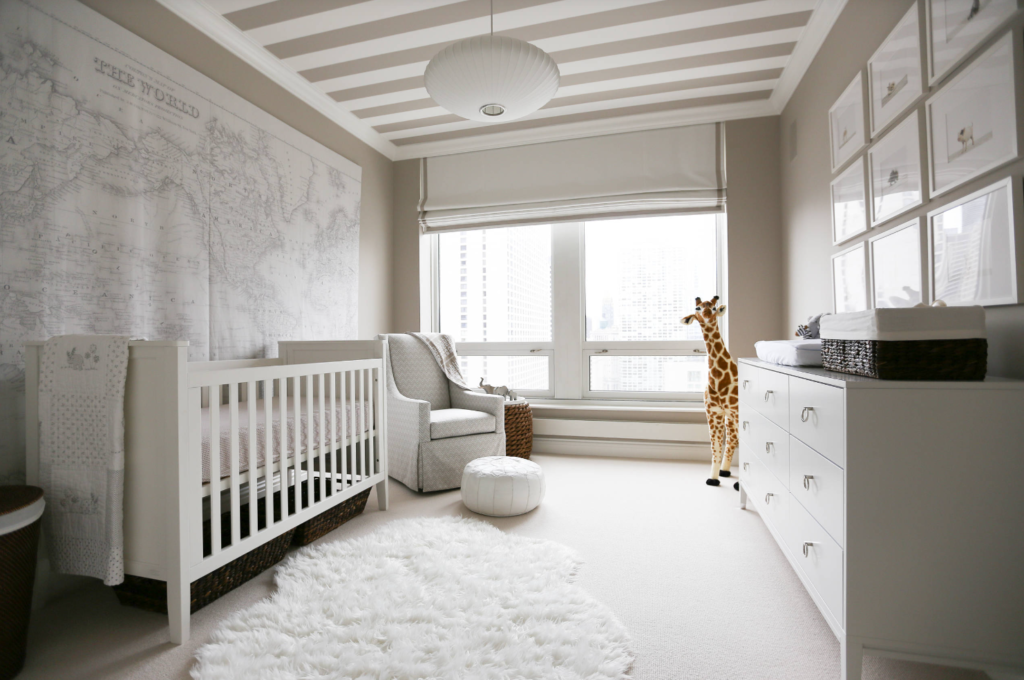
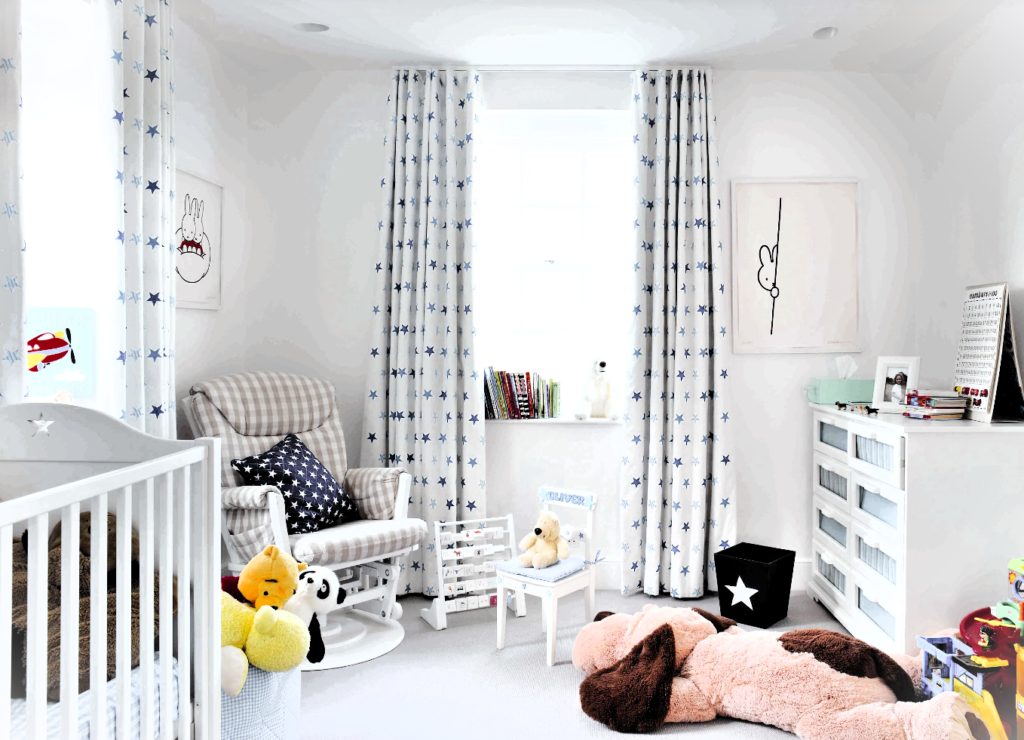
KID COUTURE: THE BEST ROMAN SHADES FOR NURSERY
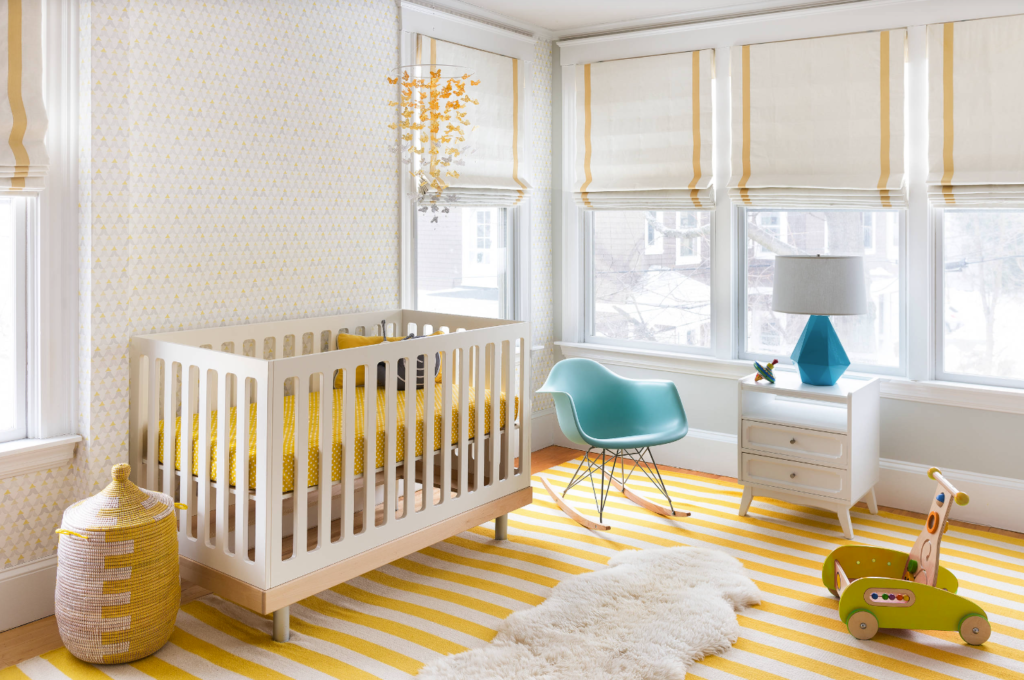
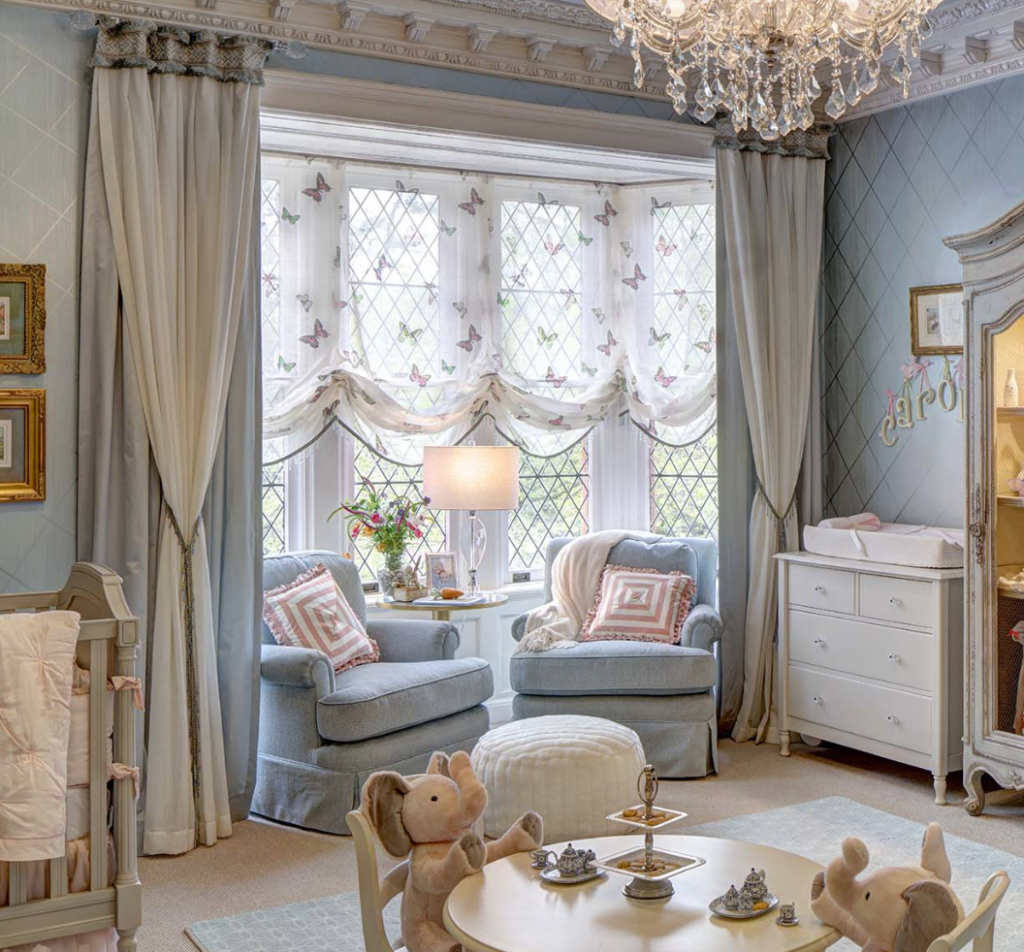
One of the most enjoyable moments for a new parent is decorating the nursery of a newborn. Your inner child unabashedly indulges in color and whimsy to create a space as charming as a dream. And when your baby blissfully sails to the ‘world of dreams’ on a sleepy ferry without a fuss – that’s when you know you have truly nailed it!
The transition from a fairytale page to a dark cocoon must be smooth, instant and effortless, and the right window treatments go a long way in making it possible. With this goal, if you’re out shopping for roman shades for your baby’s nursery, find yourself in safe hands as you travel through our stylists’ tips, and get a sneak peek into our catalog for inspiration.
Shop for custom roman shades for nursery from Spiffy Spools. Like your baby’s own fairy godmother with a wand in hand, we can style your nursery as you desire- from pretty blackouts to dreamy sheers and cartoon prints to checkered flair, our vast collection of over 3000 fabrics has got it all for you!
Reasons to Love Roman Shades for Nursery Windows
When the expectations are soaring high, designers put the best players on the frontline. If asked what’s the best nursery window dressing, we’d say it in a heartbeat – roman shades. And here’s why –
- SAFETY FIRST, LAST, AND ALWAYS: With roman shades, you need not worry about your baby getting entangled in long flowing trails of fabric because roman shades stop at the sill. The pull cords can easily be secured with anchors to keep the dangling cords inaccessible to the kid, ensuring complete safety. Parents can also consider cordless roman shades to avoid cords completely. Furthermore, they also have the option to choose hypoallergenic, natural fabrics like cottons and linens for their nursery roman shades, avoiding man-made, chemically treated materials.
- NEAR-PERFECT LIGHT BLOCKAGE: With a continuous single-panel structure backed by a blackout lining, roman shades are capable of blocking a high degree of incoming light.
- HIGHLY CUSTOMIZABLE: Unlike industrially produced roller shades and slatted blinds, roman shades allow you to choose the palette, pattern and texture of your liking – making them the favorites of imaginative designers as well as doting parents.
- HIGH-END APPEAL: Roman shades add to your nursery decor a handmade goodie and a personalized high-quality curated product in an exquisite fabric. It’s an elevated look that no factory-made shade or blind can offer.
- VERSATILITY: Where curtains might be too traditional and industrial blinds too modern, roman shades vouch affinity to both tastes. Depending on the fabric chosen, you can bring the complex decorativeness of the yesteryears or the clean lines of contemporary times to any desired degree into your nursery.
Elegantly Efficient: Nursery Roman Shades at Their Best
Since you’ve found out why roman shades are the perfect mix of style and function for nurseries, you’re probably as impressed as we are. The most beautiful part of the deal is that you can design every single part of the shade to suit your specific liking, decor style and needs. So, let’s introduce you to the tips and tricks that will make this journey of styling and decorating a cakewalk for you –
Daylight, Dimlit or Deep-Dark: Have the Control At Your Fingertips
A nursery is a place for magic and fantasy, but the hardest feat to be performed here is the instantaneous transition from a bright sprightly hub to a dark soothing cave. And that has to happen at your hands, at your will. The fabric choice for your roman shades will have a lot to do with making this act effortless, and that’s why, decide on the fabric base before anything else.
BLACKOUT SHADES AS STAND-ALONE
For roman shades that are intended for use as stand-alone treatments, you need blackout or dimout fabrics, backed again by a blackout lining for maximum darkness even during afternoon nap times.
Blackout fabrics block incoming light fully whereas dimout fabrics achieve this goal substantially, not totally. They also keep away noise and external heat from entering the nursery and maintain its temperature. For a better understanding of room-darkening fabrics and tips to use blackout lining, do read our extensive blog on this topic.
And have a peek into our blackout and dimout roman shades collection. Our Cap Ferret blackout roman shades are wisely crafted in grey-yellow chevrons for a timeless and gender-neutral addition to any nursery. And dimout Orchid Bay roman shades make their classy damasks look solemn yet fanciful in a gentle gray-pink palette.
ROMAN SHADES AS SECOND LAYER
On the other hand, for roman shades that will be layered on with blackout curtains for nursery or a second set of blinds, you can consider light-filtering fabrics such as sheers, semi-sheers or loosely woven linen. Light-filtering fabrics ensure privacy and protection from harsh sunlight without making the nursery dark. Blue Penny roman shades from our collection are a lovely example of semi-sheer cotton shades that sport artful embroidered floral motifs in stunning blue and beige tints.
So make the choice of your fabric keeping in mind its light blocking properties, your overall plans for window treatments, local overall climate, window position and size of your nursery windows in relation to the exact type of light control you wish to have.
Inside Vs Outside Mounting: Position the Shade Correctly
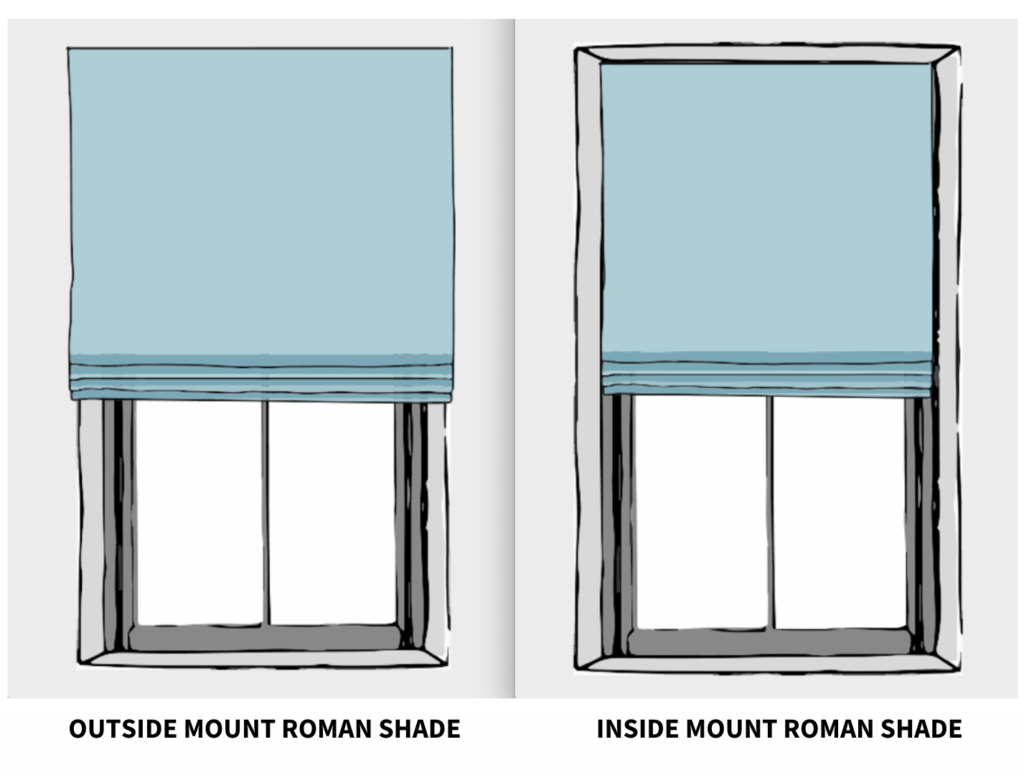
The light control aspect of roman shades is not just dependent on the fabric from which it is created but also on how it is mounted. The shade can be made in a perfect-fit size to sit snug within the frame recess close to the pane – known as inside-mounting the shade. Or, it can be installed on the wall outside, sealing the whole window – known as the outside-mounting position. Both positions have their own plus and minus points which we discuss at length in our blog post here.
The decision to mount the shade inside or outside the window will largely depend on the depth of the window frame besides your personal taste and light control requirements of the nursery. Key details follow below:
INSIDE-MOUNTING POSITION

This is the most popular way of mounting sill-length window treatments. Sitting taut within the window frame, this shade commands no wall space and is non-accessible for the baby, making it the most minimalistic and safe window treatment for a nursery. These are the key things to keep in mind:
- The window must be at least 2 inches deep so our shades can be mounted within it comfortably. Furthermore, no handles or other obstructions should come in their way.
- The shade must make seamless contact with the window frame, leaving no gaps for light leaks in between. This requires precision in measurement and the result is a window treatment that relays the custom look at first sight.
- Remember that with this style, the shade’s stacking room is accommodated within the window. Hence, it is better to avoid this mounting position for small windows. An outside-mounted shade might be a better option for small windows as the shade can be positioned to stack on the wall above instead of covering any window space, thereby maximizing light and air when the shade is folded up.
OUTSIDE-MOUNTING POSITION
In this position, the shade is mounted on the wall outside the window frame overlapping the window on all sides, and thereby providing better coverage. You also reserve the possibility to mount another shade/blind within the recess by mounting the roman shade outside.
Keep the following things in mind to outside-mount the shade:
- The headrail should ideally be mounted a few inches above the window trim. If it’s a small window, make sure that the folded stacks are accommodated above the trim so that the shade does not obstruct light, air or the views when it is folded up. It also helps to make the window look larger than it is.
- Extend the shade 4-6 inches in every direction beyond the window trim. This will help minimize light leaks from edges, making for a darker, sleep-friendly room when so desired.
Flat Fold Vs Scalloped: Choose the Apt Style
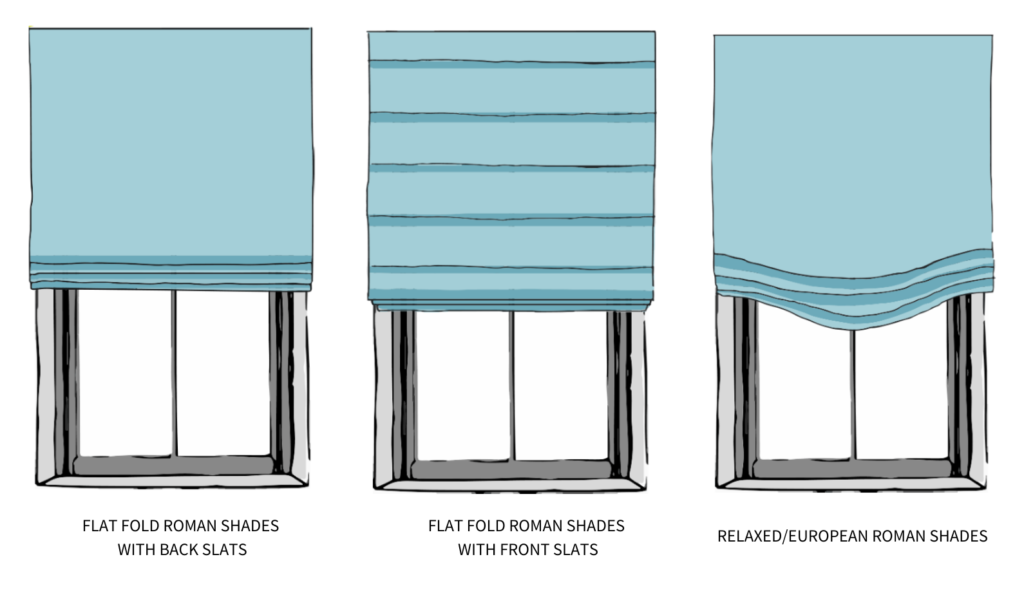
The next important decision regarding roman shades is regarding their fold style and structure which is directly responsible for their functional aspects. Our roman shades come in three popular styles that may be classified into two broad groups: flat-fold shades and scalloped shades.
Determine the style based on whether your roman shade is a stand-alone or a primary treatment. In a nursery, a standalone shade can be expected to be used several times during the day for naptime, so make sure your choice prioritizes your practical needs. Flat-folds are better for stand-alone shades and scalloped shades are better kept stationary under other functional over-treatments that can be operated easily.
Stitching Stories & Mixing Hues: Palette-Pattern Palooza
The most enjoyable part of planning your nursery’s roman shade is coming ahead. So use the tips below and let the creative in you take over!
PALETTE
Let your decor style, overall room palette and the amount of optical real estate your windows occupy have the primary say on the palette of your roman shades. The following tips may help along the way:
- While babies love saturated colors, too many exciting elements in the ambiance can make it difficult to catch sleep. Soft pastels, on the contrary, are cheery yet soothing to the eye, never making the little one too alert to fall asleep. So, for a small window, opt for saturated colors if you wish, but for a large window, a soothing tone may prove better as it occupies more visual space.
- If cave-like darkness is your goal, once shades are drawn, darker colors of the spectrum will be better friends than lighter ones, even on a blackout fabric.
- If you foresee changing the room’s palette in a couple of years as the nursery’s inhabitant grows, opt for a neutral palette for your roman shades so they can work with the renewed palette.
- We recommend picking the roman shade fabric first before the paint color for the walls so you can find the perfect complementary or contrasting shade. Remember it’s much easier to find a paint color that perfectly matches your textile elements than vice versa.
PATTERN
An easy way to bring lightheartedness to the nursery is to include patterns in the decor. However, your pattern choices must be based on your future plans regarding the nursery and your overall decor style.
- WISE CHOICE OF MOTIFS: While one may be tempted to choose thematic patterns like superheroes or popular cartoon characters, designers are quick to advise against over-investment in such themes, unless the plan is to refresh every couple of years with fickle obsessions of your tot. Otherwise, it might be wiser to choose a fabric featuring classic patterns like polka dots, stripes, florals, etc. that are playful, while also being relatively age-proof. If, however, your heart is set on introducing a cute-sy, theme-based pattern, at minimum, consider keeping the motifs broad in themes so they are somewhat adaptable to changing preferences. For example, a fabric like Princess Pink will sync with many fairytale settings – from Cinderella and Snow White to Frozen and Sleeping Beauty. Similarly, our Peter Pan roman shades have proven to set an adorable cityscape for many nurseries, easily adapting to changing preferences from Superman and Spidey on to a superhero-free decor altogether.
- CHOOSING CORRECT SCALE: Let the size of the window inform the choice of scale. On a small window, tiny and medium scaled patterns match proportions. Whereas, on a large window, you have a choice to go large scale if you wish to make it a focal point of the nursery.
- FACTOR IN DECOR STYLE: Also, make sure that you voice your decor style aptly. A traditional nursery’s wow factor is ornate paisley or damask, a country-styled nursery flaunts its easygoing aesthetics with farmhouse-style roman shades, and a modern nursery wins applause with clean-lined patterns such as this black-and-white chevron print in Baki roman shades.
Conclude with Charm: Add Tasteful Trimmings
If your creativity has not been satiated yet, here is your opportunity to do so by selecting trimmings for your roman shades. These thoughtful additions relay the custom look and color-coordinated design of the nursery effortlessly. Hence, don’t miss the possibility to add tone, pattern or handicraft that can elevate the nursery instantly.
There are a variety of trimmings to choose from in various colors, weaves and finishes. Whatever your vision, be it textured velvet ribbon trims or shiny gimp braids or lush fringe trims, you cannot but find one that suits your taste from our vast catalog of roman shade trims.
Apart from the playfulness and pop of color that they introduce to your nursery window, trims can be used with forethought to advance your design decisions.
Perhaps, you could not find a fabric that relays your palette perfectly – solve the problem by finding a plain fabric that matches your primary tone and a trim that corresponds with the secondary hue. Or, you need to echo the golden details of your vintage accessories in the nursery and a gleaming silken tassel trim on your roman shade could offer the perfect company. Or, perhaps you simply want to convey the lightheartedness of your tot’s personality? Easily done with our plush and adorable pompom trims.
Whatever your goal, you can’t go wrong with these delightful add-ons to bring a truly bespoke look to your nursery roman shades.
READ MORE: TOP ROMAN SHADES IDEAS FOR YOUR HOME
On to the Best Part
We’re at the end of the planning and the beginning of the action. Now, with all the input from this blog, take on the stage and put up the show. Your nursery windows are waiting for the best dressing of their lifetime. Explore our curated collections and start filling your cart. Happy shopping with Spiffy Spools for your favorite custom nursery roman shades!
READ MORE: TOP TIPS & IDEAS FOR NURSERY CURTAINS
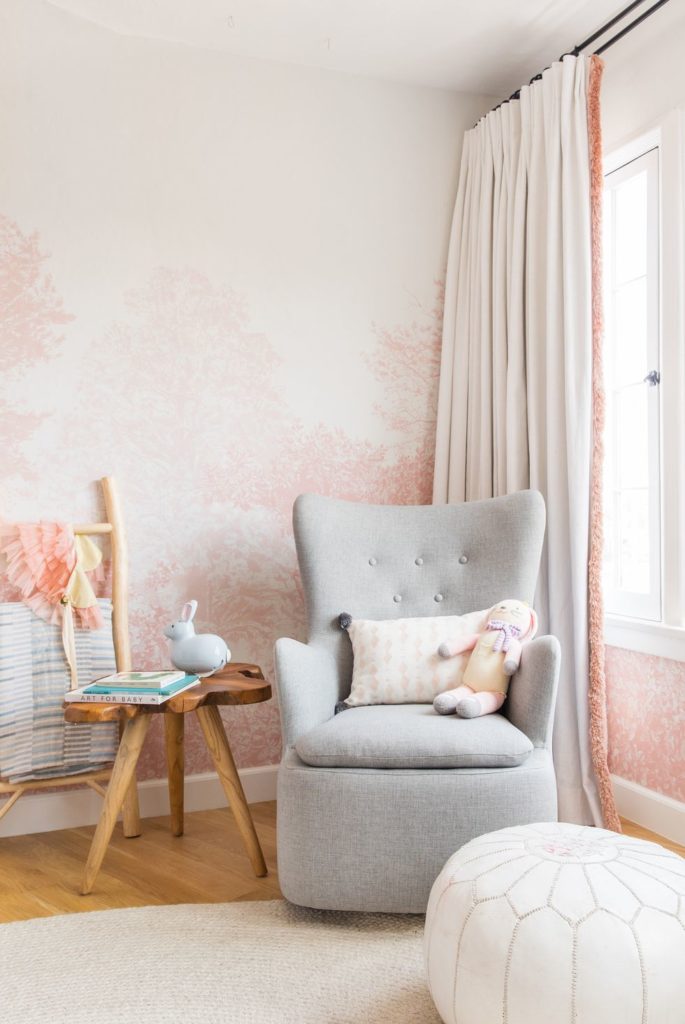
TOP TIPS & IDEAS FOR NURSERY CURTAINS

Preparing to welcome a baby is perhaps one of the most interesting phases of family life and nursery decoration might be its most exciting part. However, despite the joy and fun associated, the process can be weighing, even intimidating. The tendency to be swayed by aesthetic preferences is predictable, and want of knowhow is also real. If you’re currently trying to figure out the right nursery window treatment, you’re in the right place. Shopping curtains for nursery should be easier after reading this blog that puts together tips from our drapery experts to achieve the full potential of your nursery curtains – functionally and aesthetically.
Shop for custom curtains for nursery from Spiffy Spools. Like your baby’s own fairy godmother with a wand in hand, we can style your nursery as you desire- from pretty blackouts to dreamy sheers and cartoon prints to checkered flair, our vast collection of over 3000 fabrics has got it all for you!
Tightroping Function & Style: The Best Nursery Curtains
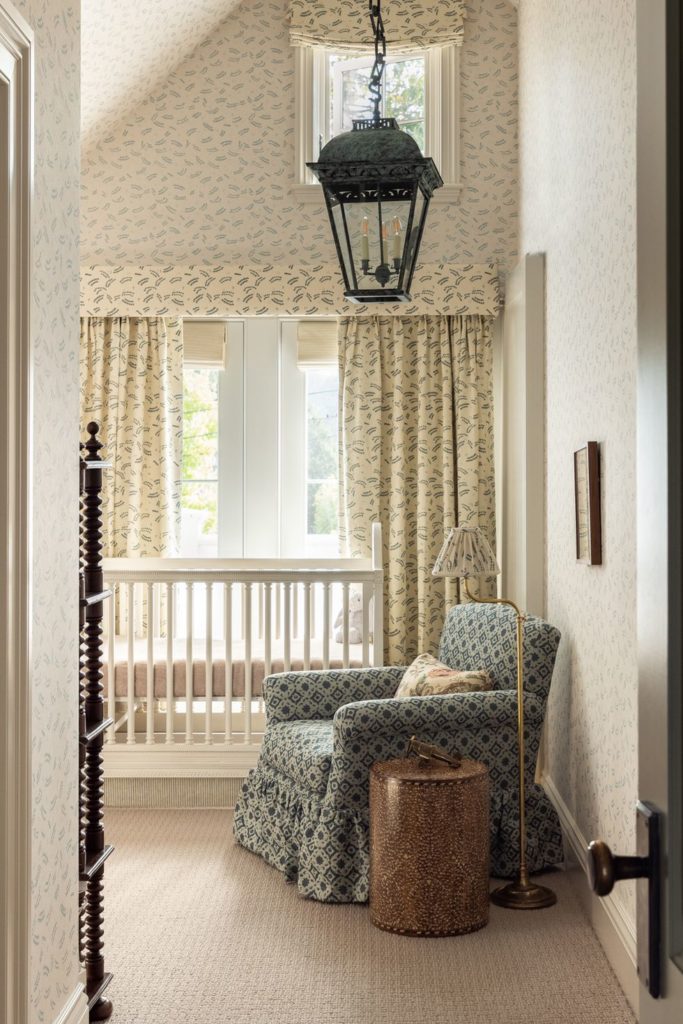
Bringing that perfect Insta-worthy nursery of your dreams to life is easier with curtains’ softness and bespoke charm. With endless choices of fabric, hardware, trimmings and designs, nursery curtains can not only host any color and pattern of your taste but also define your decor style. Over and above the aesthetic role though, curtains have serious functions to fulfill in a nursery, such as –
- PROVIDE PRIVACY: Like any other private spaces in a home, nurseries must be protected from outsiders’ views. Drawing the curtains not only fulfill this goal, but can also help the child to focus attention on the current activity and the caregiver, making it easier to be on the mark with the schedule.
- BLOCK UNWELCOME LIGHT: Window curtains are often what help a nursery to transition from a bright sparkly play zone to a cozy cocoon in an instant. Darken the room and the baby has no more visual distractions on the way to slumber.
- CUT THE CHAOS: Cutting visual noise is half the job done, and when the real ‘noise’ is canceled, the job is complete. The curtains must absorb unwanted noise from both the external and internal environment of the home so that distractions are minimized.
- REGULATE TEMPERATURE: In order to sustain a comfortable sleep, it is important to keep the room temperature steady. Keeping a heater/cooler working at its full stretch without doing enough to contain the thermal energy or cooling it generates is lost labor. The curtains must obstruct this loss and help sustain the most suitable temperature of the room throughout the night.
Design Tips for Best Nursery Curtains
Since curtains have more expectations and unique needs to meet in a nursery, their are several factors to consider when buying drapery. Although a creative process, designing nursery curtains must aim for practical ease as much as visual attraction. Here’s what our home stylists have got to share from their years of experience in this field.
Get the Canvas Ready: Pick the Fabric Base
Curtains are your blank canvas where your imagination and love are going to meld and mold through colors and shapes. And so, first things first, pick the right fabric base to be that canvas where color, whimsy and wonderment can rise on the beckoning. It should be a fabric that best defines your nursery’s decor style and theme and also fulfills its functional requirements. Keep the following factors in consideration when finalizing the fabric composition:
LIGHT CONTROL ASPECTS: Nursery window treatments need to be highly effective at light-blocking, and therefore, fabric thickness and opacity is an important factor to consider.
If your nursery curtains are intended to be standalone treatment, we recommend dimout or blackout curtains. If you want the nursery to be as dark as a cave, go for blackout curtains like Silver Sand beige curtains from our collection. Dimout curtains, on the other hand, will darken the nursery substantially, but not make it pitch dark. Club Gold curtains from our collection are great additions to a nursery that’s looking for bright hues and considerable room-darkening. Their light-blocking capacity can be enhanced by using blackout lining behind.
If, however, you already have blackout blinds/shades fulfilling the goal of room darkening, and want to add drapes as a decorative layer, then you can of course consider a light-filtering, non-blackout fabric base as well. Sheer or semi-sheer curtains like our Butter Cream serve an example.
HYPOALLERGENIC FABRICS: Since infants need to be protected from allergens and infections, natural materials such as linen and cotton which are inherently hypoallergenic are recommended. Make sure that you choose fabrics that have a thick weave such as our Brook Cream pure cotton curtains so that they can block light effectively. With a blackout lining, they are as good as blackout fabric drapes themselves.
DECOR LANGUAGE: If ‘opulent’ and ‘ritzy’ are the first adjectives that come to mind when you think of your little prince or princess’ nursery, statement fabrics like silk or velvet are the default picks. If ‘cozy’ and ‘sophisticated’ is your target, cotton, linen and their blends should have the reign. So consider the overall decor language of your nursery before settling on your drapery fabric. And whatever face fabric you choose, make sure your drapery comes with blackout lining for room-darkening during baby’s naptime.
Work Magic With Your Paintbrush: Choice of Palette & Pattern
If your nursery is a tabula rasa at this point in time, the curtains can guide the color story of the entire decor, highlighting the palette at best. In fact, we recommend picking the wallpaper or paint color for the walls after finalizing the curtain fabric, as it’s relatively easier to find a matching paint than to start with paint and scout for coordinating drapery fabric.
If your curtains are going to be a substantial part of your decor because of invasive windows, we recommend going for softer hues that sync with your overall palette. This will provide the baby with a soothing ambiance for a restful sleep. Alternatively, if your window is small, bright colors may be less intrusive if you wish to go the bold way.
Motifs such as favorite cartoon characters and superheroes are popular, though we advise clients to factor in longevity before picking a tight-theme fabric that might fail to grow alongside the nursery’s inhabitant. Unless you envision swapping the drapes every couple of years, we recommend picking classic, ‘age-proof’ motifs or broader kiddie themes that can continue to adorn the windows even as your baby’s crib gives way to a toddler bed.
If you’re aiming for a once-and-forever gig, go for patterns that are neither age-specific nor gender-specific such as stripes, abstract prints, and plaids so that the child may never outgrow these choices. Drapery in fabrics like Summer Song or Birdhouse, for example, will never get outdated or outgrown by your kid – girl or boy.
On the other hand, if you want the nursery to rhyme well with your kid’s gender, consider demure florals and playful paisleys for a girlie theme, and geometric patterns with bold definitions for masculine underpinnings.
If you fancy younger, more playful patterns, consider keeping the motifs broad in themes so they are somewhat adaptable to changing preferences. For example, a fabric like Princess Pink will sync with many fairytale settings – from Cinderella and Snow White to Frozen and Sleeping Beauty. Similarly, our Peter Pan drapery has proven to be an adorable cityscape for many nurseries, easily adapting to changing preferences from Superman and Spidey to a superhero-free decor altogether.
Sprinkle Some Pixie Dust: Time for Endearing Embellishments
How can a nursery be complete without adorable knick-knacks that mirror the playful spirit pervading the space? The world of passementerie opens up an endless potential for customizing nursery drapes with embellishments that best suit your decor and overall visual appeal.
There are ribbon trims and gimp braids that can offer a lovely refinement to the curtains’ lead edges. For a ruffled finish with a texturally rich quality, fringe trims are remarkable.
Pom pom trims are another highly popular option for playrooms and nurseries, though we advise caution and to use these only if the child is either too little or grown up enough to not rip off pom poms, and expose themselves to dangerous sports.
These dainty details are not just meant to elevate the space or make it look more light-hearted, they also reveal how invested you were in the details of the nursery’s decor. It’s only custom-made drapes that can allow you the freedom to play with embellishments of your choice. So, no better way to show off that they are bespoke than to embark on their potential wholeheartedly and splash that pixie dust to complete the magic!
Cozy it Up: Dark & Snug is the Way to Go
Opting for a blackout fabric/lining for nursery curtains is one of the key steps to make the space dark and cozy. There are, however, a few other simple measures that can contribute to the same goal. Let our stylists walk you through these below:
Heading Style
Often, clients make the mistake of choosing the best blackout fabric but picking a heading style that features gaps through which light will force itself in. Grommet tops, tie tops and tab tops are a few examples. You need curtains that hang flush with the wall and leave no possibility for light leaks through the header. Pinch pleats, rod pockets and flat top panels are a few styles that meet this standard.
READ MORE: CURTAIN HEADINGS STYLE GUIDE FROM SPIFFY SPOOLS
Hardware Placement
Mount the drapery pole at least 6-12 inches above the window trim so light leaks from the top may be canceled totally. Also, extend the rod at least 6 inches on both sides so light glows and leaks at the edges can be minimized.
Decide Length
For short curtains, ensure that the curtains don’t stop at the sill but proceed further down by at least 6 inches. This will help to control the fluttering as well as the light leaks from the bottom. For long drapes, consider the ‘kiss’ level that lets the curtains slightly graze the floor. Thus, you can cancel the harsh glare at the bottom.
READ MORE: HOW LONG SHOULD MY CURTAINS BE?
Palette Choice
Light-hued curtains will naturally reflect more light than dark ones. If you want your blackout fabric or blackout lining to perform flawlessly in achieving a pitch-dark nursery, you might have to consider dark-colored curtains.
Thickness and Weave
If you’re using a blackout lining, remember that they are efficient in themselves and yet perform their best only when supported by the face fabric. You can expect better results from a close-knit heavier cotton or velvet drapery set than a loose-woven linen curtain, both backed by the same blackout lining.
Layer for Additional Insulation
Putting up a thicker barrier to incoming light may sometimes require adding a layer. So, adding a set of light-blocking shades or blinds close to the window can aid the curtains further in creating a dark nursery for sleep time, acoustic efficiency being the bonus point. Besides, double-layered window treatments will trap air between their layers, providing an extra barrier between the cold external atmosphere and the warm air of the nursery. Invest in energy-efficient shades like cellular shades and blackout roman shades if you’re dealing with extreme weather conditions.
With all these factors keenly attended, you will have created the best room-darkening curtains that make your little one’s sleepy corner warm and snug for a whole night’s undisturbed sleep.
READ MORE: KID COUTURE: THE BEST ROMAN SHADES FOR NURSERY
Baby Shield: Make the Curtains Gentle and Safe

The curtains may block light and look charming, but they’re still not on point if they are not safe for your baby. At every juncture where a design decision has to be made, safety issues should be given adequate consideration. We’ll walk you through them one by one –
LENGTH: While we are fans of flowing drapes, in nurseries, we find short curtains more practically relevant. You can rest easy that the baby won’t crawl into the puddles and get entangled or use them as a ready swing for playtime. This saves your little one from potential accidents and the drapes from doubling up as baby wipes. But, if you can restrict access to the windows by strategically arranging the furniture, look no further than long drapes as they look more elegant and block light more effectively than sill-length curtains.
HARDWARE: Your tiny tot may enjoy giving the curtains a playful tug now and then, bringing them down if the hardware gives in. That’s why, invest in high-quality fittings that can be screwed tightly to the wall. Never use tension rods or alternatives like low-quality command hooks as they may fail to withstand pressure.
FABRIC: Although kids may not have much direct skin contact with the curtains, it is important to make sure the fabric does not have any allergens your little one might be sensitive to. Some kids might be more susceptible, and hypoallergenic, natural fabrics like pure cottons and linens might save the day.
EMBELLISHMENTS: Something good turns worrying only when it crosses a limit. Without stunting creativity, you can dress your nursery curtains with embellishments that speak to the kid’s liveliness. Avoid curtain trims and tiebacks with baubles and loosely dangling tassels that a baby can easily pluck out and attempt to swallow. Instead, opt for trimmings such as ribbons, fringes, and gimp braids that can easily bring a twinkling gleam to your nursery without posing any risk to your baby.
ADD-ONS: On a nice, breezy day when your toddler is playing on the floor, you might find your long drapes annoyingly fluttering. Invest in tie-backs and hold the curtains secure to the walls so that their movement is controlled.
Concluding the Feat

While it’s essential to style your nursery curtains to match the feel of your nursery, you also need to ensure they function flawlessly. We hope that this blog has expanded your vision and imagination to better design your little angel’s sweet abode without losing sight of the functional efficacy that’s equally important. Contact Spiffy Spools with your queries, if any, and browse our collection to create the nursery curtains of your dreams. Happy draping!
READ MORE: TOP SEVEN MISTAKES TO AVOID IN NURSERIES AND KIDS’ ROOM DECOR
TOP SEVEN MISTAKES TO AVOID IN NURSERIES AND KIDS’ ROOM DECOR
Designing kids’ spaces is both challenging and rewarding at the same time. It is that one room of the home where you can let your imagination run riot. And yet, while the aesthetic goals are often key, parents need to do justice to functionality and safety as well. And together, these three goals complete the triangle that every kids’ space is centered on. Here’s what we mean:
- PERSONALITY: Innocence, energy, curiosity – these hallmarks of a child must reflect in kids’ spaces. Colors, patterns and thematic representations must bring joy and positive stimulation to kids so they can explore, experiment and learn.
- SAFETY: Fragile structure, short stature and naivety – all three are culpable for getting children trapped in dangerous situations. Nurseries and kids’ rooms must be so arranged and designed that all possible risks to their safety are curbed.
- FUNCTIONALITY: For ‘an adult in the making’, the space must facilitate every activity required for the growth of their mind and body – study, play and sleep. The room should be designed to be as functionally efficient as visually endearing.
Which of the three goals is most important? Well, all three and equally. But attaining all three goals is easier said than done.
Often while chasing the vision of a perfectly cute, Insta-worthy nursery or kids’ room, the functional and safety needs are sidestepped. On the other end of the spectrum, say nothing of the under-decorated nursery which is safe and functional but sterile and unimaginative.
Nurseries need a balance and avoiding design mistakes is all about achieving that. On that note, let’s look at the top decorating mistakes in nurseries and kids’ rooms.
Overlooking Safety Measures

The most important need of a kid-oriented space is making it safe. Some things that look good might in fact be a safety hazard. Therefore, kid-proofing the space is essential and not doing so to the right degree constitutes the most serious mistake when decorating a nursery or kids’ room.
For example, it’s important to baby-proof sharp-edged furniture that can bruise rollicking kids and toddlers who readily mouth anything they find. Use corner guards to smoothen the edges.
There are many such steps to be taken to ensure the safety of your babies and kids. With more research, you’ll be better equipped to make your nursery the safest haven for your child.
Over-Investment in a Theme
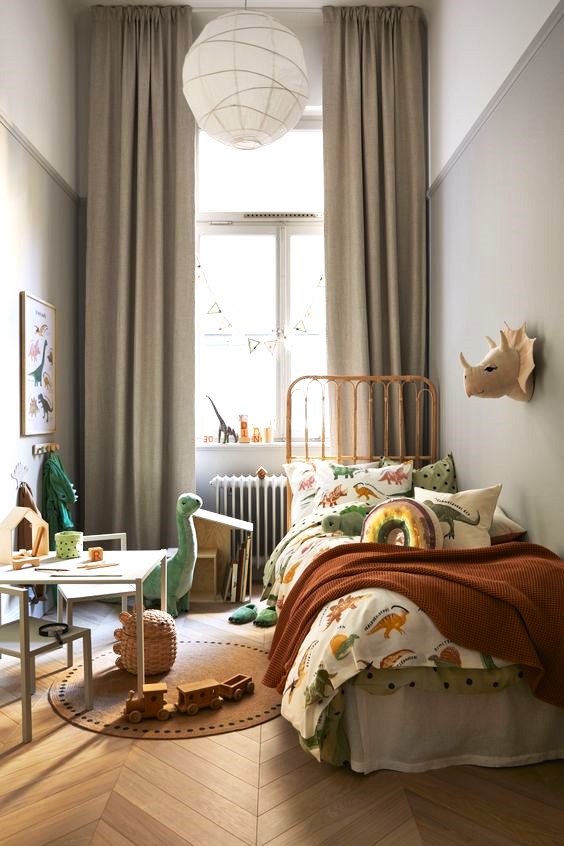
Kids are avid explorers and fanatic obsessors. They are always on the lookout for amusing things and want to be surrounded by all that piques their minds. Thematic kids’ spaces address these core needs of a child. But, here’s the glitch – the obsession is short-lived, and if you design the whole space on a theme, you won’t be able to undo it easily when they demand a change.
The solution does not lie in constant refusals or avoiding thematic decorations altogether. Rather, express the theme in items that can be easily disposed of as per their changing tastes. For example, for a child obsessed with dinosaurs, stick to a plain duvet and satisfy the desire on the sheets. When the passion has died off, the sheets may meet refusal, but it will be better than having to do away with an expensive duvet.
Similarly, a plush elephant is a better option than a wall covered with an elephant-themed mural. A free-standing canopy play corner can suffice instead of a beaucoup dollar princess bed, and an Angry Birds study table can give way to removable wall stickers of the same theme. That’s how you cut the Gordian knot without curbing your kid’s exploratory ventures and creative aspirations.
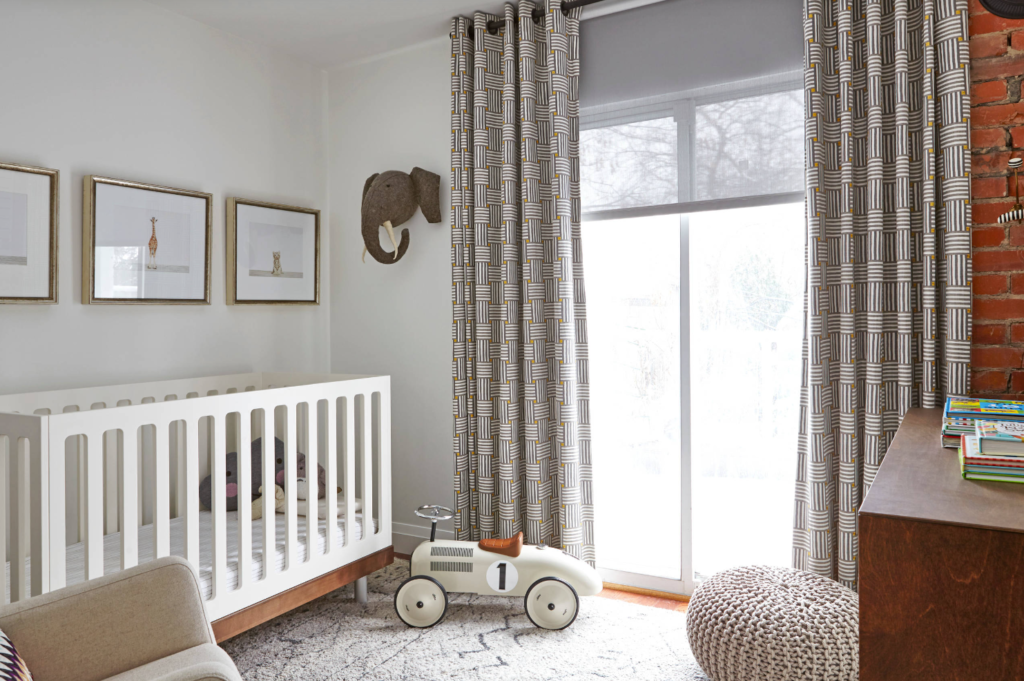
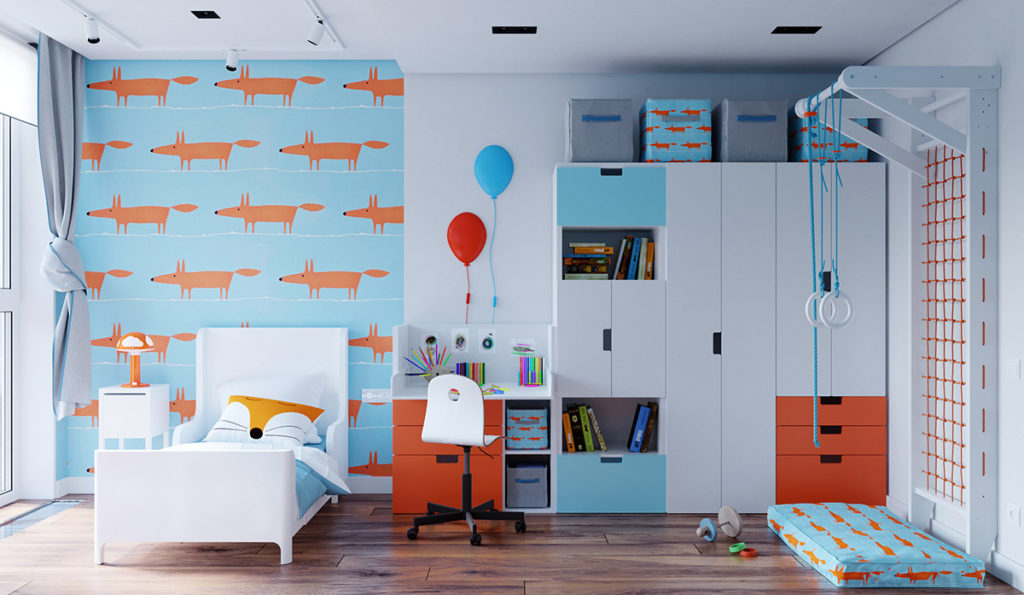
Wrong Window Treatments
Sound sleep is a big part of a child’s overall growth process and window treatments must enable a sleep-friendly ambiance for the same. The kid should be able to fall asleep faster and rest throughout the night without interruption. In a nursery, room darkening is important for the baby’s day naps. Nursery window treatments must also air the lighthearted mood of the space but in just the right amount.
The big window coverings mistakes found in nurseries and kids’ rooms are:
NON-INSULATIVE WINDOW COVERINGS: With the right type of window covering, your kid’s room will become dark, quiet and temperature-regulated when so desired. To this effect, blackout window treatments that block light substantially and act as a tough barrier against unwelcome noises must be default choices.
Window dressings such as blackout nursery curtains/roman shades and triple-cell honeycomb shades are some of the most insulative window treatments recommended for kids’ bedrooms and nurseries. If you don’t have one of them, consider adding a blackout dressing over or under your current window treatment, be they sheer or non-sheer. Double-layered window treatments offer more insulation and light control options, increasing the practical ease of living in the space.
DANGLING CHORDS AND FLOWY TRAILS: Making window treatments child-friendly is an important step missed by some. Kids may pull at window shade/blind cords, attempt to mouth them and endanger themselves with asphyxiation. If your windows have shades or blinds, go cordless or ensure the cords are not dangling or accessible to a toddler. In the case of nursery curtains, let the panels float above the floor to evade tripping accidents, better still, let them stop at the sill. Also, we strongly recommend against using tension rods in kid-oriented spaces because tension rods are not as secure as hardware that’s screwed into the wall.
OVER-EMBELLISHING: While vibrant knick-knacks have their rightful place in a kid’s room, you may do better by avoiding trimmings such as tassel trims if you have a teething baby or toddler. Let your indulgence with curtain and shade trimmings be limited to ribbon trims and tape braids that stay tightly sewn onto the base layer.
KID-SPECIFIC PRINTS: While cartoons and caricatures are often included in the nursery decor, keeping window treatments relatively ‘age-proof’ is wise. The child may quickly outgrow such design choices and it will not be easy to keep upgrading the window treatments as per their changing preferences. Better include such theme-based motifs in other easily swappable items, and keep the window treatments decked with timeless patterns.
SHOP NOW: KIDS CURTAINS FOR NURSERIES, BEDROOMS & PLAYROOMS
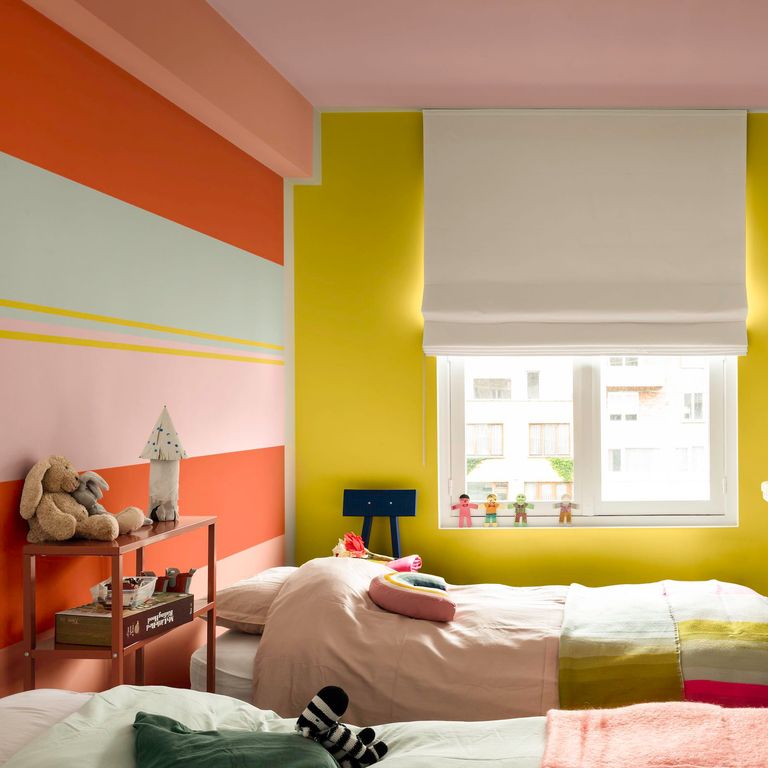
Leaning on a Kiddie Palette
Picking the right palette is perhaps the most important decision on the aesthetic aspect of nursery and kids’ room decor. Color indulgence is important here but ‘which one’ and ‘how much’ are the tricky questions. And the mistakes happen exactly along these lines:
TRANSITORY PALETTE: Parents get so invested in a theme or gender-specific decor that they end up with a palette that their kid will outgrow soon. It’s understandable that your kid is fascinated by hot pink or blazing yellow today but painting a whole room in that bright hue with matching furniture is going overboard. It’s an intimidating ambiance and when they demand a change (which is not far), only some stashed cash can save you.
There are two ways to handle this situation. One is to indulge in their favorite palette with restraint. Bring in their favorite color but in a mellowed, more muted tone and balance it with other colors. So, settle for baby blue instead of electric blue or pastel orange instead of flaming orange.
The second way is to choose an ever-relevant palette by going neutral with the larger items including walls, floors and furniture. Then, bring their favorite hue, no matter how bold or even garish, into the accent pieces such as plush toys, figurines, canopies, bedding, trims of fabric accessories, wall art, and small furniture pieces. Some day, when their obsession de jour has changed, you can swap these out for slightly more mature decor or give a fresh coat of paint yourself.
GETTING BOXED: Another common mistake is to be limited by stereotypes. Instead of falling within the ‘pink for girls’ and ‘blue for boys’ boxes, let your creativity take the reign. Introduce your kid to all kinds of colors – the key lies in the restraint of volume and saturation, not in the numerics.
NON-CREATIVE CHOICES: Sometimes, the other extreme of the color spectrum can also be a problem. A nursery should never be a non-imaginative space designed with an over-mature palette – boredom in the name of ‘minimalism’. The palette must satiate the kid’s interest, inspire positive vibes and trigger creative energy. No matter how pared back your overall palette is in the rest of the home, kids’ spaces must be stamped with vivaciousness suited to their personality.
CHOOSING THE PAINT BEFORE TEXTILES: There literally are thousands of paint colors to choose from – in every possible tone, shade and hue imaginable. Fabric choices are far limited. And yet, many homeowners make the mistake of painting the walls before they have shopped for their larger decor elements. To make for easy shopping and perfect color coordination, pick your textile elements – rugs, window treatments, upholstery, etc. – before setting on your wall paint. Matching a paint color to everything else in your room is far quicker and easier than getting everything else to coordinate with your paint color.
Missing the Whimsy
What’s a nursery without some whimsy, nonchalance, and sweet charm? After all, your child will not ask for kiddish things nor ever enjoy romping around later in life. Remember that home decor is meant to add more value to the way we experience life, and not to take away from it. Missing out on this key aspect would constitute a serious mistake when designing spaces meant exclusively for kids.
The decor in kids-oriented spaces must be elegant, but not too precious that it restrains them from being their most lively selves. So, stick to choices that won’t get you stressed when the tiny tot opens their paint bottles or races from the kitchen with grimy hands.
All design choices here must be mindful of the fact that the child depends on the immediate environment to learn and experience life, so the ambiance must fulfill their curiosity and trigger their imagination. Efforts for self-restraint must not strip the kids’ spaces of their playfulness, but must rather facilitate it.
A toy house in which the kid can get in and take a nap, a swing or a hammock that gives the pleasure of rhythmic movement, a neon light fixture fashioned on their name – it could be anything that excites a little heart.
The more you include whimsical decor that equips their visual interest and imagination, the less you have to strain about keeping them entertained. Allocate a small (or large) percentage of the room decor for playful elements. And make the most of this opportunity while your little one is still…well, little.
Insufficient Storage Opportunities
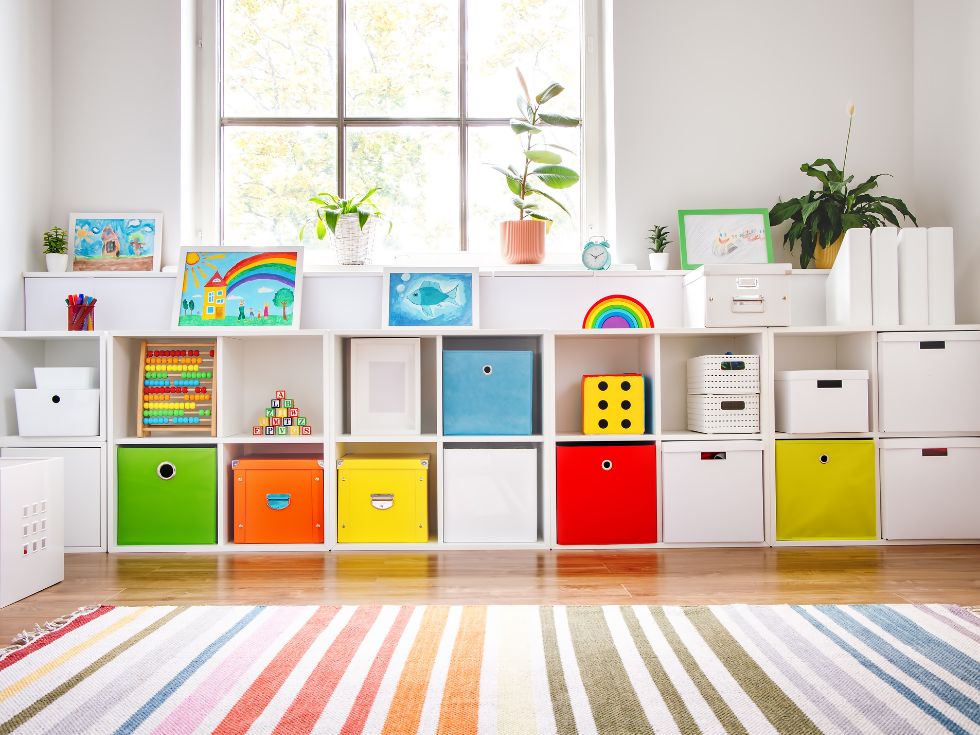
When designing nurseries, new parents often tend to sideline the requirement for extra storage units assuming children’s items will take up less space, little knowing that their rooms will be filling up sooner than all others. From building blocks to dollhouses, from craft items to story books, from sports sneakers to party footwear – kids’ wardrobes, dressers, wall cabinets, desk drawers and all storage units put together may one day be full to the brim.
Future-proofing is essential so that storage opportunities don’t run dry as your little one grows. Also, make a combination of closed and open shelves so that accessibility is made easier besides neat organization.
Having said that, make sure that the kid’s room does not end up looking like a store room. There should be ample floor space for play and craft activities. So, make use of the vertical space more than the horizontal, with floor-to-ceiling built-in cabinetry, storage beds and wall-mounted shelves.
Lack of Distinctions between Zones
This is a mistake regarding the layout of the room. Provision is made for sleep, play and study in the room’s design but not laid out properly. Earmarking the zones with clear distinctions both visibly and tangibly encourages self-discipline and cleanliness in the child. When it’s time to sleep, there should be no toys near the bed that tempt the kid to jump out of bed and play, for example.
The other benefit is that you can do a task-oriented design that helps the child make the most of the given resources. Here’s an example – you may provide a low table in the play area with inbuilt drawers for the little artist to sketch and craft and a regular study table for academic work. Now, it will be easy for the child to contain the urge to grab the coloring pens during homework time.
The separation between zones can be achieved by using different paint colors, area rugs, furniture, decor accessories, and lighting. For example, you can use the darkest part of the room for the bed flanked by a mood-setting dim night lamp and the space around a window for study aided by a cool light pendant lamp.
The play area can be demarcated by a rug and the toy cabinets alongside. This will help immensely to ensure that the child does not mess up every place during playtime. If the play zone is a separate room or part of the living room, apply the same logic there when designing that space. You don’t want their play items strewn all over the place, making it difficult to tidy up at the end.
Concluding on a Colorful Note
We hope that you find yourself forearmed to design your kids’ spaces rightly. The key to a well-considered nursery or kids’ room is in striking the balance between functionality, aesthetics and safety needs. And we hope you are better equipped now to fix that triangle while keeping your little darling excited and happy.
If fabric window treatments are on your mind for their excellent customization potential, do explore our blog and collection for inspiration. We’re happy to partner with you in decorating your kids’ rooms and making them truly special, soothing and fun. For more ideas & inspiration on decorating kids and teenagers room, refer to our Spiffy Speak blog page that has a treasure of detailed guides like teen boys bedroom curtain ideas, teen girls bedroom curtains picture guide, girls room curtain tips & ideas, boys room curtains tips, and many more!
READ MORE: KID COUTURE: THE BEST ROMAN SHADES FOR NURSERY
HOW TO PUT CURTAINS OVER BLINDS
Looking to revamp your home and salvage your window decor from the sterile look of your blinds? Layering your blinds with curtains is one of the most successful methods of achieving this goal. Curtains add versatility to functionality and bring unique charm to the space. With that goal, in this blog, we’ll share with you a wholesome guide on why and how to put curtains over blinds.
Order your custom curtains from Spiffy Spools online in any size. We have over 3,000 fabrics and patterns to pick from, so you can find the perfect one to go with your blinds easily.
Why Layer Your Blinds with Curtains
Many buildings and homes today have blinds installed by the builder so that the homeowners don’t have to go through any hassles to make their space private. But while privacy is assured and the light control options available are truly impressive, you might be left wanting for more insulation and aesthetic pleasance.
Blinds are strictly function-oriented, minimal and neutral, incapable of bringing in colors and patterns, whereas curtains offer scope to introduce the design details that you might be looking to characterize your home with. Curtains relay your decor style, palette, and personal preference to the highest possible degree.
Thanks to the soft pleating and the flowing trails of curtains, one does not have to settle for seemingly bare windows when the blinds are stacked up in the cassette. And that sad industrial look of the blinds, which makes them more suited to a business office than to a cozy home, can be made up for with the oomph and character that curtains effortlessly bestow.
Besides being highly customizable, curtains layered over blinds enrich the persona of the room by adding volume to the space. While blinds sit snug inside the window frame, curtains project outward, adding substance and dimension to the space. They make the space come alive with visual depth creating a more elevated and lived-in feel.
In addition to the aesthetic benefits noted above, layering your blinds with curtains offers other great benefits, such as –
INSULATION & POWER SAVINGS: A lot of thermal energy is lost through the slats of the blinds and windows, and this matter is of great concern when the temperatures are at their extremes. If the window coverings are not highly insulative, you end up overworking the heater, consequently sending the power bills over the roof. Curtains offer a thick insulative barrier as they entail generous use of fabric and block the heat from escaping.
VERSATILE LIGHT CONTROL: Louvered treatments give you many options for the amount of light you wish to allow into your space. But, even with all the slats closed up tight on each other, light glows at the seams are inevitable. This is not a great situation in rooms that need total darkness such as bedrooms, nurseries and media rooms. Hanging curtains over the blinds cancels all light leaks – from around the blinds and between the slats. With a blackout lining, their room-darkening capacity can be further amped up.
ACOUSTIC BENEFITS: For the same reason that blinds fail to contain light and heat, they are ineffective in blocking external noise too. Curtains with their voluminous use of fabric are wonderful sound absorbents as they are excellent insulators. They minimize exterior sounds from entering the home and muffle indoor noises too, helping to create a quieter indoor ambiance.
SHOP NOW: CUSTOM INSULATIVE BLACKOUT CURTAINS FROM SPIFFY SPOOLS
How to Mount Curtains Over Blinds
One of the first decisions you’d need to make when layering your blinds with curtains is whether to opt for full-coverage drapes or to only use narrow, decorative panels to frame the windows. The answer, of course, depends on your budget and goals.
Narrow, stationary panels will bring some level of aesthetic appeal and be easy on your pocket, but be limited in any other functional benefits that full coverage drapery can bring to the space.
Whether decorative or functional, full-scaled or narrow, curtains are fulfilling for both the over-expectant homeowner and the ingenious designer.
So, if you’ve decided to top your blinds with curtains, either decorative or full-coverage, you couldn’t be more spot-on with your design decisions. Just get your research done here on how to hang curtains over blinds, and let your creative juices flow. Here are the top methods of hanging curtains over blinds –
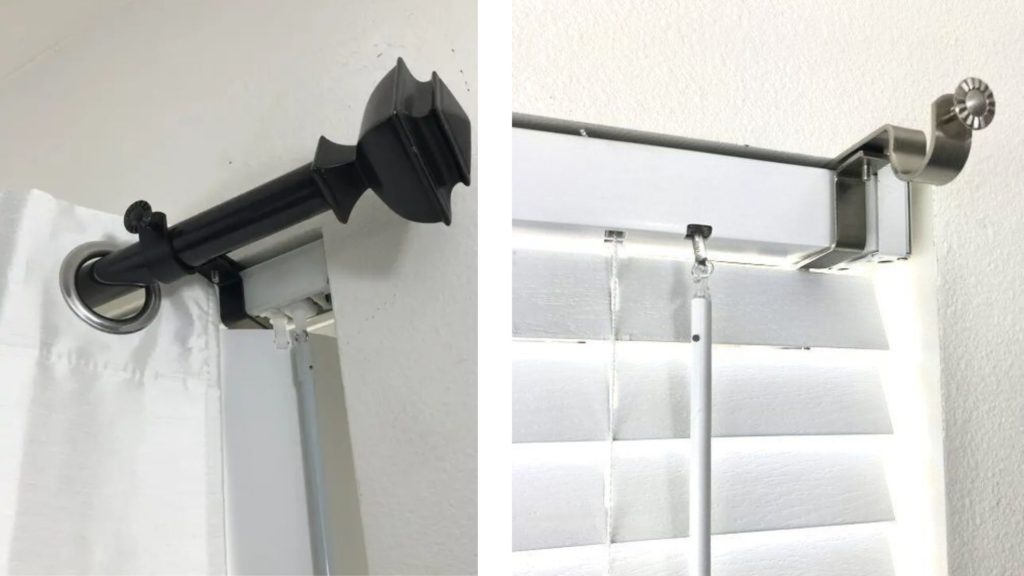
Drapery Rods
This is the conventional way of hanging curtains over blinds. The blinds are mounted within the recess of the window and the curtains overlap the window from all sides. The light leaks from around the blinds are contained well in this method.
To achieve this look, measure the window and get a drapery pole of a suitable length. Then screw the curtain rod brackets to the wall and position the pole securely within the brackets.
For decorative curtains, install small rods at the two ends of the window so that the drapes stay intact in their position, framing the window. Alternatively, you can also use sash rods or medallion holdbacks to host the drapes as they are narrow and lightweight.
Drapery Tracks
Tracks are a more modern solution with their sleek non-ornate profiles. You can order traverse tracks to operate curtains at the pull of a string. Although tracks are mostly installed onto the ceilings for the curtains to blend seamlessly, with the right brackets, they can also be mounted on the walls just like drapery rods.

However, mounting the tracks on the ceiling is recommended if you have outside-mounted shades/blinds. This is because you get more flexibility of space to bring the curtains further away from the window and give the blinds/shades the space they need for operation.
Drapery Medallion Hold-backs
An age-old method of hanging stationary, decorative drapes is being revived of late and for good. Employing the use of ornate medallion holdbacks, this arrangement is especially popular for windows with specialty shapes like arches or triangles.
You might need three to five medallions to hang a narrow decorative curtain panel. The medallion hold-backs are screwed to the wall at equal distance. With the help of rings or fabric loops, the curtain is then hung such that the panel forms folds between the medallions. Since this hardware ‘fixes’ the panel in this method, the risk of curtains sliding back and forth as in case of rods and tracks is canceled. So, you can rest assured that curtains will never overtake the blinds but frame them perfectly and with a well-deserved decorative touch.
SAFETY TIP: If your windows/ceilings have particularly large lintels, it can make drilling holes into them to secure hardware challenging and sometime beyond beyond DIY.
Choosing the right anchoring method is crucial. Expansion anchors or concrete screws are commonly used for attaching fixtures to lintels. Ensure that you select anchors that are suitable for the lintel material and the load you plan to hang. Using the appropriate drill bits designed for the specific material can also significantly affect drilling efficiency. If you notice your drill sparking or slowing down, then it could be a sign of worn carbon brushes, in which case they will need to be replaced.
If you continue encountering difficulties or if the lintels are exceptionally hard or challenging to work with, consider seeking the assistance of a professional contractor or handyman with the experience and tools required to tackle the job safely & effectively.
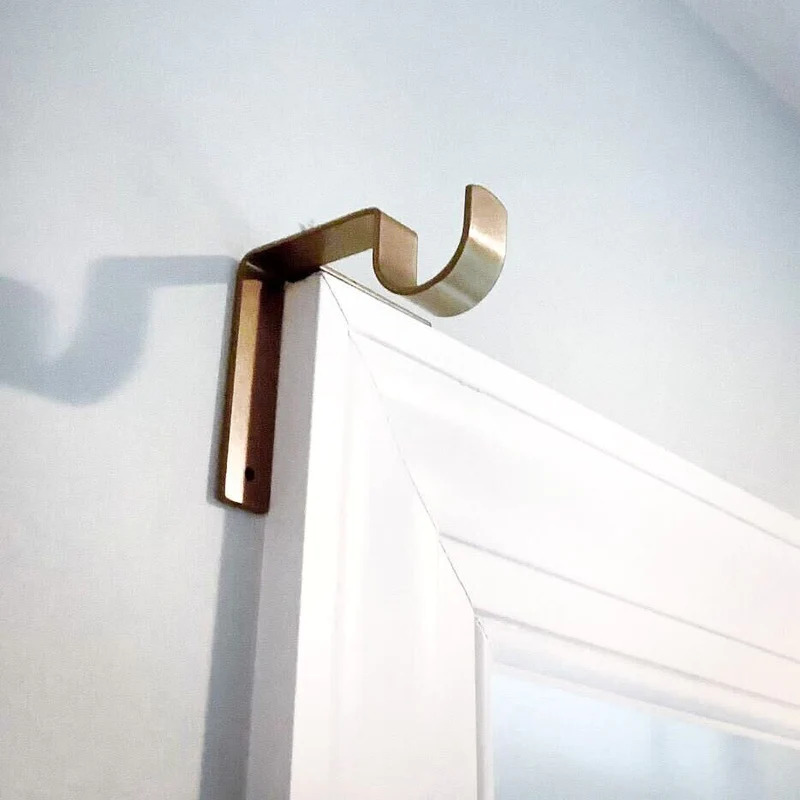
No-Drill Headrail Bracket Attachments
In this method, you make use of specialty hardware specifically designed to hang curtains using the headrail of the blinds. If you are not allowed to drill holes in the walls by the homeowner or if you don’t have access to power tools and professional help, this method of mounting curtains is an excellent option.
Depending on whether your blinds are inside-mounted or outside-mounted, you can get special bracket attachments that lock onto the blind headrail. If your blinds are installed in the window frame, opt for the ‘Inside-mounted blind curtain rod attachment’. And otherwise, opt for the ‘Outside-mounted blind curtain rod attachment’.
Make sure that the headrail is able to bear the additional load of the curtains. Measure the width of your headrail and purchase brackets that fit around them. Then position the pole upon the brackets.
In this method, the curtains stand exactly over the blinds as their coverage is limited by the length and vertical position of the headrail.
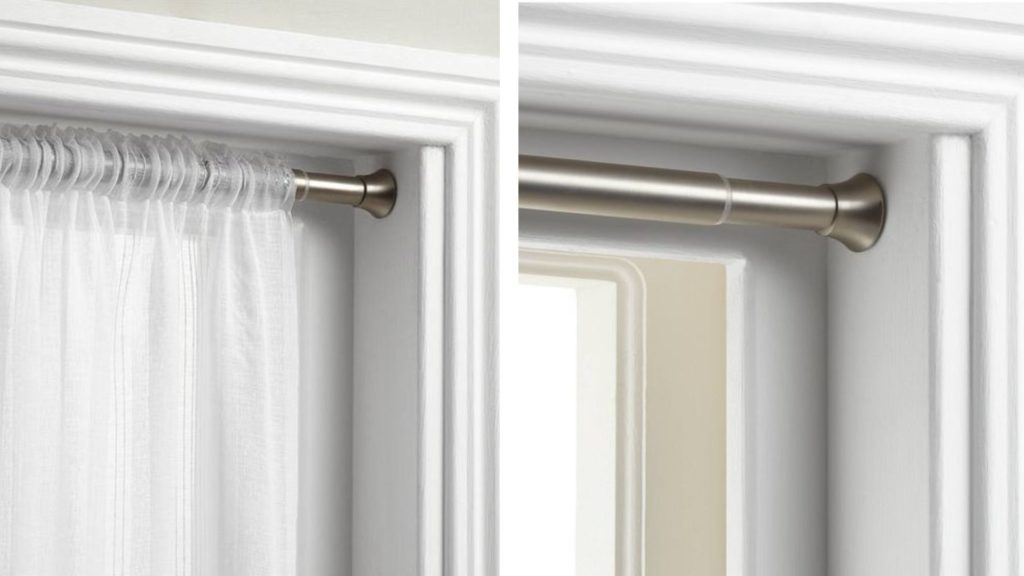
No-Drill Curtain Rod Brackets
Another no-drill method is to use drapery rod brackets such as Kwik-Hang brackets which are hammered atop the window frame. This type of bracket can only be used where the window frame is jutting out from the wall. No screws or additional hardware are required to mount these brackets. However, the curtains will not have ample space away from the windows for stacking, so expect them to block the window partially at the jambs.
Adhesive Hooks

Adhesive hooks such as Command Hooks that can hold weights up to 5-10 pounds can be used instead of brackets.
Depending on the weight of the drapery rod, you may need to use more than two hooks, though we recommend that drapery be kept lightweight regardless when using adhesive hooks.
Make sure you mark the exact position for brackets on the wall beforehand to avoid making mistakes. Just peel off the paper at the back of the hook and stick the hook to the wall. Then, slowly nudge the drapery rod with the curtains into the hook.
As the curtains will sit flush against the wall, this method is perfect for decorative drapes that are meant to be kept stationary.
This method gives you the freedom to take the curtains higher and wider than the blinds. So, it is also great for functional drapes, provided that they are not too heavy for the adhesive hooks to handle.
Tension Rods
In certain situations, tension rods solve the problem in a jiffy. These rods are spring-loaded and sit taut between the walls.
Tension rods can be used if walls run perpendicular to the window on both sides. Just hold the rod in the right position and then unwind the loose end slowly until it sits taut between the two walls.
Once the curtains are mounted, give them a gentle tug to make sure that the rod is not rickety, if it’s tight, your job is done. However, to be on the safer side, it’s advisable to use tension rods only for lightweight curtains.
If you’re hanging short curtains and the window frame is deep enough, you can install the tension rods within the frame itself. In this case, you need to first ensure that the curtains will not interfere with the functioning of the blinds or cut access to them in any way.
In case your window frame is too shallow to accommodate both blinds and tension curtain rods, explore tension rods that project away from the window. These often come with decorative finials, making the hardware look better, and just in case you need extra support for heavy curtains, these also have holes for you to screw them in if you have the option.
In Closing
Which method you decide to mount your curtains over blinds depends entirely on the position that you prefer to hang your curtains from and the possibility or lack of it to drill. If you can drill the wall, you can hang the curtains above the window, attaching the brackets either to the wall or the ceiling above the window. If you cannot drill the wall, as is the case when you live in rental apartments or camper RVs, the next best option is curtain rod attachments and no-drill brackets. If there are supporting walls on the sides or a deep recess, you can consider tension rods.
We hope this guide on how to put curtains over blinds has helped you get the perfect look for your space! If you’re ready to shop for custom curtains, browse Spiffy Spools today. With over 3,000 fabrics and patterns, we’re sure to have an option that suits your design needs. Explore our site to find the perfect curtain selection for your home, and don’t hesitate to contact us with any questions.
READ MORE: LAYERING ROMAN SHADES WITH CURTAINS
WAYS TO KEEP YOUR HOME WARM IN WINTER

While winters are mystically beautiful, the experience of it is not always the most happy memory if your home is not warm. Overworking the heater to improve the situation is an option but not the most economical one. Homeowners often desire more budget-friendly and energy-efficient solutions to support the heating system, and take the burden off it. To this end, we share here tips and solutions to keep your home warm in winter so you can transform it from chilly to cozy without inviting overwhelming power bills.
Order winter-loving thermal insulative blackout custom window treatments to keep the shivers out and bring snuggling coziness in with style with Spiffy Spools.
Rearrange Your Furniture

In a bid to hide the not-so-great looks of a radiator, you might have moved a piece of furniture in front of it in summer. Totally understandable! Except that when you’re freezing, you have to undo this excellent hack and accept the more practical furniture layout. Rethink the layout of your room to remove barriers such as curtains, furniture, or rugs that are blocking the air passage of your heating system to spread the warm air they provide evenly across the room.
Employ Smart Radiator Hacks
For radiators fixed on external walls, use an aluminum foil behind them to reflect the heat back into the house instead of getting absorbed by the cold wall. Also, consider mounting floating shelves above the radiators so heat circulates in the room instead of rising up to the ceiling or escaping the windows.
Invest in Space Heaters
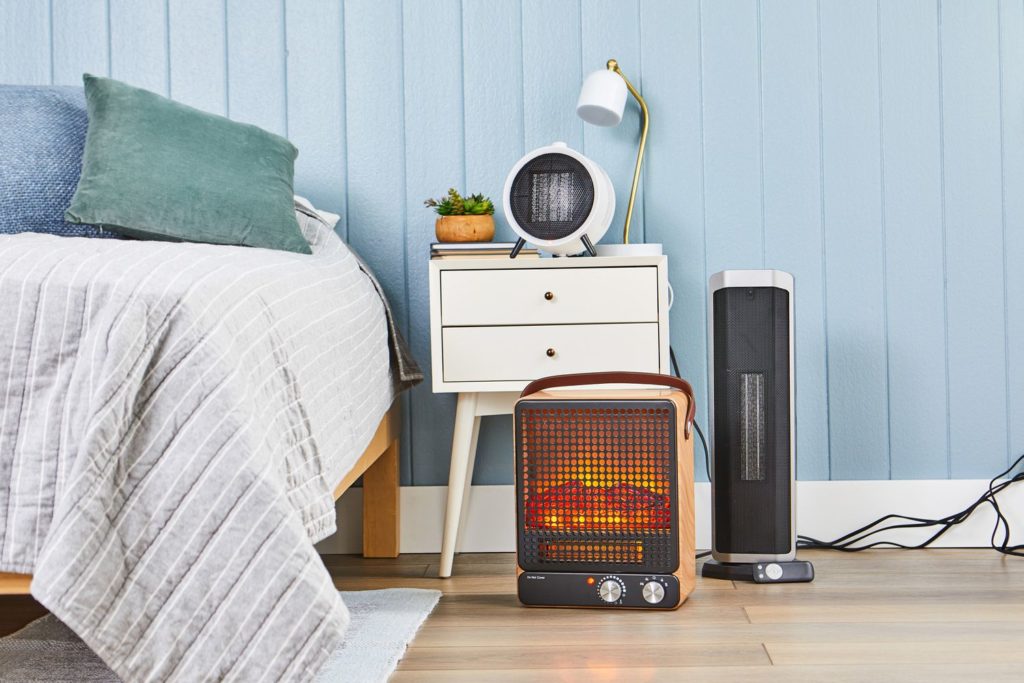
Consider topping up the heaters’ efforts by adding a modern efficient space heater. While the heat they generate is only available in a small area, together with a regular heater heating up the whole ambiance, it can make a huge difference. Use a space heater in a room that is particularly colder because of its oversized windows or old inefficient heating system. There’s a wide range of choices available from fuel-operated ones to electric ones.
Reverse the Fans’ Movement
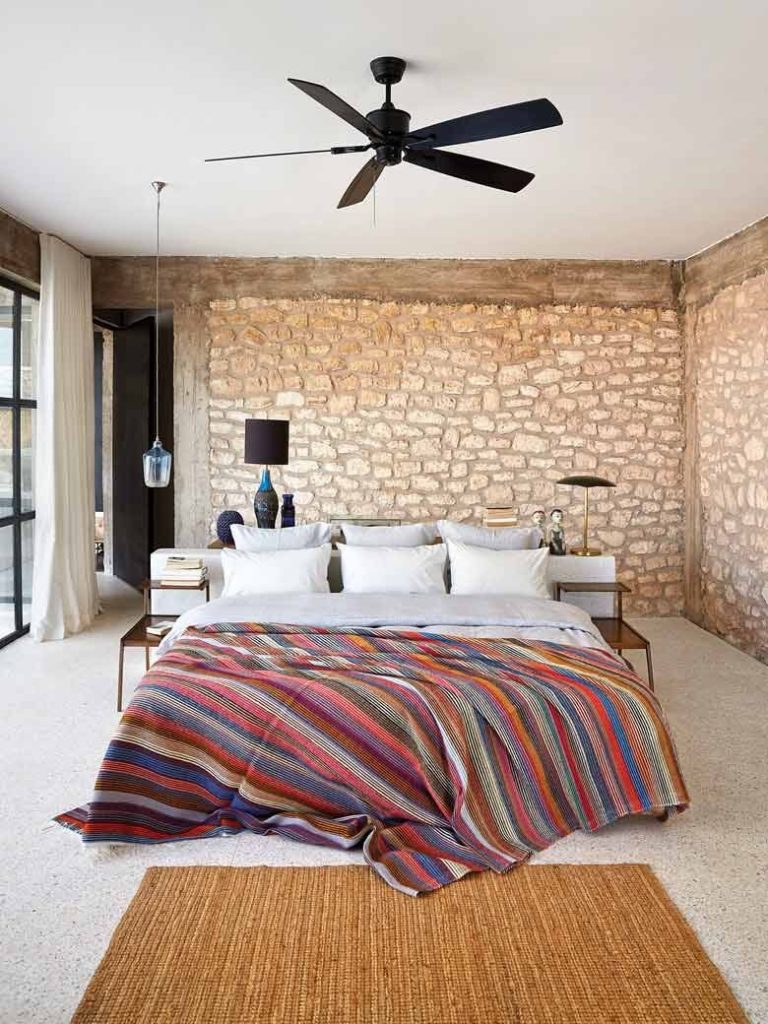
If you haven’t reset your fans after summer, they are rotating counterclockwise currently. Change their rotational direction so that they will pull up the warm air and spread it. Basically, fans help to circulate the warm air generated by your heater if only they are set to turn clockwise.
Add Door Draught Stoppers
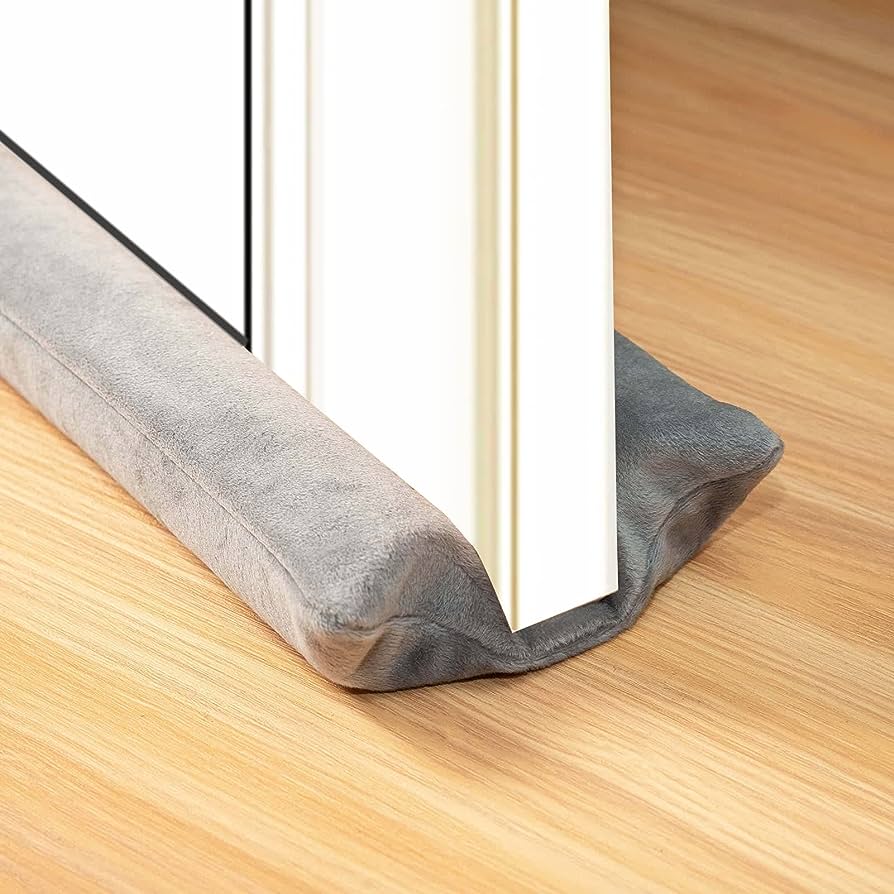
While opening the doors often may be unavoidable sometimes, checking out the cold drafts that push in from underneath the closed doors is possible and easy by installing door draught stoppers. They are weatherstrips made of fabric, foam or rubber fixed under the doors. They seal the gap between the door and the floor acting as a barrier between the warm air of the room and the cold external air.
Service the Boiler

If you have a boiler, don’t miss out on the annual servicing. Perhaps the vent pipes, chimney or combustion chamber may be in bad condition, and the boiler is working too hard to produce heat/steam, hyping your power bills unreasonably. Servicing helps to troubleshoot in time and solve the problem before it is too late to solve. If the boiler is worked out and replacement is not easy, consider making retrofit upgrades like a programmable thermostat, updated ductwork in forced-air systems or zone control for hot-water systems.
Upgrade to a Smart Thermostat

A programmable HVAC is the comfort of these technologically advanced times. With a smart thermostat, you can schedule your desired temperature levels for the whole day. It senses the level of heat in each room and sets the heating system to work accordingly. You can make the heater work at a minimum or shut off when you’re absent and start working at a set time to be comfortably warm when you arrive. Waking up to a warm home and being welcomed by the right ambiance makes the day, but the better part is that the energy savings will directly reflect in lowered power bills while also making your home more eco-friendly.
Electric Blankets & Warm Bedding
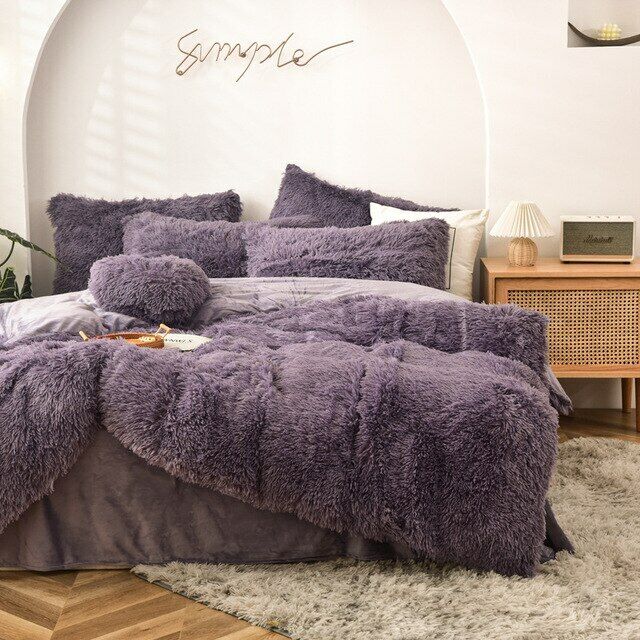
Instead of spending a whole lot of energy and money heating up the entire house or at minimum your bedroom, heat your bedding, and that will keep you warm the whole night. Under blankets, over blankets, throws and duvets – all of these are available in the category of electric sleeping aids. Using electric blankets instead of heating your bedrooms all night can cut your power bills substantially. Sounds like great savings, right?
READ MORE: HOW TO TRANSFORM YOUR BEDROOM INTO A WARM RETREAT
Blackout Window Treatments
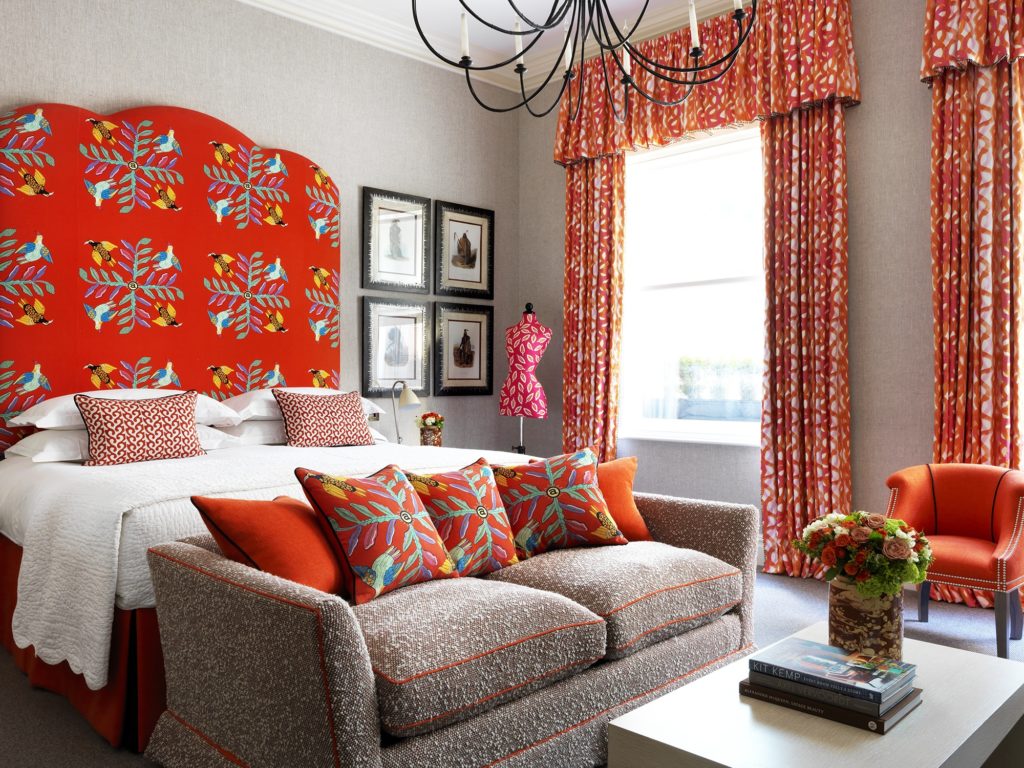
While windows cannot be upgraded without a fortune, window treatments can be. Store away your light linen and sheer curtains and opt for blackout window treatments that are designed specifically to insulate the house substantially. Blackout fabrics are chemically treated multi-layered fabrics that form a thick barrier between the internal and external environment. By disabling penetration, blackout window treatments resist the external environment from affecting the interior and block almost 30% of energy loss from the room. So, admittedly, they are not only wise choices for winter, but also for summer, making your investments doubly worth the haul.
READ MORE: HOW TO STORE DRAPES & CURTAINS
Go for Insulative Decor

Layering the home with several textiles and decor objects is not just an expression of maximalism but also about amping up the insulation. Thick and multi-layered rugs on the floor, upholstered walls, wainscoting, wood paneling, gallery walls, art installations, large wall mirrors, sprawling tapestries, throws, blankets, bed runners and long-flowing drapes are all extremely effective in making the room warmer, both literally and aesthetically. It’s simply because they add volume to the walls and floors, holding out one more layer to pierce through for the cold as against easy penetration through a single layer. Even if it may seem nominal, the cold resistance put up on a daily basis by these elements makes a significant difference in the long haul.
Add a Rug
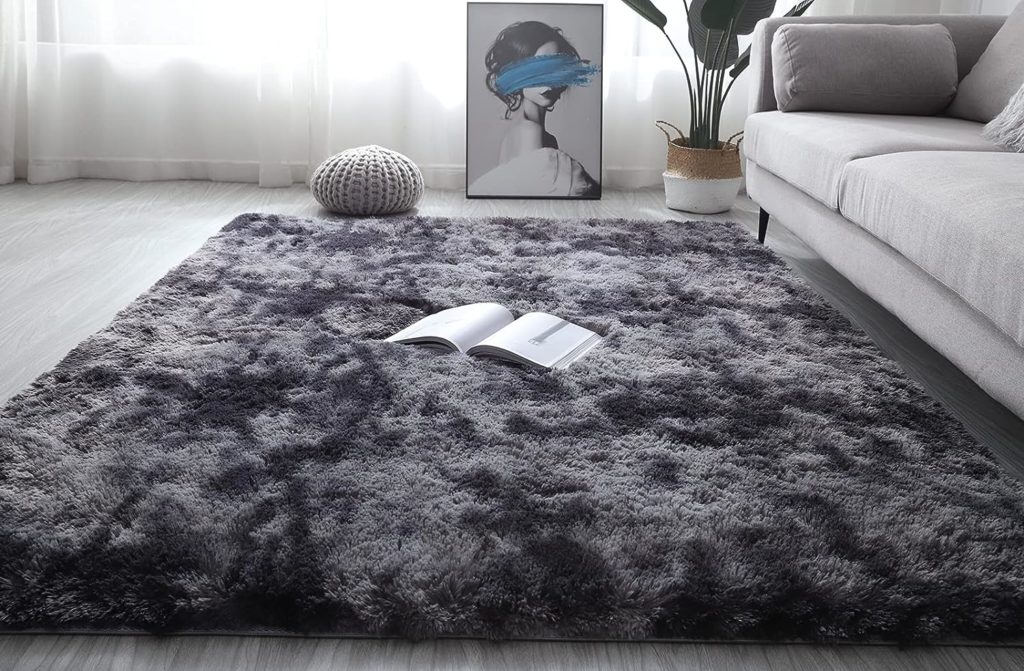
Rugs make all the difference on a chill day. Together with a rug pad under, area rugs become efficient insulators. So, consider investing in thick rug pads and layering multiple smaller rugs over a large rug for more warmth.
Draught-Proof the House

Teeny-weeny gaps and openings in the walls, floors and ceilings can play spoilsport with your heating business by draining out the thermal energy in little ounces throughout the day. Whether you outsource professional help or do it yourself, the key idea is to seal the chinks to lock the heat within the room, so you tax the heater much less.
Chimneys of unused fireplaces, gaps between the window/door and the frame, old extractor fan vents, mail slots and cracks in the walls are some examples. And the remedies can likewise range from heavy materials like concrete bricks and metal caps to delicate materials like silicone fillers and foam wiper strips. Draught-proofing the home will enable you to save on power spent on heaters which will directly reflect in your bills.
Install Multi-Glazed Windows

Glazed walls are priceless architectural gems but they make the house more vulnerable in winter by leaking precious thermal energy. Multi-glazed windows that have two or three glass panes set in the same frame with a thin layer of air or inert gas separating them are the solution.
Switching the current glass panes for new double-glazed or triple-glazed panes will help substantially to insulate the house. If you’re in the process of a new build, go for these energy-efficient windows in the first take. The initial investment cost will be offset in terms of a warmer home and lower energy bills.
Enable Natural Heating
Clear skies and peeking sunlight are some rare moments of winter that you must not miss. In these warmer times, open the doors and windows and let the house soak the heat as much as possible. The sun filling your home with its energy is the most effective way of heating any home. Open all the interior doors and windows and even the cabinets and closets so that the natural light and heat can enter every nook and cranny and warm it up.
On a Warm Note
Being able to lower the power bills is always an attractive idea but you don’t have to freeze yourselves with an under-performing heating system to make it happen. Following our top tips above will not only keep your home warm without running up your energy bills but also make it easier to sell your home should you so decide in the future.
Create a winter wonderland within your home and stay snug in style with Spiffy Spools window treatments. Shop for plush velvets and cozy blackouts and bring home the warmth of summer amidst the chills of winters!
READ MORE: HOW TO KEEP YOUR HOME COOL IN SUMMER
Laying the Groundwork: Seven Elements of Floral Design
Enchanting and captivating, flowers have forever held a profound significance in celebrations. From joyous weddings to solemn memorials, flowers weave a thread of emotion, speaking a language of their own that transcends words. These natural marvels go beyond their ornamental allure; they possess the power to stir emotions, invoking a sense of joy and serenity wherever they bloom. No wonder our homes continue to show our love of blooms in floral curtains and chinoiserie wallpapers!
Behind every exquisitely arranged bouquet lies the artistic prowess of a skilled floral designer. Like maestros conducting an ethereal symphony, these professionals wield their expertise to curate floral arrangements that leave a lasting impression. Every stem, petal, and ribbon is orchestrated with precision and care, guided by the client’s desires and the occasion’s essence.
In this blog, we’ll be exploring the essential elements that compose the very foundation of breathtaking floral arrangements. So, whether you are an aspiring florist yearning to ignite your creative spark or an admirer of floral beauty seeking to understand the intricacies behind each stunning arrangement, let us get you started with the seven fundamental principles of floral design.
Floral Design: The Poetry of Flowers

Floral design is the art and practice of arranging flowers and other plant materials to create visually appealing compositions. It is a creative process that involves selecting, cutting, and arranging various blooms and greenery to craft beautiful and harmonious arrangements.
Whether it’s creating stunning centerpieces for weddings, crafting sympathy arrangements, or simply brightening up a space with a vibrant bouquet, floral design is a skillful blend of nature’s bounty and human ingenuity, resulting in breathtaking floral displays that celebrate life’s moments and add beauty to our surroundings.
But beyond the seven elements, we must start by mentioning that fresh flowers are of utmost importance to create stunning floral arrangements. And, if you ever end up having a floral emergency at Long Beach and you need same day flower delivery for fresh flowers, you can rely on My Global Flowers for a seamless experience.
Elements of Floral Design
Join in as we delve into the seven key elements that orchestrate the symphony of colors, textures, and shapes in every exquisite bouquet. The following are the chief elements of any floral design:
Line
Line dictates the flow and motion of an arrangement and refers to the visual path that the viewer’s gaze follows while looking at a floral design.
The diversity of lines available – straight, curving, zigzag, and more – allows designers to express various characteristics, whether bold masculine, or delicate feminine. Lines with surprising turns and twists like zig zags add energy to a composition while slow curves add a more relaxed and graceful look to the floral design.
Certain line flowers and line foliages work well together to create visual lines effortlessly guiding the eye’s pathway. Line flowers like tuberose, veronica, and bells of Ireland form the skeleton of many arrangements. These lines are even more visible when stems of certain flowers are allowed to stand out.
Line foliage like iris leaves, eucalyptus, and fern, extend the visual path of an arrangement beyond the lines of the focal flowers and container of the arrangement by overflowing out of the structure in a planned manner. This makes an arrangement look visually whole and complete.
The understanding of the emotion a particular style of these lines will evoke is necessary to make sure that the floral arrangement is being done according to the event it is for and also complements the architectural qualities of the surroundings.
Form

The best way to explain the element of ‘form’ is to consider it as the overall three-dimensional structure including the shape, depth, width, and height of a floral arrangement. There are two main types of forms – open form design and closed form design. While an open form has more negative space in between flowers, a closed arrangement has flowers bunched together closely, making it look more dense. The shapes in form may include geometric shapes like triangle, wedding arch, square, linear.
Different structures are typically intended for varied aesthetics and emotions. To give an example, round closed forms are traditional and elegant while asymmetrically open forms are more modern and natural to look at. Different flowers add to these varied forms and shapes. The following are a few examples:
- ROUND: Roses with their perfect symmetry, peonies with their voluminous blooms can be used for round designs.
- CRESCENT/ ARCH: The graceful and arching stems of orchids and cella lilies, or the tall beauty of bending delphiniums are great for creating gentle arches and slow romantic curves in a crescent design.
- TRIANGLE: Bells of triangle can be exploited for their length to create the top point of triangular arrangements. Other flowers good for this form are sunflowers which can form the base of a triangle and irises with their pointed blooms that make them suitable for accentuating the upper points of a triangular design.
- VERTICAL: Tall and stately flowers like gladioli and snapdragons tower over any plan and easily create a vertical form of arrangement.
Space
Space in floral arrangement can be defined as the total area that an arrangement takes up including the positive and negative sections of the design. This element is necessary not just for making the entire arrangement fit into a designated area but also for creating a sense of rhythm and spacial harmony that neither overburdens a room nor goes unnoticed in a hall.
Positive space refers to the area taken up by the elements of the design while negative space is the area that is left empty to give breathing space to the form. Too little space can make the arrangement feel crowded and cluttered, while too much space may make it look sparse. The perfect spacing is achieved when the florist is able to strike a balance between the openness and fullness of a design.
The negative space helps the flowers and foliages of a design to stand out individually, while the positive spaces bring all the elements together as one singular arrangement. Correct spacing also gives visual cues for determining the focal areas of the design.
Fragrance

Fragrance is much more of a personal and atmospheric element than an element of the visual design itself. Fragrance can elevate the sensory experience, making it more memorable and pleasurable. Designers often choose flowers with delightful scents like roses, lilies, or jasmine to create captivating bouquets. The aroma of the flowers can evoke feelings of joy, calmness, or nostalgia, enhancing the overall appeal of the design.
While in weddings and funerals, sweet-smelling flowers like peonies can be used to evoke nostalgia and commemoration, flowers with subtle scents like gardenias should be used in black-tie affairs or dinner table settings so they do not overpower the room with their presence.
Size

Size refers to both the measurement of each of the elements of the design and the overall amount of space occupied by the floral arrangement.
The size of the flowers themselves, such as large sunflowers or petite daisies, can dictate the arrangement’s scale and presence. Choosing the right container size is equally vital; a small vase creates an intimate display, while a tall container adds drama. Again, you cannot use large sunflowers in small vases or daisies in huge flower baskets. The size of the flowers must complement the size of the container.
The overall size of the arrangement must also match its intended location. A tiny centerpiece on a vast table may get lost, while an oversized display in a small room can overwhelm. Balancing the sizes ensures a captivating floral design that harmonizes beautifully with its surroundings.
Colors

Color refers to the various hues and shades present in a flower arrangement. Different colors evoke various emotions and set the tone for the entire composition. Soft pastels whisper sweet serenades, fiery reds ignite passions, while bold mixes celebrate life’s vivacity.
Bright and bold colors like reds, oranges, and yellows create a vibrant and energetic atmosphere, ideal for celebratory events and joyous occasions. On the other hand, soft pastels, such as pinks, lavenders, and blues, convey a sense of tranquility and elegance, perfect for more intimate gatherings or serene settings.
The strategic use of complementary colors can enhance the impact of a floral arrangement. When complementary colors, like purple and yellow or blue and orange, are placed together, they intensify each other, resulting in a dynamic and visually striking display.
The color choice also has an impact on the decor of the entire room. To give an example, for a rustic-themed wedding with the venue adorned in natural and earthy tones, the bouquet designer might carefully select flowers in warm, rich hues like burgundy, blush, and cream to complement the rustic ambiance. An interior designer may pick a bunch of white daisies to go with an all-white, minimalist kitchen or a beach-themed guest bedroom.
Pattern and Texture

The feel of any material of the design by sight or touch like smooth, rough, velvety, etc. is referred to as the texture of the design. The pattern is created by repeating specific flowers or foliage, offering a sense of rhythm and coherence. Both these elements together add depth and visual contours to the design.
Texture pertains to the surface quality of the flowers, leaves, or other materials used. Combining various textures, like velvety roses with feathery astilbes, creates captivating contrasts that elevate the design’s allure. For instance, a bridal bouquet may feature a repeating pattern of blush roses, interspersed with delicate baby’s breath and rough-textured eucalyptus leaves.
Bottom Line
Floral decorations can be a delightful challenge, demanding expertise in design, color, and size considerations. As a skilled florist, a deep understanding of each flower’s distinctive features is vital. Be resourceful, utilizing each element to its fullest potential, and let your artistry flourish in creating captivating floral wonders. With expertise and creativity, transform any mundane space into an enchanting one filled with beauty and joy.
One can never get enough of flowers, and if you want to evoke the delicacy of floral designs in your home, start with shopping for botanical curtains and floral roman shades with Spiffy Spools. These flowers never wilt and stay forever precious, inducing elegance and artistry to your space. And whether you want to learn how to drape curtains for events like weddings or simply looking for tips to spruce up spaces like a screen porch with drapes, you can find all the ideas and inspiration you need in our Spiffy Speak blog. And if you are still in need of further assistance, we’re just an email away!
READ MORE: A POETRY OF LOOM: DECORATING YOUR HOME WITH IKAT
HOW TO KEEP YOUR HOME COOL IN SUMMER

Sunlit skies and flower-laden trees, group hiking and mountain biking, icy mojitos and pool parties – Ah! Summer is all about having fun! We love our summers but only until the AC goes on a strike or sends the power bills shooting up to the sky. If you’re looking for ways to keep your home cool in summer and to lower the burden on your cooling system, this blog is for you.
Order summer-friendly custom window treatments made of cotton or linen, add blackout lining, or choose blackout fabrics and keep the heat out in style with Spiffy Spools.
Apply Heat-Resistant Films
Resist the heat from pushing its way in through the glazed walls, doors and windows. Apply heat-resistant window films on your glass panes so the sun rays get deflected when they hit the surface. Films are available in various types and qualities, some of which are capable of blocking as much as 95% of infrared rays and over 70% of heat. Depending on whether you like a clear glass or tinted view or a mirror-like reflective look from the outside, you can choose from among a wide array.
Close the Curtains/Shades
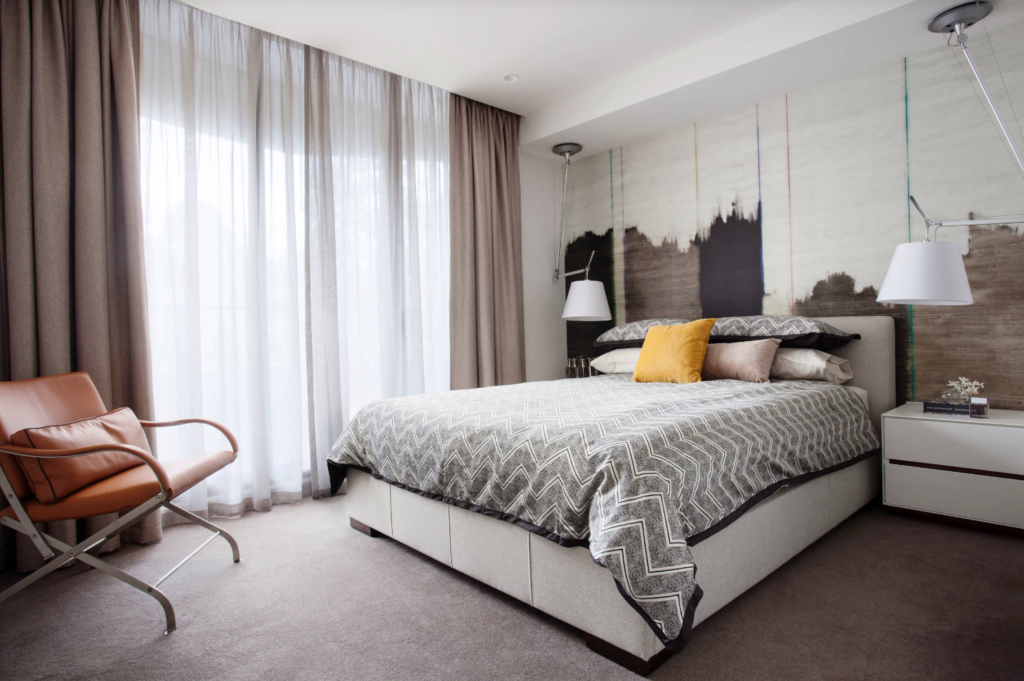
Cutting sunlight’s entry into the home at its most incredible intensity is key to cooling the home. North and west-facing windows will get the most heat, so be mindful of closing them before the sun is high. Close all the curtains and blinds before noon and keep them so until the evening when the air has started to cool. And if you haven’t installed your window treatments yet, go for a blackout variety for higher insulation from heat.
SHOP NOW: CUSTOM BLACKOUT CURTAINS FROM SPIFFY SPOOLS
Mount Awnings

Shading the windows and doors helps to reduce the volume and intensity of the incoming heat. If your house does not have structural overhangs above the vents, install window awnings. Wood, glass, or tiled awning shades are permanent additions recommended for hot locales. But if your winter also goes to extremes, it is better to opt for easily installable retractable shades to avoid snow piling and to draw in more light.
Insulate the huge patio doors by shading the patio entryway with fabric awnings. Cover the patio area adjacent to the house with a huge portable umbrella canopy. Not only will it give you a shaded area for hanging out in the evening, but also reduce heat exposure for the windows and doors facing the canopy.
READ MORE: WAYS TO KEEP YOUR HOME WARM IN WINTER
About-Turn the Fans
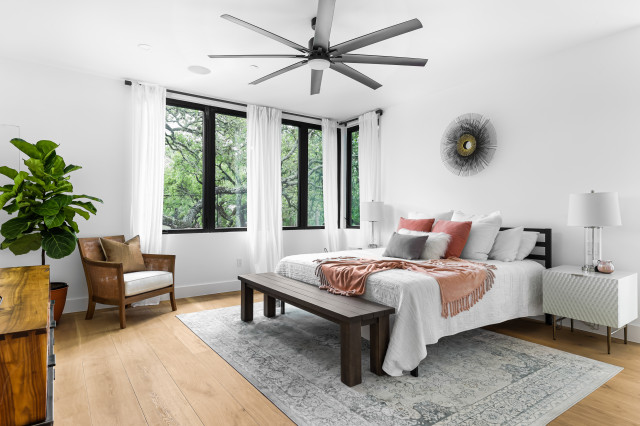
If your AC is doing a great job, use your fans to spread the cooling. Tap the reset button of your fan to make the blades move counterclockwise. This will serve to push the cool air down toward you and the hot air upward.
Give the Hob a Break

Cooking meals in the house raises the temperatures in the house by a few degrees. So, here’s what you can do. Avoid cooking in the kitchen when the sun is high. Use the hob in the early mornings with open doors and windows so that the heat gets vented out promptly. Use your outdoor cooking area and consider cooking your dinner outdoors so that the heat doesn’t keep the house warm during the night. Give your hob a break and go alfresco dining with your priced barbeque griller.
Switch to LED Lights

Incandescent bulbs warm up as they produce light, adding significantly to the room’s temperature. In fact, 90% of the energy they produce is just heat. See them off and install energy-saving LED lights instead – invite light, not heat. And save on your bills too!
Give Time Off to Electrical Appliances

Give a holiday to all the electrical gadgets and appliances that are not in use because any device that is powered on, especially television and computer, is generating much heat and adding to the malady of the ambient heat. Turn off unnecessary lights or at least dim them. Cut down the use of the dryer and string-dry your clothes in the sun. Taking these steps will substantially lower the heat in the room as well as your power bills.
Upgrade to a Smart Thermostat
Whether you have an excellently working HVAC or an old tired one, upgrading to a smart thermostat is like providing it with a new brain. It can memorize your temperature level preferences for different seasons of the year at different times of the day, create schedules based on them and fully automate the cold airflow. Coming back after a long draining day to an already-cooled home makes a world of difference. Smart thermostats are desirable especially if you don’t have smart ACs as they will automatically switch off the AC after the desired temperature has been achieved, resulting in energy savings and reduced power bills.
Maintain your Cooling System

Everything can be automated with gadgets, but maintenance is still done the old-fashioned way. The AC does need to be shown some love from time to time. Clean the air filters fortnightly and replace them at least twice a year. If they are clogged, not only will that affect their performance, but also their longevity. Besides, it will also reflect in the overwhelming power bills.
Try Cooling Curtains
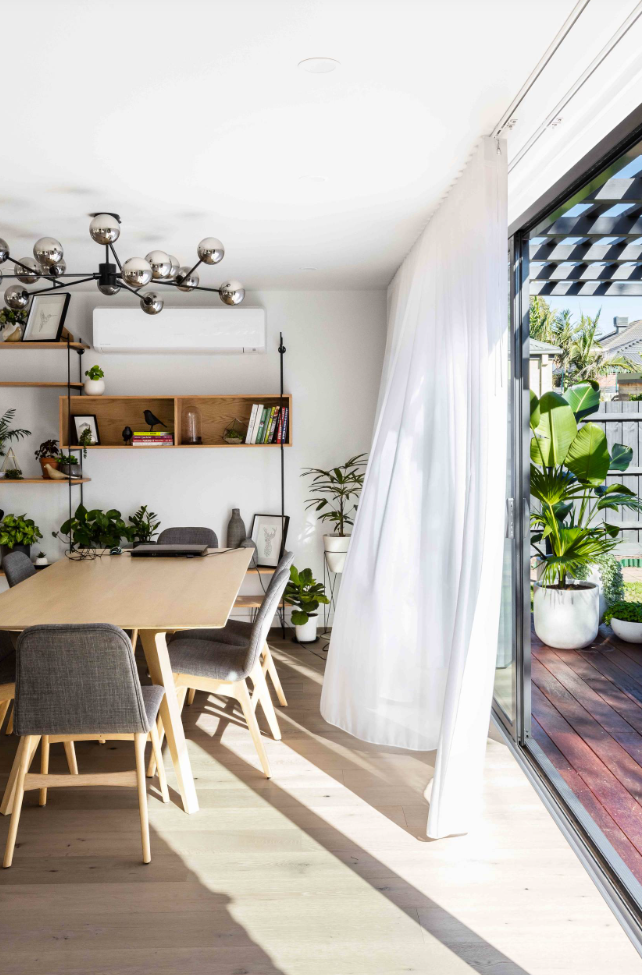
If you have curtains at your open windows, moisten them so that the hot air will cool down when they come into contact with the moisture. Keep a floor fan right in front to spread that chilled air and you have your very own DIY air cooler.
SHOP NOW: CUSTOM CURTAINS FROM SPIFFY SPOOLS
Shift to Cooling Textiles
Textile elements, from bedding to clothing, must ideally be inherently cooling to beat the summer heat. Tuck away the wool and polyester duvets and sheets and your crepe, chiffon and nylon outfits. Switch over to natural fabrics such as linen and cotton which are breathing, lightweight and moisture-wicking. They are comfortable both to wear as well as to sleep in during hot summers.
Employ Strategic Landscaping

The greener the surrounding, the cooler the house. For an expeditious arrangement, consider surrounding your house with potted plants that have dense foliage. If you’re ready for the long haul, you can enjoy a cooler home, summer after summer.
Plant fast-growing trees on the west side that will level up to the roof to provide shade from the dreadful noon heat. Line trees that crown higher up on the south side to curtain the evening sun. Prefer deciduous trees so that the autumn shedding will prevent light-blockage during winter. Provide a lattice structure at the patio and driveway for vines to climb up to form a canopy. Similarly, plant smaller trees, shrubs, hedge bushes, and garden turf around the house. Apartments must make the most of the terrace with vertical garden planters and succulent vines draping the balustrade.
Introduce Cool Roofing

‘Cool roofing’ is an umbrella term for various techniques of roof construction to allow more sunlight to reflect, thereby absorbing less solar energy than a conventional roof. Various materials may be used such as polyurethane foam, bitumen membranes, asphalt, wood or polymer shingles, clay tiles, concrete tiles and so on. Ballasted roofs and green roofs are other methods of cool roofing. Cool roofing keeps the temperatures of the house significantly cooler than conventional roofs and can cut your AC power bills by almost a third.
Action Time
We hope you’ve found this blog handy to cool your home this summer while giving some rest to your AC. With a combination of heat-repelling and coolness-sustaining strategies listed above, you will not only be able to keep your home cool without running up your energy bills, but also find it easier to sell your house should you so decide in the future.
Start your summer prep with us and shop for summer loving window treatments made of soft natural fibers like cottons and linens, and give your home a fresh airy look along with functional benefits of such fabric window treatments.
READ MORE: TOP 35 CANOPY BED CURTAINS: IDEAS, TIPS & IMAGES FOR BEDROOMS
WAYS TO MAKE AN ALL-WHITE KITCHEN POP WITH COLOR
An all-white kitchen is a daring design decision and safe-keeping its pristine beauty is a demanding yet rewarding task. Sometimes though, a white kitchen can come across as sterile and non-imaginative, begging desperately for some color and texture to make it more warm and inviting. Fortunately, this is not a tough task at all to achieve because there are umpteen ways to breathe life into a blank canvas.
There are two ways to go about this project. One method is to add colorful accessories which can be removed later without affecting the base aesthetic of the kitchen in any way. A set of colorful coffee mugs is a good example – tuck them away into a cabinet or replace them with a white porcelain set, and the kitchen is plain white again.
The other way is to make major, structural changes that can last until another revamp. Like, an overhaul of your countertop from white quartz to hard maple wood. Or, a semi-permanent change such as swapping a glass pendant light over the island for a colored one.
Which course to take entirely depends on whether you’re looking for temporary or permanent changes or even a combination of both. If you’re seriously committed to having an all-white kitchen and want your tryst with color to be short-lived and experimental, we suggest you go for temporary additions first. If you like it, you can then slowly make major upgrades of a permanent or semi-permanent nature.
Let the destination determine the path, and here are our top suggestions for making a white kitchen pop with colors to take you there:
Easy and Temporary Additions
Add a few colorful elements and they breathe new life into any all-white space gone too clinical. They do not take up much optical real estate, thus, making their colorful interventions a welcome change rather than intrusive misfits. On that note, here are our recommendations:
Start with the Artist’s Palette: Hang Colorful Wall Art
A lovely picture with captivating, vibrant colors can make a white kitchen wall look so pretty and lively. Take it big on the scale if you want it to become a focal point or keep it medium-sized to keep restraint over the volume of color. Or create a gallery wall of art prints in varied sizes to take that art moment in the kitchen to the next level.
A mystical oil painting of a verdant landscape enveloped in a vintage gilded wood frame or a thought-inspiring abstract design in a sleek black frame – let your choice spring from your overall kitchen decor language. If you’re planning to bring in more colorful elements to the kitchen, give a designer touch by tying all the colors together in the art piece’s dominating palette.
Let Function & Art Converge: Install Beautiful Window Treatments

A well-designed window treatment is an art piece in itself, capable of bringing shapes and colors into play while fulfilling its function of light and privacy control too. You can introduce a zesty pattern or color, like a splash of sunny goodness with yellow kitchen curtains, or a burst of florals through your spring kitchen curtains. Or, go for a tone-on-tone treatment with a shade of white for an understated contrast. You can even be subtle with this addition and go for white curtains with trims black and white curtains and kitchen roman shades that can introduce a peppy element to your decor without overwhelming the pristine white space.
Colorful patterns, no matter how fine or bold, have a special place in kitchen window treatments because other elements are mostly solid-colored steel, lacquer, or solid wood, incapable of hosting patterns. Even the simplest of patterns like stripes is more eye-engaging than a plain surface, so try patterned curtains or shades to elevate the look of your kitchen.
READ MORE: BEST ROMAN SHADES FOR KITCHEN: IDEAS, TIPS & TRICKS
Show Off Your Culinary Assets: Add Open Shelves
Think of those lovely dappled ceramic jars that you purchased on your last trip to Europe or the heirloom colored glassware that holds a piece of your history. Wouldn’t they like a podium to shine? How wonderful it is for a kitchen to draw its colors from elements that originally and organically belong there!
Even if you’ve got excellent wall-mounted cabinetry work done that hides all your things well, think of breaking the rules with some open shelving. Then add colorful knick-knacks of your choice – a chef figurine, a cheerful ivy draping down from a vibrant planter, some cookbooks with artfully designed hardbacks or your favorite enamel cookware.
If you don’t want to bring in decor for the sake of it, display your favorite serveware, dinnerware, plates, jars, and canisters. Their varied hues and textural quality are decorative in themselves and can lift your kitchen from its sterility without going overboard on color or design.
Reimagine the Tiny Details: Introduce Color in Subtle Ways
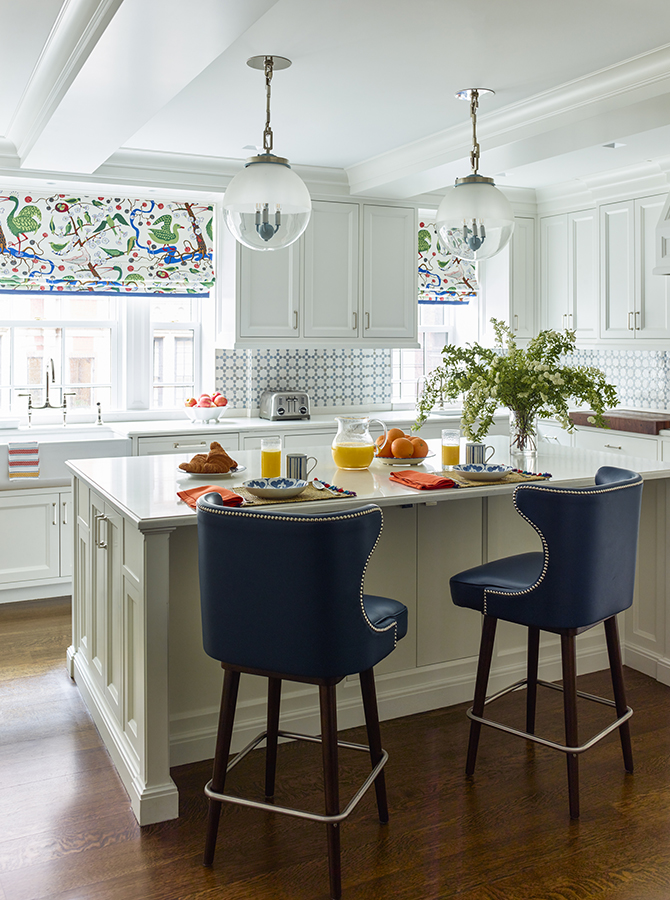
Adding color to the existing accessories is another way to bring visual contrast and interest. A little splash of color here and there can make all the difference in a white kitchen without making it too pronounced. Here are a few suggestions –
- COLORFUL HARDWARE: Exchange the nickel pull handles and knobs for colorful ones or warm metal accents like brass or brushed gold. And let the kitchen faucet and wall-mounted task lights follow suit.
- VIBRANT CABINETS: Do you have a cabinet or hutch with glass doors? Wallpaper the inners with a color that pops out from the rest of the space and also becomes a contrasting backdrop for the precious crockery displayed in them.
- STATEMENT PLANTS: Have a penchant for statement indoor plants in the kitchen? Consider plants like crotons and orchids that bring a burst of color besides adding a whiff of freshness to your kitchen.
- ARTISTIC EXHIBITS: Swap your glass flower vases for African clay pots or Moroccan vases that bring bold colors in full saturation to play. Or, display your antique chinoiserie vases that can add a refreshing touch of blue on the clear white backdrop.
- PLAYFUL TOWELS: And don’t miss the opportunity that your tea towels provide. Yes, the milky white towels that are so hard to maintain can give way for some colored and patterned ones that can hide the stains better and also break the tedium of white.
Cozy Up a Quiet Spot: Redo the Upholstery to Introduce Vibrance
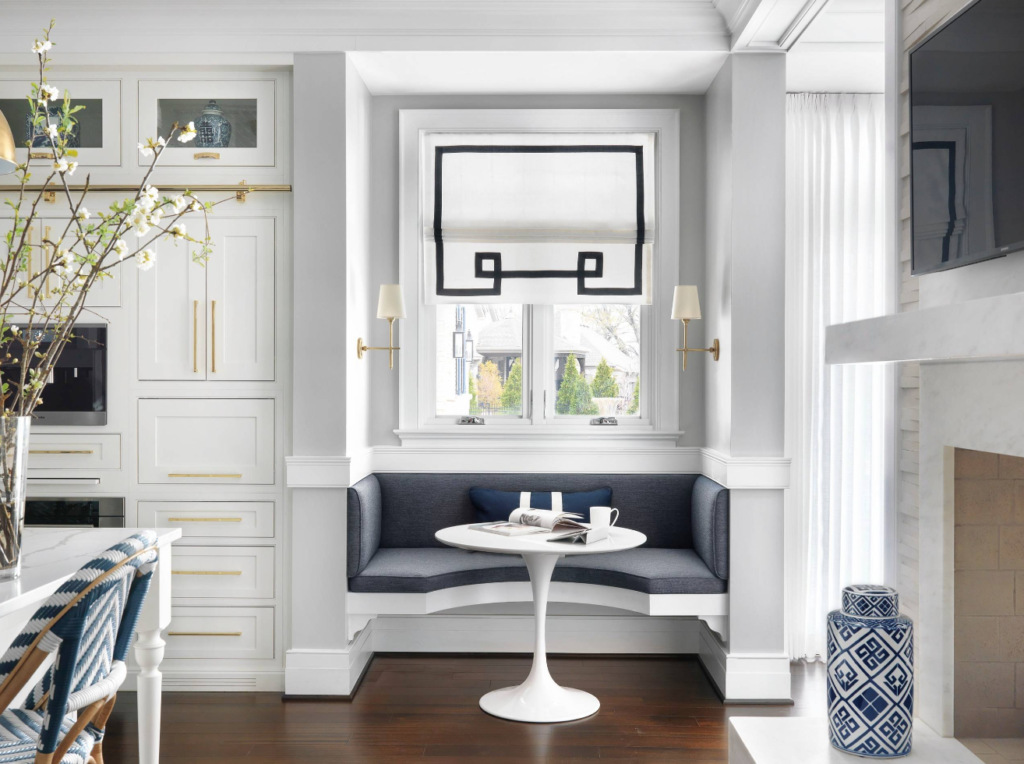
No material is so customizable in the kitchen as textile and losing that opportunity would be a shame. Look at your bar stools and chairs at the breakfast counter, and the upholstered seat at the bay window. Refreshing these elements with new, colorful upholstery is a fantastic way to bring a punch of color to your white kitchen.
It’s also an apt moment for patterns to come to play since kitchens are generally dominated by solid surfaces. From simple patterns like plaids and stripes to intricate ones like florals and geometrics – choose as per your taste and decor style – while bringing color into the space.
Run a Contrast to White Walls: Introduce Vibrant Rugs
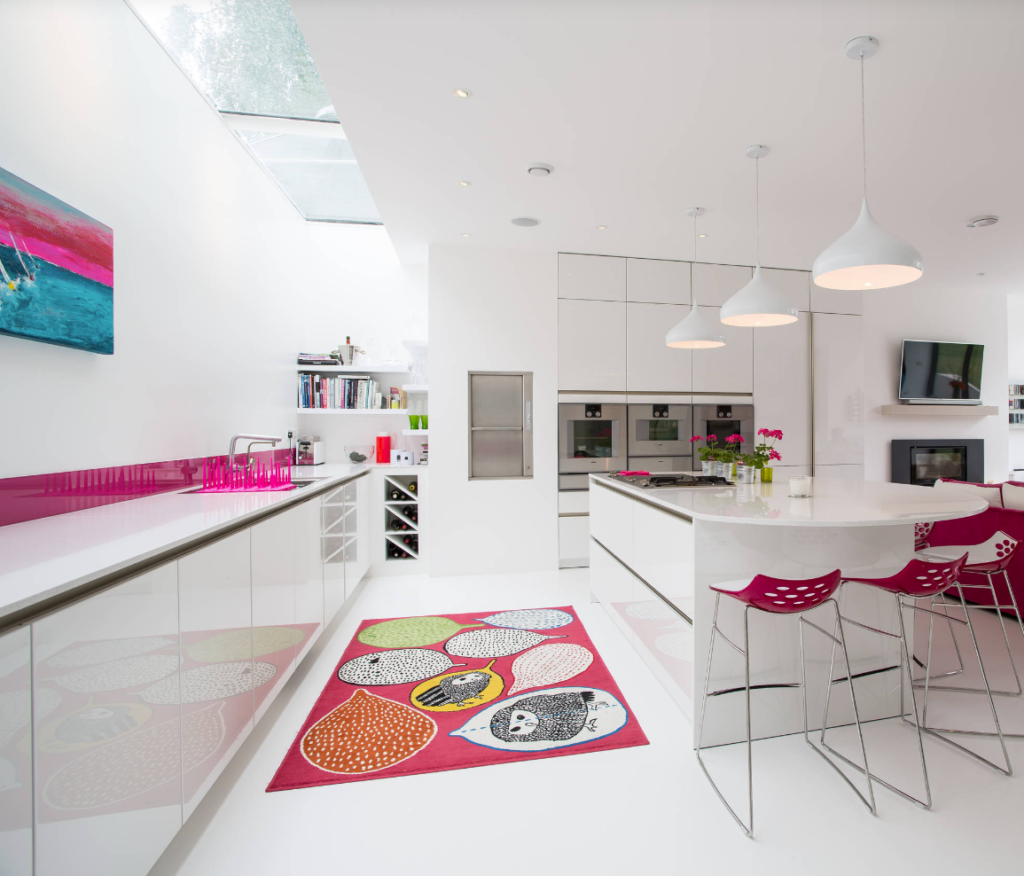
If you want to change the overall feel of the space without taking away from the whiteness of the eye-level details, consider layering the floors with a peppy-toned rug.
If you want to rush in some colors with a deeper impact, consider saturated patterns that you find in the Moroccan, Persian, or Ikat pattern rugs. Their detailed color-packed designs will add visual interest and make the space look more cozy and personalized. Don’t forget to support it with a rug pad, especially if you have hardwood floors, to prevent slipping and provide greater comfort underfoot.
You might want to consider white LVT flooring options as they can provide a striking contrast to colorful rugs. Additionally, these floors offer the advantage of being waterproof, which is particularly beneficial in kitchens where spills and accidents are common.
Permanent and Semi-Permanent Additions
While we will forever remain fans of the classic, white kitchen, sometimes, the case may be that you’ve had your time with white and you’re excited to move on from neutral pared-back design styles to more bold and more carefree ones. If you’re ready for a major revamp to make your white kitchen more lively and vibrant, these ideas may help:
Make a Colorful Impact: Install Solid-Colored Pendant Light
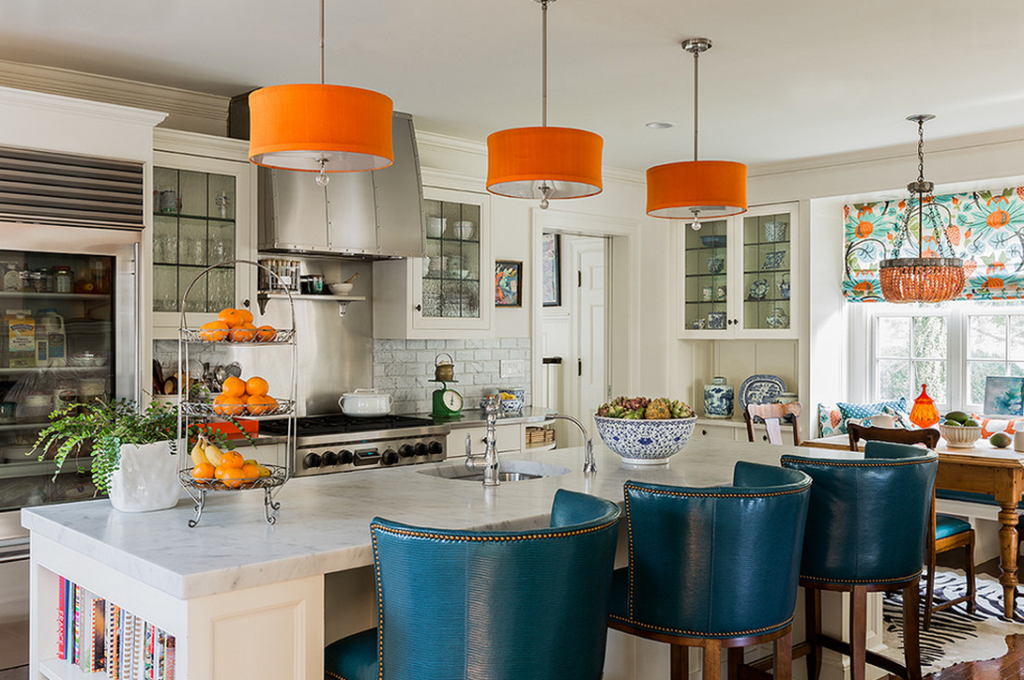
The white backdrop of the kitchen allows you to use color strategically and the pendant lights over your island are definite points for tonal contrast. They stand out because of their size and position, but with color, they become even more impactful.
Choose saturated bright colors like red or blue for a striking contrast. Or, go for reflective ones with metallic tones so they bounce light and coordinate with other metal fixtures in the kitchen.
Throw Color on the Fifth Wall: Refresh Ceiling/Floor
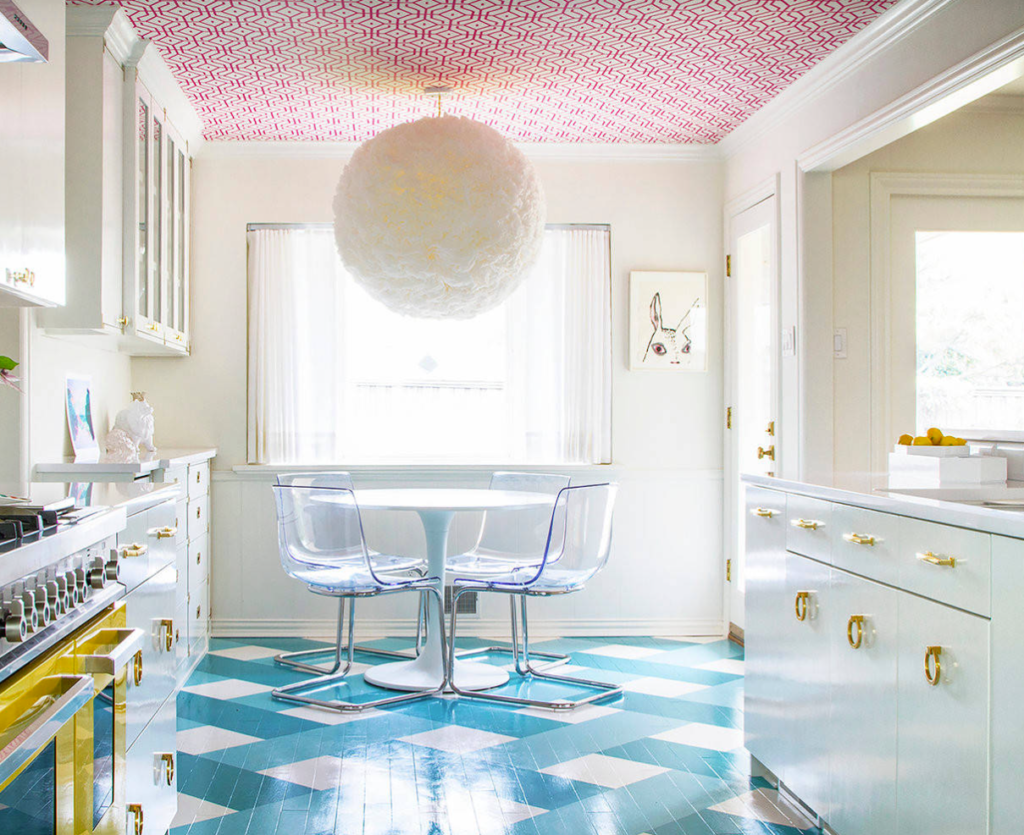
While kitchens hardly have full walls that you can throw a bucket of paint on for a makeover, the entire ceiling and/or floor is at your disposal. You can easily add color to your kitchen by giving these a fresh coat of paint, wallpaper or tiles in a color of your choice.
If your kitchen has a low ceiling, this technique can also help to make you grasp the vertical space better.
Alternatively, consider laying a pretty wallpaper on an accent wall if you are looking for an excuse to bring some patterns into the kitchen. Make sure, though, that the wallpaper can withstand the harsh situations that kitchens will put it through with its moisture, grease, and mold. Always opt for a smooth-surfaced one so that it can be wiped clean easily.
Change Your Daily Experience in the Kitchen: Color Your Cabinetry
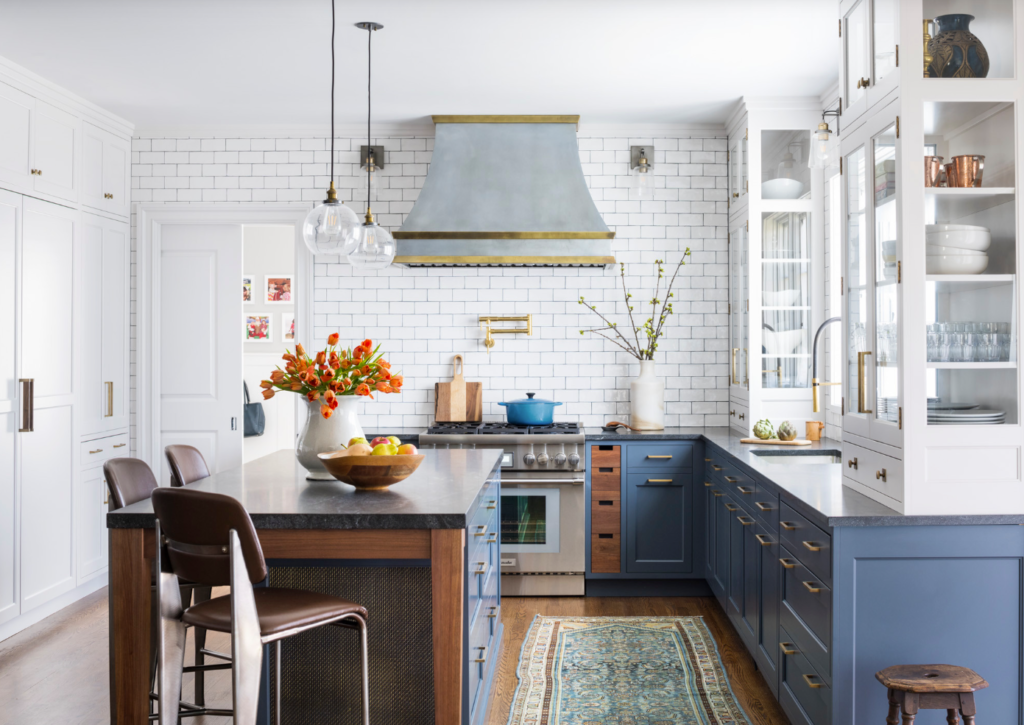
Changing the color of the cabinet doors will not only change the look of your white kitchen exceedingly but also change the way you experience this space.
If you don’t want a huge leap into color, you can leave the upper cabinets as is and revamp just the base cabinets. But should you make a total changeover, your white kitchen will literally cease to be ‘white’.
Define the First Impression: Switch to an Eye-Catching Backsplash And Countertop
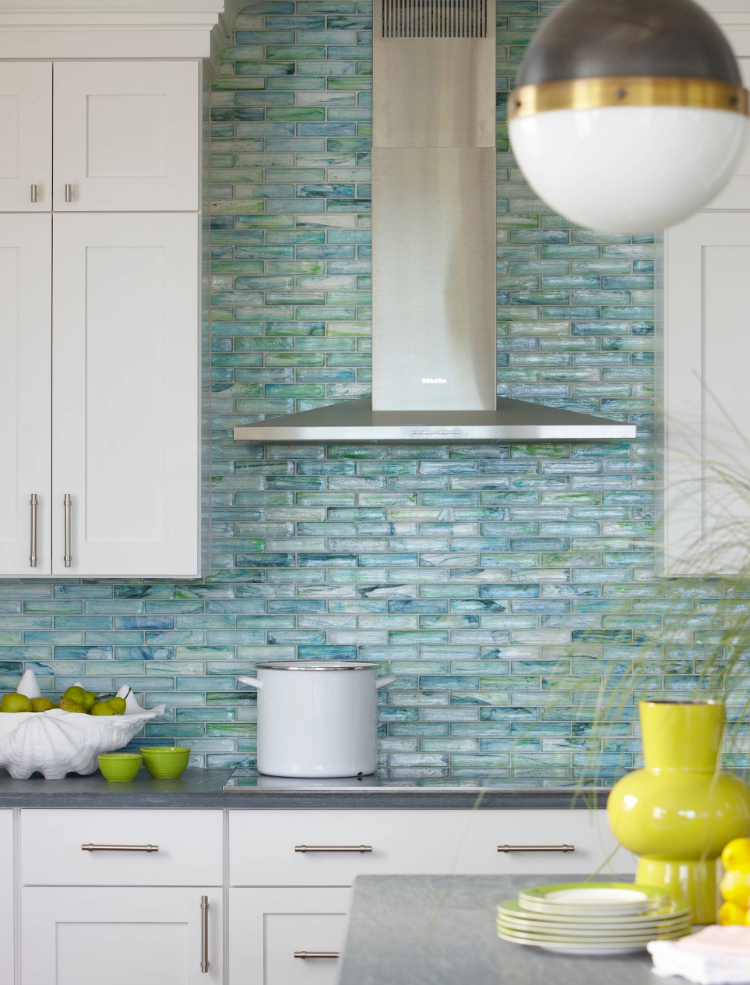
The first glimpse you get of a kitchen typically involves the countertop and backsplash. Exchange these pure white beauties for colored ones and make your kitchen go from white to vibrant in every Insta-post instantly. Even if you change nothing else about your kitchen, it will look anything other than a ‘white kitchen’ in every single camera frame.
Changing a countertop is not an easy step, nor smooth on the budget. So, if you are not ready for that change, at least make a breather with the backsplash. Bringing contrast in the backsplash helps the wall-mounted cabinetry, stove hood, and countertop to stand out in their spotless white. It’s no secret that white gets its well-deserved adoration only when deep-contrasted by rich hues.
If you’re on a budget, explore the options available with peel-and-stick wall tiles that are very easy to install and maintain. Anyone will be easily deceived into believing that they are new tiles – get the job done and save the dollars for another one.
Concluding The Colorful Venture
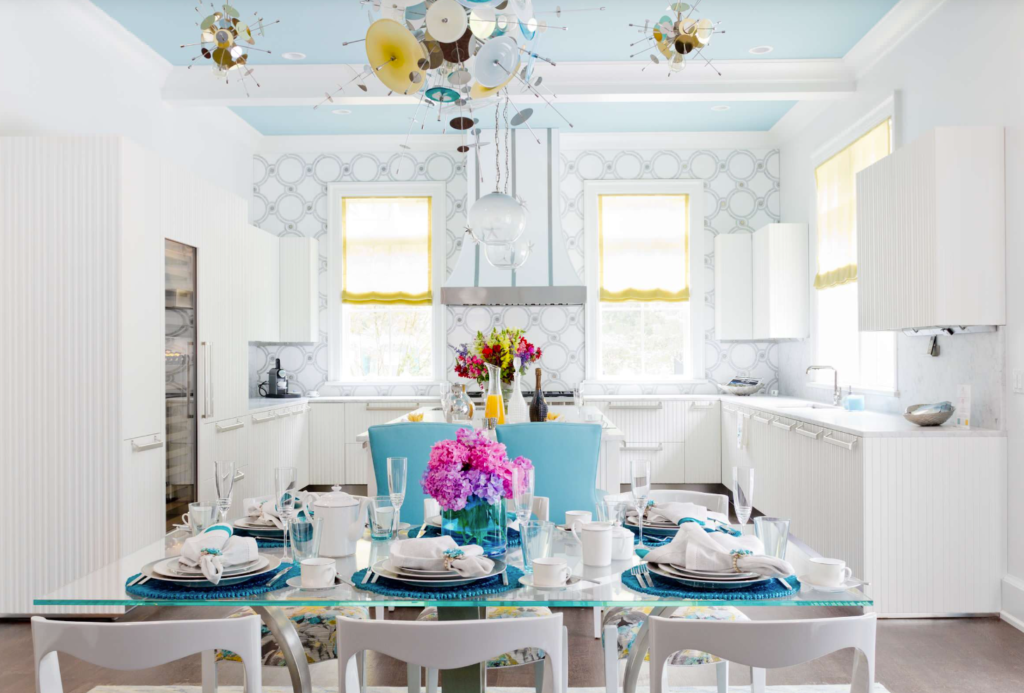
A white kitchen is an oasis where the heart can experience calmness in the middle of a rush hour of your daily chores. But with sufficient and strategic use of color, that peace can get elevated into joyful positive vibes. We hope that the ideas we presented in this blog, both temporary and permanent, will help you attain your mission of taking your kitchen from white to brilliant.
If you would like to bring that colorful twist to your kitchen with fabric window treatments and kitchen/dining accessories, do check out our collection and our Spiffy Speak blog for more inspiration. Let us join you in topping your well-baked white kitchen with some sparkly bright garnishments. Good luck from Spiffy Spools!
READ MORE: KITCHEN CURTAINS: FROM MODERN TO CLASSIC…ALL THE IDEAS YOU NEED
BEST WINDOW TREATMENTS FOR NURSERY
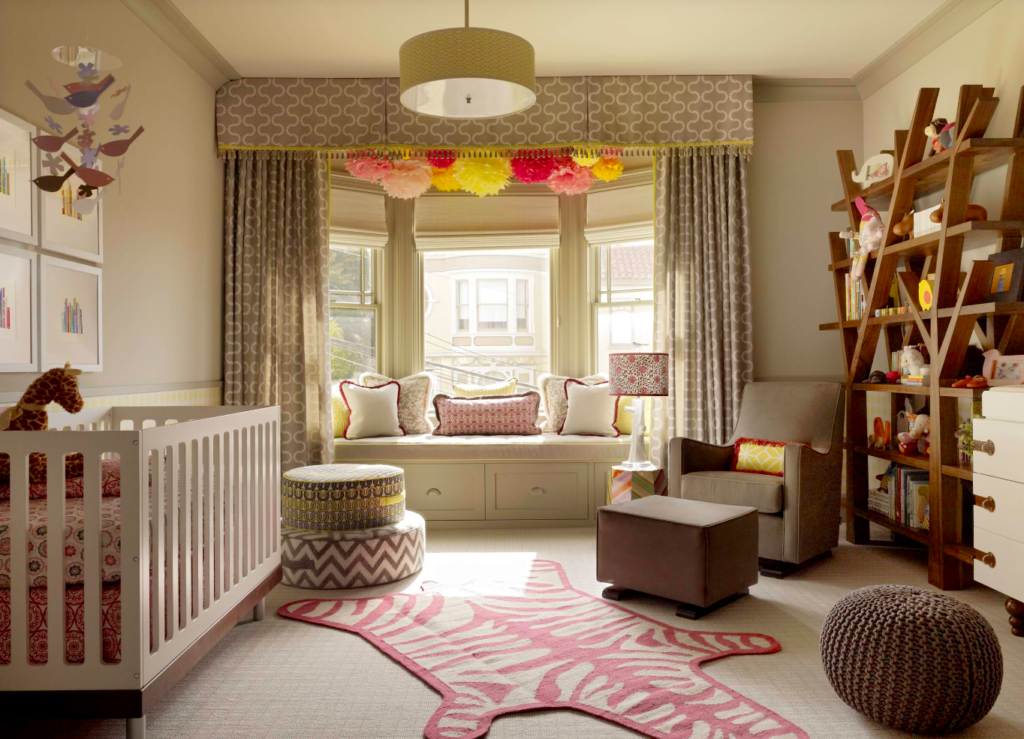
One of the challenges that many parents face is getting their toddlers to sleep on time. After an entire day of exploring, playing, and learning, sometimes it is hard to get them out of the excitement and frolicking and transition into sleep mode. One way to calm them down is to keep your light settings moody by nightfall and to darken their nursery for naps during the day so there’s nothing to stimulate their mind. That’s why window treatments for a nursery need much forethought.
Besides being sleep-friendly, they need to check other boxes too. If you’re researching various options for window treatments for your little one’s nursery before shopping, we hope this blog will serve as a handy reference.
Order custom window treatments from Spiffy Spools online in any size to decorate your nursery. Pick from a wide variety of 3000+ fabrics and patterns!
Nursery Window Treatments: Goals & Priorities
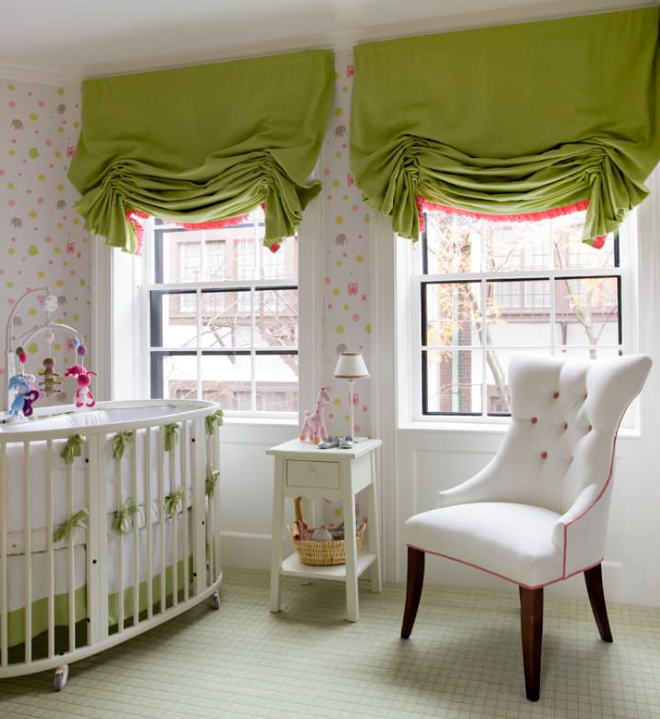
Window treatments are generally meant to provide privacy and light control. But in nurseries, there are many more demands laid on them, such as:
ROOM-DARKENING
No matter whether it’s night or day, little ones need to sleep well. The dawn must not break into the nursery so crudely that the deep slumber suddenly breaks. Not only does that leave the baby crying until comforted, but the entire routine of the day might also get displaced because of the early rising. Say nothing about how cranky the tiny tot may get due to sleep deprivation. Therefore, window treatments must effectively curb incoming light in the nursery, giving a cozy ambiance with nothing to rest the eyes on, thereby calming their senses and getting them to focus on sleep.
NOISE CONTROL
If you darken the room but the loud music from a party in the neighborhood does not leave your baby at peace, it will be understandably hard to catch a wink. Together with cutting light, your window treatments must also do enough to block external noise from entering the nursery. Of course, they are not to be left alone in this task – the rug, nursery wallpaper, and upholstery are a few other elements that share the burden.
TEMPERATURE CONTROL
Whether it’s summer or winter, a change in room temperature can leave the baby stirring in the crib for want of warmth or cooling. Insulative blackout window treatments can keep your home warm in winter and cool during summer. Almost thirty percent of the thermal energy in the room is lost through the windows. It’s not wise to invest in a top-class heater/cooler without ensuring the windows are insulated enough to save what is generated. Hence, make sure that the window treatments insulate the nursery as best as possible so your baby can sleep through the night, and catch the precious naps unhindered.
SAFETY CONCERNS
Kids love tchotchkes and we are tempted to offer them what they like. With window treatments, however, avoid embellishments and trimmings that can get detached easily from the base layer. The little one might try to swallow them, causing a risk of asphyxiation among other things.
Also, window treatments with long trails increase the risk of tripping and strangulation hazards, especially for toddlers who run on all fours. If you have long windows in the nursery, you can’t help the length. But you can ensure that the window treatments are child-proofed with sturdy materials, hardware, and a steady structure. Or, put a piece of furniture in front to cut the accessibility.
EASY MAINTENANCE
Cleanliness and hygiene are of utmost importance in a nursery. The window treatments must be easy to use, clean, and maintain. If the task is complicated or needs professional assistance, it may get delayed to the point of being a whole assembly of dirt and dust. Look out for window treatments that can be easily maintained at home without taking up much time or effort.
READ MORE: HOW TO WASH CURTAINS & DRAPES
AESTHETIC VALUE
The nursery is the first classroom for the infant to learn through observation and assimilation. The decor of this room involves colors, themes and motifs, not just to fulfill an aesthetic goal but also to educate the young growing mind. And window treatments are a great opportunity because they occupy vertical space and effortlessly capture attention thereby. Kids are easily drawn to saturated colors and simple shapes as these are easier for their young developing eyes to grasp. Without ignoring functionality, window treatments must aim to satisfy the aesthetic requirements of the nursery as far as possible.
READ MORE: TOP SEVEN MISTAKES TO AVOID IN NURSERIES AND KIDS’ ROOM DECOR
Our Top Recommendations for Nursery Window Treatments
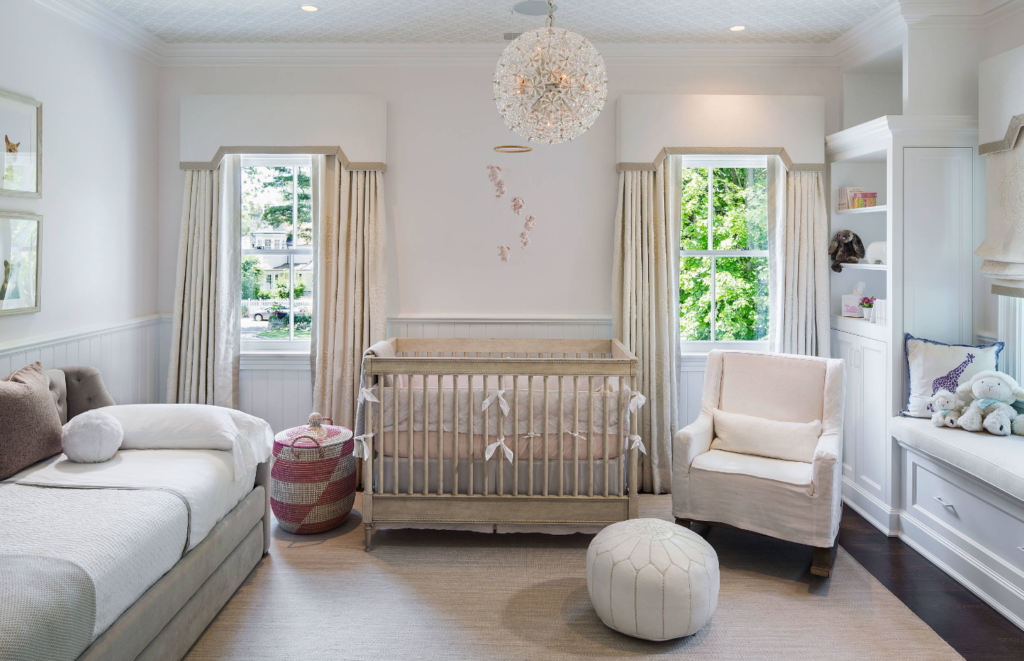
Every doting parent loves decorating the nursery with bright colors and adorable patterns that make their kid happy. When selecting window treatments for the nursery, however, one must be cautious to strike a perfect balance between function and style. The functional requirements which we have described sufficiently above should not be compromised in the least.
With that said, it’s time to glance through the various types of window treatments. Based on the prerequisites for nursery window treatments that we elaborated on above, we have some favorites. We’ll tell you exactly why we find them to be the top three prize winners among nursery window treatments from a wide gamut of products available in the market today.
Golden Glory for Roman Shades
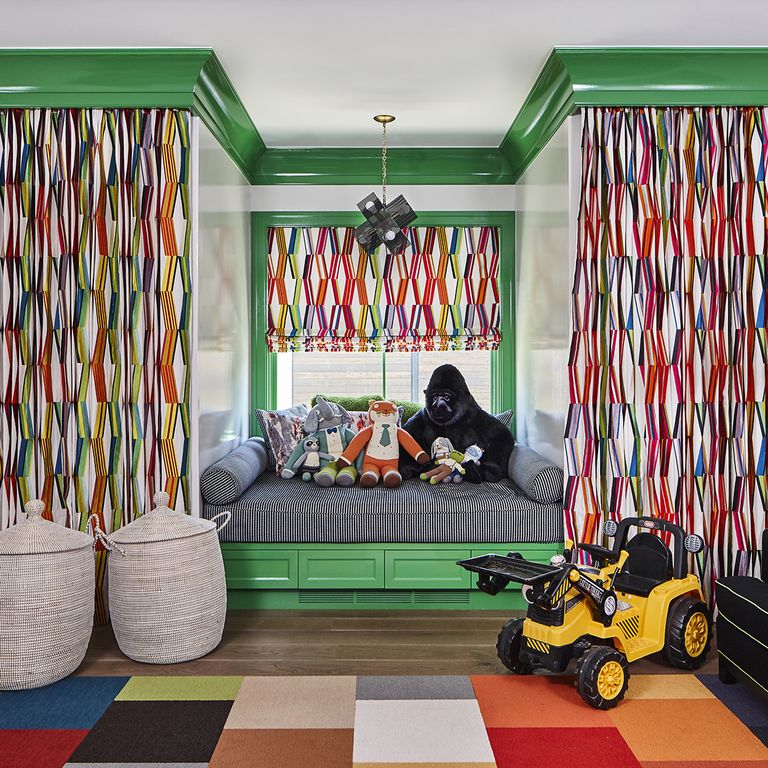
Romans have historically been rulers. Let’s roll with that pun and introduce you to fabric roman shades that continue to hold on to the golden trophy for nursery window treatments.
Roman shades bring both style and functionality to create a regal nursery fit for little kings and queens. As the most practical window solution and our top favorite for this space that ought to ooze coziness, fabric roman shades are chic, stylish, minimalist, and truly bespoke. And again, with regard to the function, they are royally spot on.
The most prominent reason for roman shades to be on the top of our list is that they run only up to the sill. With child safety anchors in place or cord-free operation settings, you don’t ever have to worry about your kid ever getting to mess with them or endanger themselves. And their sweet besmeared hands that have just gotten out of their favorite snack mug cannot ever land on the roman shades simply because they are inaccessible.
But any industrial shade or blind should be able to satisfy you up to this point, right? Our experts say, not really.
Why we love roman shades more is because of their fabric-making and the endless creative potential they bestow. Just the fact that they are made of fabric pushes the potential to introduce color, pattern and texture beyond the horizon. You can get as creative as you possibly can with all your design choices because the base material allows you that freedom, unlike the factory-made shades and blinds.
Besides, fabric softens the space like no other. And, is that not the kind of serenity, style and comfy vibes that parents would like to offer their growing kid rather than industrial sterile-looking blinds?
Further, since the shade is sill-length, you can be a little more adventurous with the trimmings. Whether it’s playful pompoms or stylish tassels that you want to layer your shades with, worry not as long as your curious tot can’t get hold of them.
Further, you can add a blackout lining or design the shade from a blackout fabric for energy efficiency. This keeps your window highly insulated, preventing thermal energy loss to a great extent, muffling sounds, and darkening the room for a sleep-friendly ambiance.
Roman shades tick all the boxes for an ideal nursery window treatment. They are the perfect balance of function and style for a room that highly benefits from sill-length treatments. If we’ve convinced you on the merits of this choice, here are a few tips to keep in mind when designing your nursery roman shades:
- When inside-mounted, roman shades are most inaccessible and thereby safer besides giving off a custom-made look effortlessly. But, you may expect mild light leaks at the seams. Make sure that your shade makes seamless contact with the wall by specifying the measurements with surgical precision.
- When outside-mounted, extend the shades by a few inches on all sides to minimize the light flow at the seams.
- Follow these tips and tricks to make the most of a blackout fabric/lining.
READ MORE: KID COUTURE: THE BEST ROMAN SHADES FOR NURSERY
Shimmering Silver for Cellular Shades
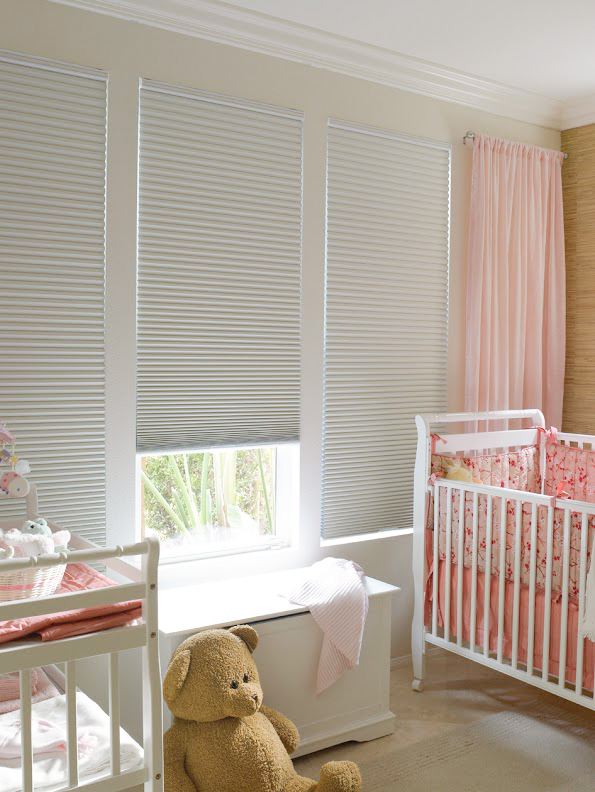
We did not need to think long to make our choice for second place. Just as we place B after A, following the lead of roman shades, we have the second best candidate on our list – the neutral pared-back modern window treatment that has a promising insulative capacity: cellular shades.
Constructed with multi-layered fabric with open pockets that look like honeycomb cells from the side view, cellular shades trap air within the cells, forming an insulative barrier between the external and internal environment. Thus, these shades help maintain the room’s temperature, block incoming light, and absorb sound more effectively than the slatted blinds and single-layered shades.
Being cordless, cellular shades are one of the safest choices for a nursery. They can also be motorized for centralized operation and ease of handling.
Cellular shades are also known for their distinctive top-down/bottom-up feature. While other top-mounted shades can only be lifted up, cellular shades can be pushed down from the top as well. Thus, the shades can start and end at any given point of the window, making it extremely versatile with light control and privacy requirements.
Like, when you are nursing your baby in the rocking chair, needing privacy over light control, you can leave the shade to cover the middle portion of the window. Or, when you want to control the afternoon light from disrupting your kiddo’s playtime, you can fix the shade to cover the bottom portion, letting in light from the top but curtailing its prickly glare.
If insulation is the top priority for your climatic situations, cellular shades can clearly outdo all other factory-made shades and blinds. Where industrial blinds lose precious thermal energy through the slats and single-panel roller shades provide lower insulation, cellular shades offer an intermediary solution with their rippled contour and high thermal resistance.
For best results in energy savings, we suggest the double or triple cell blackout cellular shades with side tracks for a nursery. While the multiple layers provide more pockets to lock air and the blackout fabric works hard to block light and sound, the side tracks seal the gap between the shade and the window from all sides.
From an aesthetic point of view, cellular shades contribute a neutral-hued textured surface where the play of light and shadow are central. If designed in the same hue as the walls, they will tend to sink into the architecture, calling no attention to themselves. They blend into the space offering a calming space instead of a stimulative one so that the baby can fall asleep easily.
Bronze Brilliance for Curtains
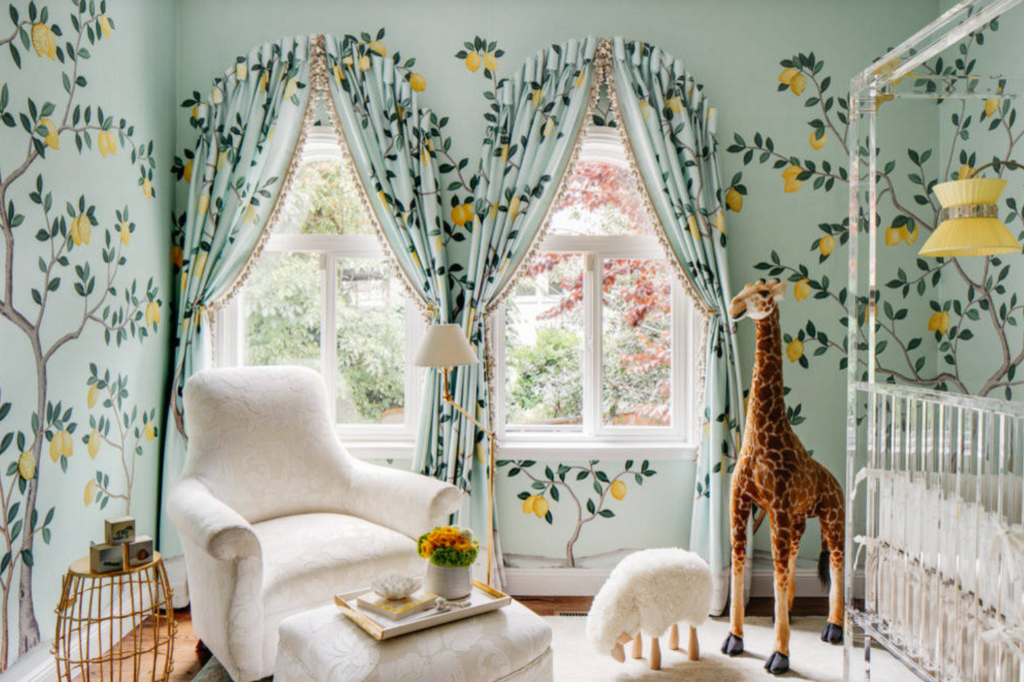
If not for their potential to serve as handy wipes and joyful swings for little toddlers, we would have kept drapes a little higher on the list. But with all their pros and cons being considered, these free-falling beauties have nevertheless graced the third place on our list.
Curtains are that one timeless element that always finds its place among top choices in the window treatment list for every room. So, if it is the elegance of soft fabrics with lazy ripples that defines your idea of an adorable nursery, think no further than curtains. Soft and sumptuous, these beauties are yet another insulative and energy-efficient window treatment.
While long drapes are the most desirable, we would advise short curtains for nurseries. They stay out of the kid’s reach, making it easier to keep them spotless. Where long drapes often double up as swings for a cheeky kid and props for a crawling baby, inviting danger in the process, short curtains save them from getting caught between the pleats or tripping on the trails. Besides, they are just as adorable as your little one and fulfill all the required functions. Design them with soft pastels, kid-specific motifs, and lovely ribbons – and you’ll have a window decor that deserves a chef’s kiss.
But if your nursery needs a good level of insulation and you can restrict your child’s access to the curtains, long drapes are the best option. No window treatment can beat their elegance, however, do avoid puddling them and trimming them with loosely dangling embellishments such as pompoms and tassels to cut down the risks to the minimum. Also, choose sturdy drapery rods that can withstand tugs from a child; rickety ones will come down along with the drapes and injure the child.
Long or short, never make a mistake when selecting the fabric. Blackout is the way to go if you are seeking to create a quiet, dark, temperature-controlled space for your little one to sleep easily. You can either order a blackout lining for the curtains or get blackout fabric itself for the face fabric. However, you also need to consider other elements to support the cause.
The drapery rod, for example, must be so installed that it extends a minimum of 6 inches beyond all sides of the window frame. This helps to contain light leaks from the gaps. To achieve this, use rods that are longer than the width of the window. Similarly, we advise choosing heading styles that don’t feature any gaps or holes through which light can penetrate such as pinch pleats, back tabs, or rod pockets.
If your heart is set on curtains, here are a few tips from our stylists to design your nursery curtains:
- Avoid tension rods as they may lose their grip when a child pulls at the curtains with force, and that can potentially cause injury.
- Add tie-backs to control fluttering when it’s windy. This ensures both safety as well as good sleep.
- Follow our expert tips to make the most of blackout drapery to meet the specific needs of a nursery. Click here to read our blog on ‘Best Blackout Curtains for Nursery’.
READ MORE: TOP TIPS & IDEAS FOR NURSERY CURTAINS
Awesome Accolades for Roller Shades

While the shining medals are all given away, the best runner-up also deserves an honorary mention. Though not the star of the day, roller shades are celebrities in their own right. Available in various types of materials, colors, and patterns, this window treatment is our final recommendation for your nursery.
Capable of bringing a wide gamut of materials to your nursery – from natural fabrics and wood to synthetic polyester and vinyl – roller shades can be styled in numerous ways. Whether it’s animated pictures or a prismatic color palette that you want to use to pique your baby’s interest, roller shades will likely never disappoint you.
No matter what material or palette you choose, don’t miss out on the blackout ones. If you’re looking for waterproof quality, vinyl shades can do you the favor. But if high-end looks are your goal, fabric shades with rich texture are the go-to. And if you opt for the woven wood shades to tap in on their nature-rich beauty, ensure beforehand that they come lined with blackout fabric.
While you are more than convinced about how blackout shades are a boon to any nursery, you may be also looking for light-filtering options to soften the daylight while the baby is awake. Here double roller shades are stars. Both the blackout shade and the light filtering shade are rolled into one cassette but operated separately. Leave the light-filtering shade open when you want privacy and pull down the blackout shade behind it at naptime. You meet two types of light control needs with one stroke.
Sharing all the right traits required for nursery window treatments with other shades and blinds, roller shades’ sill-length and cordless lifts make them kid-friendly. They are also highly cost-effective offering relief for those who are looking for budget-friendly options.
Despite all these laurels, roller shades did not make it to the podium today because even at their best, they are not as insulative as the top three. Nor do they offer as vast a spectrum of design choices as fabric window treatments do. Their sleek flat frontage might interest minimalists but may fail to find peace in a maximalist setting, making them not the most favored for most design styles.
Here are a few tips to design your nursery roller shades:
- Inside-mount the shades and make sure that they make seamless contact with the walls so that light leaks from around the shade can be minimized.
- Look out for double roller shades that offer maximum versatility over privacy and light control requirements.
Double the Function – Double the Fun

If you’re looking for a very versatile window treatment that can offer various degrees of light control and privacy maintenance, we suggest layering your nursery window treatments. You can either combine two sill-length treatments or layer a sill-length treatment with a floor-length treatment. Layering does not just double the functionality but also becomes an opportunity to juxtapose solids and patterns for visual interest.
We list below some of the best layered window treatment combinations for a nursery:
SOLAR SHADES & ROMAN SHADES
If your window frame is deep enough, you can inside-mount both shades in perfect-fit style; if not, outside-mount the roman shade. While solar shades protect the nursery from harmful UV rays, blackout roman shades offer style, light control, privacy, and foolproof insulation during the night.
ROMAN SHADES & DRAPES
This classical combination of layering roman shades with drapes brings you the benefits of fabrics in double dose. Design one in sheers and the other in blackout for maximum functional versatility. Look at your window as a blank canvas waiting for your creativity to make a splash. The variety ranges from fabric to palette to pattern, giving you free rein over your imagination.
VENETIAN BLINDS & BLACKOUT CURTAINS
If you have builder-grade slatted blinds, you can regulate incoming light based on its direction and intensity. But, you miss out on a cozy aesthetic, room-darkening and temperature control, unless you layer them with energy-efficient blackout drapes. The blackout curtains will also be your opportunity to bring a je nais se quois element to the window decor.
CELLULAR SHADES & DRAPES
While cellular shades are energy-efficient, they may not provide the aesthetic mileage that your decor style needs. The punch of color or the adorable pattern that you know your kid will drool over can make an entry with curtains. Design them in sheers or semi-sheers, but if you want to double up the insulation, go for blackout drapes.
WOVEN WOOD SHADES & BOARD-MOUNTED FABRIC VALANCES
If your decor style reads something like rustic-maximalist-organic-cozy or the like, you can dramatize your window decor with this combination. While the woven wood shade brings a piece of nature in its raw essence, the valance layers it with softness and color. Here, the valance is a decorative layer, hence, you need to give a blackout lining to the shades to make them energy-efficient. Alternatively, in a modern streamlined nursery, you can replace the woven shade with double roller shades or zebra shades that offer the dual function of light-filtering and light-blocking in one go.
SHOP NOW: CUSTOM WINDOW VALANCES & SWAGS FROM SPIFFY SPOOLS
It’s Action Time
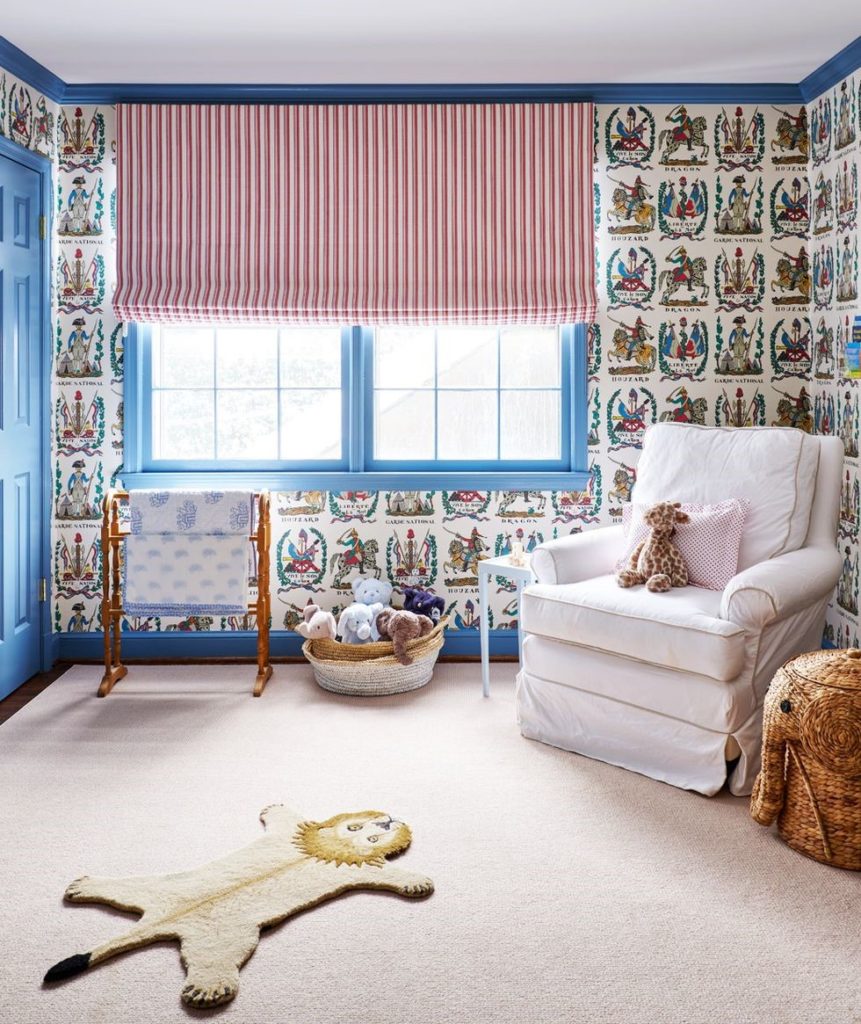
We hope you found this blog enlightening enough to find the window treatment that best suits your nursery. The challenge is in drawing the right balance between function and aesthetics, neither coming in the way of the other. If your mind is settled on one of the fabric window treatments, do browse our blogs for more inspiration, and our collections for a range of choices. Spiffy Spools is committed to providing quality fabric window treatments at reasonable prices and is more than happy to partner with you in your nursery design project. Good luck!
READ MORE:BEST BLACKOUT CURTAINS FOR NURSERY
How To Transform Your Bedroom Into A Warm Retreat
Gone are the days of a lackluster bedroom that simply serves as a place to sleep. With a few simple yet powerful tips and techniques, you can transform your bedroom into a warm retreat that rejuvenates your mind, body, and soul. Imagine sinking into a soft, plush bed surrounded by great blackout curtains, basking in the gentle glow of ambient lighting, and inhaling the delicate fragrance of calming scents. It’s time to unlock your bedroom’s true potential and the door to serenity. Get ready to discover the secrets to transforming your bedroom into a warm retreat that embraces you with open arms and allows you to unwind.
Order blackout curtains and drapes from Spiffy Spools for your bedroom in any size. Pick from over 3,000 fabrics and patterns!
Set The Mood And Transform Your Bedroom Into A Warm Retreat
Firstly, transform your bedroom into a warm retreat by embracing a warm color palette that envelops you in coziness. Think soothing earth tones like soft beige, warm caramel, or gentle shades of gray. These colors have the power to calm your senses and create a serene atmosphere. If you are changing the color palette in your entire home, professionals from Verified Movers advise you to put your things in storage. This way, they won’t get damaged during the process.
Next, soft and ambient lighting is the key to setting a warm and inviting mood. So, swap out harsh overhead lights for gentle, diffused lighting options. Additionally, consider adding bedside table lamps with warm-toned bulbs or installing dimmer switches to control the intensity of the light.
In addition, introduce natural elements like plants or flowers to infuse life and serenity into your space. Opt for low-maintenance plants like succulents or peace lilies that not only add beauty but also purify the air and improve your well-being. As you snuggle into bed, let your senses be caressed by high-quality bedding and textiles. Invest in sumptuously soft sheets made from natural fibers like cotton or linen.
Next, layer your bed with cozy blankets and plump pillows, inviting you to sink in and unwind. Finally, complete the tactile experience with a luxurious area rug.
Use The Right Bedding And Textiles
Indulge in the embrace of luxurious bedding that beckons you to relax and unwind. Choose high-quality sheets crafted from soft, breathable fabrics that pamper your skin with every touch. Also, don’t forget the power of textures! Introduce tactile delights through cozy throws and blankets with sumptuous textures like faux fur or knitted materials.
These textured layers add depth and warmth to your retreat, enveloping you in a cocoon of comfort. So, enhance the ambiance with carefully selected textiles – opt for curtains or blinds that block out harsh light and cocoon your space in privacy. Choose fabrics with thermal properties that help regulate the temperature, ensuring a cozy environment year-round. For further assistance on how to select your curtain and roman shade fabrics, read our blogs on ‘Best Fabric for Curtains & Drapes‘ and ‘Best Fabric for Roman Shades.’
Additionally, consider adding an area rug near your bed for visual appeal and a touch of warmth underfoot. Select a plush rug with a soft pile that tickles your toes and adds a cozy element to your sanctuary. Play with patterns and colors to infuse personality into your bedding and textiles. Experiment with subtle patterns or soothing, monochromatic schemes that promote relaxation.
Carefully style different fabrics in your room, reflecting your unique taste and creating a space that truly feels like your own. With the right bedding and textiles, you can easily transform your bedroom into a warm retreat.
READ MORE: MASTERING THE ART OF LAYERING: ENHANCING DEPTH AND TEXTURE IN YOUR HOME
Increase Comfort
Elevate your comfort with a quality mattress that provides optimal support for a restful night’s sleep. Sink into the plush layers and feel your body unwind as you drift off into sweet dreams. Control the amount of natural light and create a cozy ambiance with bedroom curtains or roman shades. Choose options that allow you to block out unwanted brightness or gently filter sunlight to create a soft and inviting glow.
Indulge in the power of soft textures and materials that invite you to touch and feel. Opt for velvet curtains that drape gracefully or plush throws that gently embrace you. These soft elements add a tactile dimension to your retreat, enhancing overall comfort. Surround yourself with various pillows to create a personal oasis of comfort.
Layer your bed with soft blankets, inviting you to burrow in and enjoy cozy moments. Consider adding a comfy seating area, complete with soft chairs or a plush reading nook, to create additional spaces for relaxation. Check to see if you can reuse any furniture from your old home in your new bedroom for the seating area. When unpacking the bedroom, make the process quicker by taking your time and using the right materials. Once done, sink into a comfortable armchair or curl up on a cushioned window seat. Embrace the art of layering with soft textures. Incorporate velvet or faux fur cushions to add depth and a touch of luxury to your bedroom.
Embrace Minimalism
Finally, simplify your bedroom with the art of minimalism, allowing for a serene atmosphere. So, clear away clutter and embrace clean lines. Opt for furniture pieces with a minimalist design featuring sleek lines and a streamlined aesthetic. Choose pieces that serve both functional and aesthetic purposes, enhancing the harmony of your space. Moreover, focus on quality over quantity, selecting a few carefully chosen items with a significant impact. Let each piece shine and contribute to the overall warmth and serenity of your retreat. Declutter your surfaces, creating an uncluttered and peaceful environment. However, remember to store belongings out of sight, utilizing smart storage solutions to maintain a tidy and organized space.
Next, let natural light flood into your space, highlighting the simplicity and elegance of your minimalist retreat. Use sheer curtains or roman shades that allow for the gentle diffusion of sunlight, creating a warm and inviting atmosphere. Incorporate intentional decor elements that add a personal touch to your minimalist space. Choose a few meaningful pieces, such as a piece of art or a cherished item, to create focal points and evoke a sense of warmth and sentimentality. Overall, embracing minimalism in your bedroom allows you to create a warm retreat by eliminating distractions and focusing on the essence of tranquility. It is one of the best and most simple ways to transform your bedroom.
SHOP NOW: SHEER ROMAN SHADES FROM SPIFFY SPOOLS
Final Thoughts
Overall, it can be easy to transform your bedroom into a warm retreat. Embracing minimalism allows you to declutter and create a serene environment while personalizing the space adds a touch of warmth and familiarity. Remember, the goal is to create a space that nurtures your well-being and provides solace from the outside world. So, go ahead and unlock the true potential of your bedroom, infusing it with comfort, tranquility, and your unique style.
Finally, prepare to embark on a journey of relaxation and rejuvenation as your transformed bedroom becomes the ultimate warm retreat you’ve always longed for and we would love to be a part of this adventure with you. So, start your shopping spree with us and find just the window treatment that your bedroom has been missing, with which your space becomes a cozy and comfortable haven!
READ MORE: WAYS TO KEEP YOUR HOME WARM IN WINTER
Mastering the Art of Layering: Enhancing Depth and Texture in Your Home
Home decor art is more than furniture arrangement. Layering surfaces adds depth, richness, and character. Overlapping textures and tones on walls, floors, and tables create visual depth and complexity that draws the eye in. The gradual buildup of surfaces through layering is crucial to a decor style that feels curated and inviting, reflecting your sense of beauty and comfort. Experimenting with the art of layering can transform a sterile space into a warm and welcoming home.
Order custom window treatments from Spiffy Spools online in any size. Pick from over 3,000 stunning fabrics!
Understanding the Power of Layering in Home Décor
Layering is about building up visual depth, contrast, and texture through overlays and combinations. It’s a simple design technique with a significant impact. When you layer decor elements properly, your home comes alive with dimension, interest, and allure. Details seemingly blend yet remain distinct—like melodies in a harmonic chord.
With patience and an eye for balance, thoughtful layering will breathe life into your home. Dimension emerges from simplicity. Contrast sparks visual allure. Texture weaves a tactile harmony. The result?
A curated space that welcomes, soothes, and inspires—attainable through this simple yet transformative design practice.
Innovative Wall Treatments and Textures
Paint alone is often not enough to make a space come alive. Beyond color, innovative wall treatments can transform a ho-hum area into a happening haven. Textures, materials, and surface variations on your walls are among the most influential design elements for creating visual layering, depth, and intrigue.
Instead of plain paint, strategically layer materials like wood, stone, and tile for immediate visual impact. Repurpose reclaimed wood as paneling in high-traffic areas. The warm, worn aesthetic introduces beautiful irregularities that draw the eye while infusing your space with character.
Access Doors as Design Innovations in Home Decor
Access panels are often an afterthought in home design, but with careful planning, they can enhance a space functionally and aesthetically. Incorporating access panels in a visually aligned manner allows you to blend utilitarian needs with a cohesive decorative scheme seamlessly.
Select materials and finishes that complement the surrounding surfaces when adding access panels. Wood panels matched to the room’s trim and molding create harmony and continuity—metal panels like bronze, nickel, or matte black work well in contemporary spaces.
In practice, well-placed laundry chute access doors can simplify tasks and improve the overall environment. Located discreetly behind a piece of furniture or in an inconspicuous corner, the door allows easy access to the chute while maintaining a sleek, uninterrupted aesthetic when closed. Ergonomic hardware and high-quality components ensure smooth operation with minimal noise or disruption.
Layered Lighting for a Captivating Atmosphere
Proper lighting does far more than merely illuminate; it sets the tone and transforms the space. Layering various light sources allows you to curate a precise ambiance and enhance the emotional experience of your interior.
Begin by establishing a balanced foundation with ambient light. Overhead fixtures or recessed cans provide dimmable warm white light for general illumination. This activates the entire room and forms a user-friendly baseline.
The warmth of a layered lighting scheme draws us in from the moment we enter and lingers long after we leave a room. With intentional arrangement and dimmable controls, you can curate the perfect nurturing luminosity for work, relaxation, and everything in between. Lighting, like music, reveals its true beauty when experienced as a multilayered symphony.
Textiles and Accessories for Visual Interest
Textiles and accessories are a design lover’s secret weapon for infusing depth, texture, and tactility into any space. Layering a variety of soft furnishings like solid blackout curtains and patterned sheer curtains or bedding with different textures, colors, patterns, and scales is an impactful yet inexpensive way to transform a mundane interior into a cozy, inviting space.
Begin by building visual layers on your furniture. Pillows, throws, and blankets in varied shapes, sizes, and materials grouped artfully together create a welcoming nest for lounging. Look for textures like fuzzy plush, woven ridges, and patterned embroidery for maximum tactile appeal.
Layering multiple textures through soft furnishings and accessories is a simple yet transformative design tactic. Like a skillful composer, arrange varied shapes, patterns, colors, and materials into a harmonious balance that delights the eyes and hands alike for an irresistibly inviting atmosphere rich in visual interest and tactile pleasure.
READ MORE: HOW TO LAYER SHEER & BLACKOUT CURTAINS
Take Your Home From ‘Blah’ to ‘Wow’ With Layering Techniques
Adding depth, texture, and layers can make a mediocre home shine. By incorporating the right techniques, you can transform any space into a beautiful retreat that reflects your style and personality.
When you adopt layering as a mantra, every decision—from art placements to furniture arrangements —can fold depth, texture, and an irresistible allure into your design. Small changes compound to create significant transformations that delight the senses. So, experiment boldly and envision how these techniques could elevate the feel of your unique space. By focusing on adding depth instead of chasing fleeting trends, you’ll uncover your home’s actual wow factor.
With these tips in mind, start your shopping spree with us and purchase customized window treatments and soft furnishings so you can match and layer them as you wish. We make it easy to design curtains that fit your exact specifications and style. Whether you’re looking for tips to measure curtains for your sidelight windows, or simply want to learn how to hem your curtains, our extensive Spiffy Speak blog will serve up all the ideas and inspiration you need! Explore our site to find the perfect options for your home.
READ MORE: LAYERING ROMAN SHADES WITH CURTAINS
Sustainable Homes: The Future of Eco-Friendly Interior Design

The future of interior design leans into the embrace of sustainability. Sustainable home décor, powered by renewable energy sources and built with eco-friendly materials, has become increasingly popular as awareness about climate change has grown.
However, sustainability doesn’t stop at the structure of the house itself. Interior design plays a critical role in reducing a home’s environmental impact. Before you come to any conclusions, going green does not have to be a limiting or expensive decor decision. This blog reveals budget-friendly ways to make your home an eco-friendly one while offering you a plethora of options.
Order custom window treatments made of natural fibers from Spiffy Spools online in any size. We carry over 3,000 fabrics and patterns to pick from, so you can dress your windows exactly to your liking while still being in touch with the better side of the earth!
Adopting Sustainable Materials in Interior Design
Sustainable materials are the backbone of eco-friendly interior design. Not only do they reduce the carbon footprint associated with home construction and renovation, but they also create healthier living environments.
Eco-Friendly Construction Materials
Choosing eco-friendly materials should be your first step when planning new construction projects or renovating sustainable custom homes. Examples of such materials include:
- RECLAIMED WOOD: Instead of being discarded, reclaimed wood is repurposed for new construction projects. This practice conserves forests and reduces waste.
- BAMBOO: Bamboo is a rapidly renewable resource that’s stronger and more durable than many types of wood.
- CORK: As an insulator, cork is excellent for reducing energy needs. It’s also renewable, as cork trees aren’t cut down to harvest the material.
- RECYCLED METAL & GLASS: These materials can be recycled endlessly without losing their quality, making them an ideal choice for sustainable homes.
By making conscious choices in construction materials, homeowners can drastically reduce their environmental impact.
Furnishings and Decorations
Just as with construction materials, the furnishings and decorations in your home can also be eco-friendly. Here are a few ideas:
- SECONDHAND FURNITURE: Buying used furniture not only saves money but also keeps items out of landfill.
- SUSTAINABLY SOURCED WOOD FURNITURE: If you prefer new furniture, look for items made from sustainably sourced wood.
- ORGANIC TEXTILES: Choose organic cotton, hemp, or bamboo for your curtains, bedding, and upholstery.
- NATURAL DECOR: Incorporate houseplants and other natural elements into your decor. Plants also improve indoor air quality by absorbing toxins and releasing oxygen.
Choosing sustainable furnishings and decorations reduces your overall environmental impact and can also create a more calming, natural environment.
Improving Energy Efficiency
An eco-friendly home is energy efficient. It’s not just about reducing the amount of energy used but also about sourcing that energy responsibly.
Energy-Saving Solutions
Home appliances, including your refrigerator, dishwasher, HVAC system, and window treatments contribute significantly to your home’s energy usage. Consider the following when choosing your appliances and decor:
- ENERGY STAR-RATED APPLIANCES: These appliances meet strict efficiency guidelines set by the U.S. Environmental Protection Agency.
- SMART THERMOSTATS: These devices optimize your home’s heating and cooling system, saving energy and reducing your utility bills.
- LED LIGHTING: LED bulbs use significantly less energy and last longer than traditional incandescent bulbs.
- THERMAL BLACKOUT WINDOW TREATMENTS: Other than electronic appliances, another important investment that’ll help you save on energy bills considerably is blackout curtains or blackout roman shades. They are insulative window treatments that help in keeping the house cool in summer and trap heat to keep the home warm in winter, minimizing AC and heater usage.
By incorporating energy-efficient insulative home decor solutions and smart appliances, you can drastically reduce your energy consumption and carbon footprint.
Utilizing Renewable Energy
To further reduce your home’s environmental impact, consider using renewable energy sources:
- SOLAR PANELS: By installing solar panels, you can generate your own electricity and even sell surplus energy back to the grid.
- WIND TURBINES: If your property is large enough and located in a windy area, a small wind turbine can provide a significant amount of electricity.
- GEOTHERMAL ENERGY: Geothermal heat pumps can heat and cool your home more efficiently than traditional HVAC systems.
Incorporating renewable energy sources into your home design not only reduces your dependence on fossil fuels but also saves you money in the long run. If you live in Texas, exploring Texas energy prices can further help you make informed decisions about sustainable energy options.
SHOP NOW: CUSTOM BLACKOUT CURTAINS & WINDOW DRAPES FROM SPIFFY SPOOLS
Adopting a Sustainable Lifestyle
Sustainable living goes beyond design choices. It involves making conscious decisions in your daily life that align with sustainability goals.
Reducing, Reusing, Recycling
The three Rs of sustainability—reduce, reuse, recycle—can significantly reduce your environmental impact. Here’s how to incorporate them into your life:
- REDUCE: Minimize your consumption. Buy only what you need, and opt for items with less packaging.
- REUSE: Use items more than once. This could mean reusing shopping bags or repurposing glass jars as storage containers.
- RECYCLE: Recycle materials like paper, metal, glass, and plastic.
By adopting these practices, you can reduce the waste you generate and make a significant contribution to sustainability.
Conscious Consumption
Conscious consumption means considering the environmental impact of the items you buy. You can practice conscious consumption by:
- BUYING LOCAL: Purchasing locally-made goods reduces the carbon footprint associated with shipping.
- CHOOSING SUSTAINABLY PRODUCED ITEMS: Look for items that are made using eco-friendly methods and materials.
- SUPPORTING COMPANIES WITH GREEN POLICIES: Support businesses that prioritize sustainability.
Conscious consumption encourages the production of sustainable goods and helps foster a more sustainable economy.
Final Words: The Future is Green
As we continue to face the challenge of climate change, it’s clear that sustainability is just not an interior decor trend, but a necessity. Sustainable homes are a significant part of the solution. By incorporating eco-friendly materials, improving energy efficiency, and adopting a sustainable lifestyle, you can not only make your home a beacon of sustainability, but also find it easier to sell your home should you so decide in the future. In today’s real estate market, there is a growing preference for sustainable homes, making eco-friendly home upgrades an investment with high returns that positively impact your home’s resale value.
Eco-friendly interior design is not only about creating a healthier home environment—it’s about contributing to a healthier planet. As more and more people embrace this trend, we will surely see a greener future. Let’s all play our part and make sustainable choices in our homes, not just for us but for the generations to come.
Spiffy Spools would love to be a part of your journey to creating a sustainable home. Explore our range of cotton and linen window treatments, fabrics, and other soft furnishings, and shop for the ones that suit your decor the best. We’re sure you won’t run out of options even while trying to stick to eco-friendly options with our vast collection of over 3000+ window treatment fabrics.
READ MORE: SIMPLE HACKS FOR CREATING MORE SUSTAINABLE INTERIOR DESIGN SOLUTIONS
BEST BLACKOUT CURTAINS FOR NURSERY
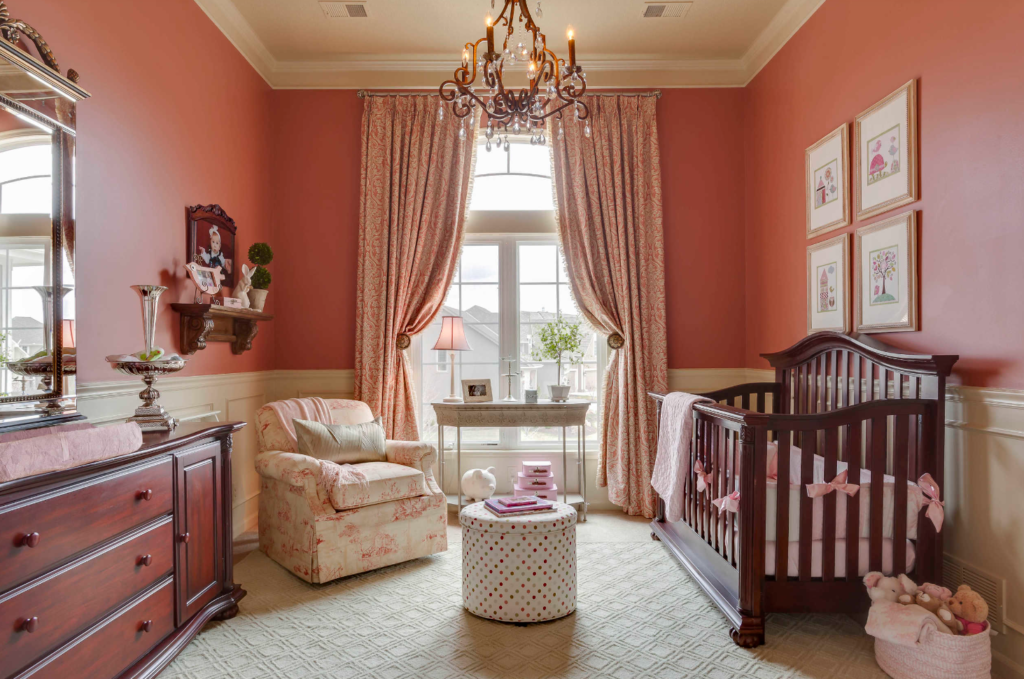
A story, a lullaby, a little snack – it can take so much to get your baby to sleep – and that precious sleep needs to be guarded at all costs! One way to sustain that restful slumber without interruption is to install blackout curtains at your nursery windows. They are an easy and effective way to eliminate light, noise and distractions, so your little one can sleep throughout the night peacefully and also enjoy the little catnaps during the day. With that goal, we invite you to explore our best blackout curtains for nursery below, as well as some top tips for styling them to perfection.
Order custom blackout curtains from Spiffy Spools online in any size to decorate your nursery. Pick from a wide variety of 3000+ fabrics and patterns!
Why Blackout Curtains for Nursery?

While light brings alertness that makes it harder to fall asleep, a dark room serves as a cozy place to curl up in. At dawn, the daylight speeding into your baby’s nursery together with the noises of an up-and-about world can wake up the little one sooner than welcome. And, that can keep them clingy and cranky the whole day besides affecting their health. Since infants spend almost 70% of their time sleeping, a sleep-friendly atmosphere is the primary need of a nursery. That’s why you need blackout curtains in the nursery.
While curtains made of any fabric provide enhanced privacy and light control to some extent, blackout curtains show how these functions can’t be done better. They block out all incoming light and don’t let even a shadow of you be visible from the other side. But their benefits are certainly not limited to that. There are three ways in which they contribute to making your baby’s nursery a truly sleep-friendly space:
Two Ways to Go Blackout
Blackout drapery can be created in two ways – by selecting a blackout drapery fabric or by giving a blackout lining behind a standard non-blackout drapery fabric. Either way, the purpose is achieved in full.
Depending on a blackout lining instead of a blackout face fabric opens up the design potential to infinity. While blackout fabrics have no dearth of choices, the spectrum of choices available in the non-blackout category is certainly wider. If you have freezing cold winters, we highly recommend going for a blackout drapery fabric backed by a blackout lining to double the insulation of the windows further.
However, while it is true that with a blackout lining, any drapery becomes blackout drapery, it is worth noting that its performance will be somewhat affected by the face fabric.
You can make the most of the blackout lining when your face fabric has a close-knit weave and dark palette. So, for example, the blackout lining placed behind a semi-sheer fabric will be less effective as compared to when placed behind a heavy velvet drapery. Similarly, blackout lining will block out more light when placed behind a black drapery fabric than a white one.
READ MORE: SPIFFY SPOOLS LINING OPTIONS FOR CURTAINS & ROMAN SHADES
Dimout Curtains
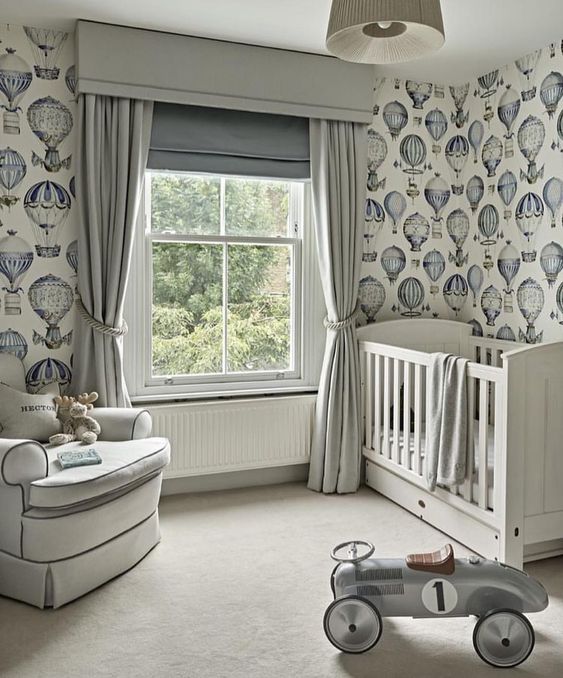
Also referred to as room-darkening curtains, dimout curtains block 70-90% of incoming light as opposed to blackout curtains that are credited with 95-100%. So, if you wish to darken the nursery but not make it pitch-dark, dimout curtains are the answer. You can see a dim glow on the curtains which will vary from soft to bright depending on the color of the fabric. However, you can improve their room-darkening performance by adding a blackout lining.
Owing to the difference in the manufacturing process and the performance capacities, dimout curtains are often less expensive than blackout curtains. So, if you are constrained by a budget or are not looking for total darkness in the nursery, stick to dimout curtains.
READ MORE: ROOM DARKENING VS BLACKOUT VS DIMOUT CURTAINS: WHAT’S THE DIFFERENCE?
Designing Blackout Curtains for Nursery
Chasing High-Performance Goals

Blackout fabrics are high performing in themselves, but if the other design decisions don’t support the cause, you may end up with a set of under-performing blackout drapes. To avoid this, our drapery stylists have curated all their tips below to enhance the function of your blackout curtains and meet nursery-specific needs.
- SELECT THE RIGHT HEADING: In order to have total light control, it’s important to select the right heading style for your blackout curtains. Avoid heading styles such as tab tops and grommet tops because they feature loops, holes, and gaps that will allow in some light. Instead, we recommend rod pockets, back tab tops, pencil pleat styles or pinch pleat styles that are hung by hooks on the back of the fabric. This will better eliminate any potential light leaks, helping to ensure total darkness.
- STRATEGICALLY PLACE THE POLE/ TRACK: There are two elements to consider when mounting your pole or track. First, consider mounting the hardware at least 8 inches above the window frame, which will help prevent light from coming through the top of the curtains. Second, extend the rod 10 inches or more on both sides of the window frame. This way, you’ll also have total coverage on both sides of the windows.
- INSTALL RETURN RODS: These rods don’t use finials and are bent at the ends so they ‘return’ to the wall. The curtains curve around the window as a result, blocking all light leaks from the sides.
- TRY THE HOOK & EYE TRICK: If you’re using straight rods, try the simple “hook & eye” hack. All it requires is screwing an ‘eye’ into the wall underneath the rod, parallel to the final pleat hook. You can then place that final pleat hook into the eye, which will draw the curtain fabric as close to the wall as possible. You can feel confident that no light will get through this surefire-darkening hack!
- ADD FRINGE TRIMS TO THE CURTAINS: Although we discourage embellishments on nursery curtains for safety purposes, fringe trims are rather safe to add as they cannot be plucked out easily by a child. Additionally, they also partially block light from breaking in through the side gaps.
- USE MAGNETIC TAPES: Cut several small pieces of the magnetic strip and glue them at regular intervals, one side to the wall and the other to the lead edge of the curtains. The curtains will stick to the wall, leaving no gaps on the sides for light to crack in. If you have double-panel curtains, you can also use a piece to fasten the panels to each other so that light does not break through the gap in the middle when it’s windy.
READ MORE: CURTAIN HEADINGS STYLE GUIDE FROM SPIFFY SPOOLS
Top Blackout Curtains from Spiffy Spools
Blackout curtains come in a variety of styles to match your unique design needs. To get you started on your shopping spree, we invite you to explore some of the top nursery blackout curtains from Spiffy Spools that will look stunning in your space:
FEATURED LOOKS

Our Peeping Pearl blackout curtains will provide your nursery with a soothing, serene feel. The pink curtain is covered in a lovely marbled print in a soft lavender hue, creating a dreamy effect that will encourage your children to rest.
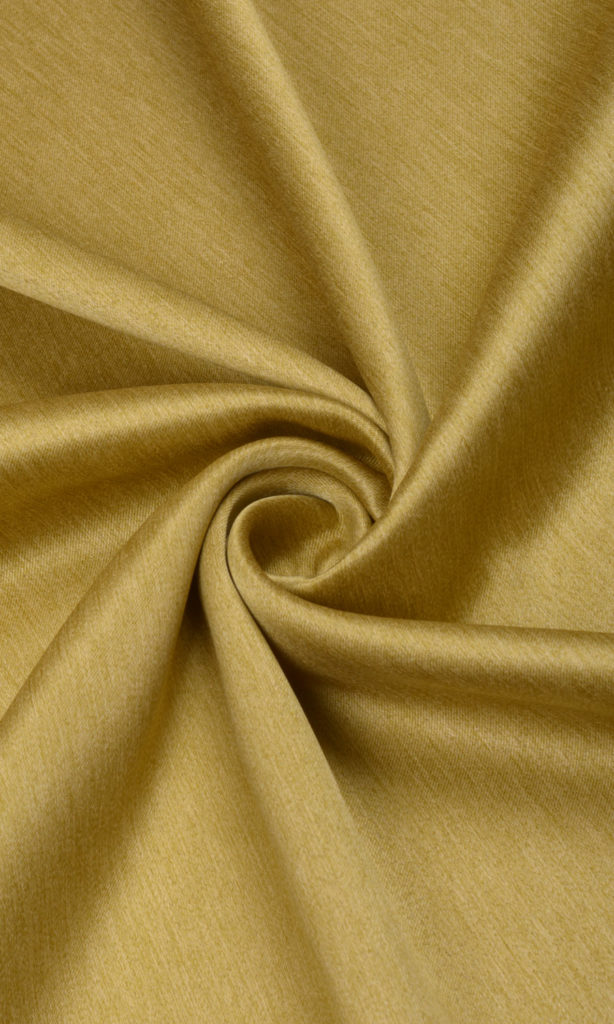
Add a little glamour to your nursery with our stunning Sabz Gold blackout curtains. The pale gold fabric features a bit of shimmer and shine for some extra flair. Not to worry, though—despite the light hue, these regal curtains work wonderfully to protect your nursery from incoming sunlight.
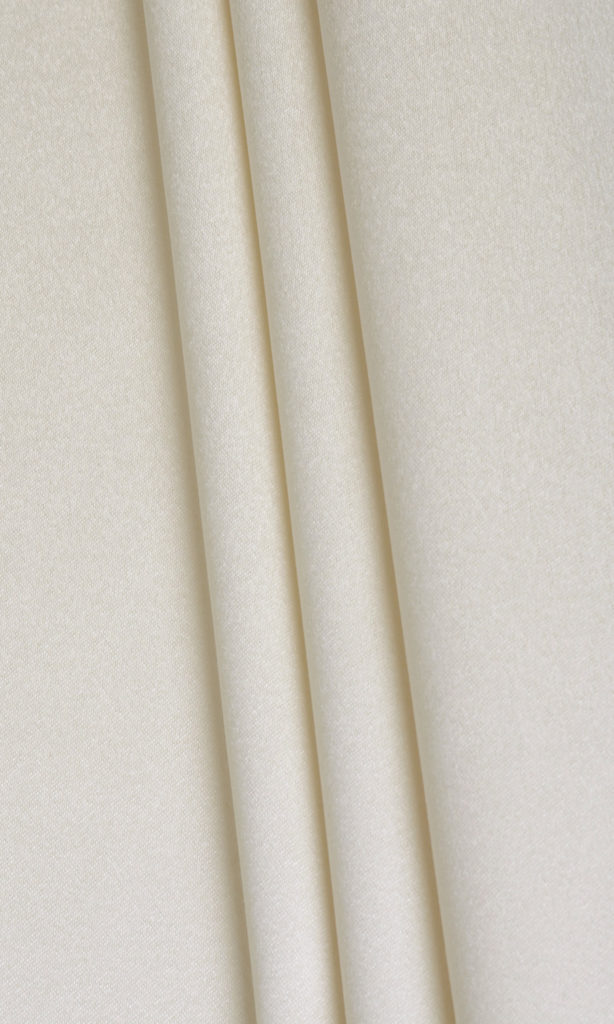
Despite their lovely off-white shade, you can darken your nursery with our Warm Snow white curtains. This light and airy choice is a fabulous addition that will brighten your space aesthetically but darken it functionally. The simplicity of the design of this cream-colored blackout curtain will bring a zen-like quality to your nursery and exude an air of elegance.
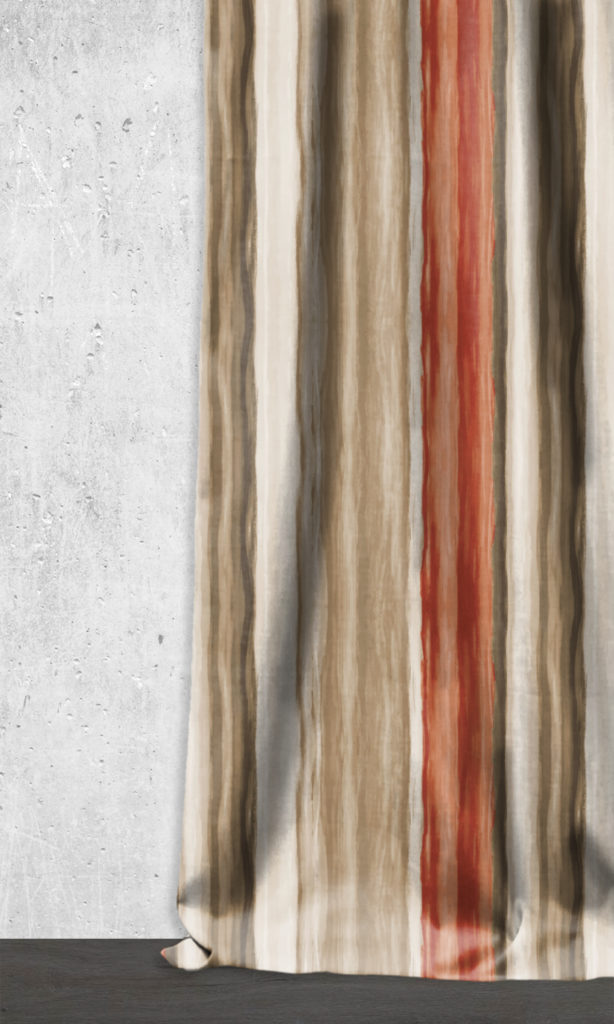
The perfect addition to a nursery that aspires to become a boy’s room or girl’s room in the future – a gender-neutral, timeless pattern with the right balance of neutral tones and warm colors. If your nursery has a low-height ceiling, use the vertical stripes of Aquarius to fake a sense of height in the space. Design them in long curtains to make the most of their vertical motif.
Spotlight On: Royan
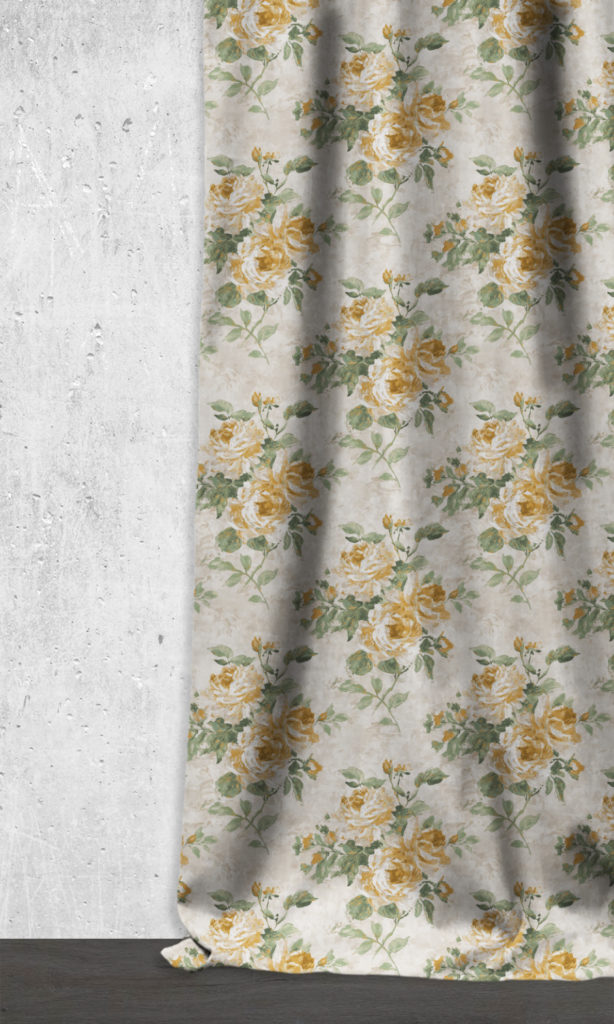
If you love a touch of nature or find floral prints to be the best expression of your design style, consider these lovely golden-green Royan dimout curtains. These delicate beauties of nature best mirror the innocence of childhood. They might also save you a trip to the garden when you need some lovely flowers to keep the little one occupied.
Order Custom Curtains from Spiffy Spools
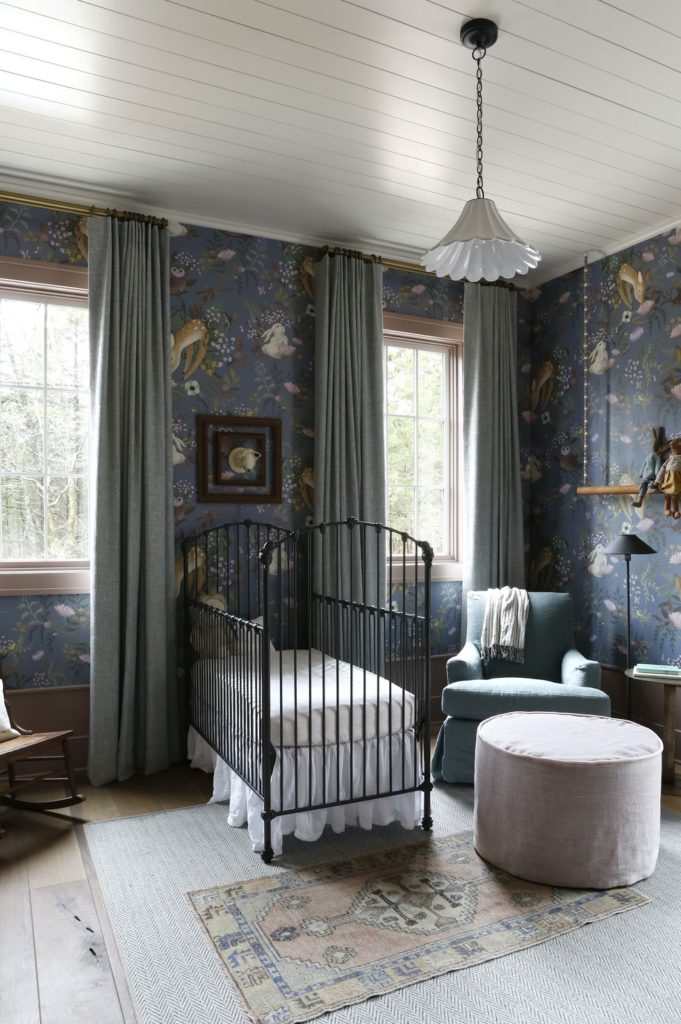
We hope you’ve enjoyed exploring these nursery blackout curtain ideas and tips to make the most of them. If you’re ready to start shopping, browse our collection and order custom curtains from Spiffy Spools today. With over 3,000 fabrics, we make it easy to design curtains that fit the exact specifications and style of your nursery. And when you find the perfect pair of nursery curtains after you’ve spent all your creative juices designing them, we will share your sense of pride and joy in decorating your nursery exactly as you wanted it to be.
READ MORE: BEST WINDOW TREATMENTS FOR NURSERY