Spiffy Speak
Installation Instructions to Mount Roman Shades from Spiffy Spools
Image by Cara Woodhouse
You have made some really great and nuanced choices while shopping for roman shades and the picture-perfect roman shades from Spiffy Spools are either on their way or have already made a show-stopping entry to your home-sweet-home.
Now, next comes installing the roman shades. To help you nail this final step, we have put together this installation guide with simple bite-sized steps and handy reference images. So, don’t worry, this is going to be a breeze. Come along.
Spiffy Spools’ Hardware Kit for Roman Shades
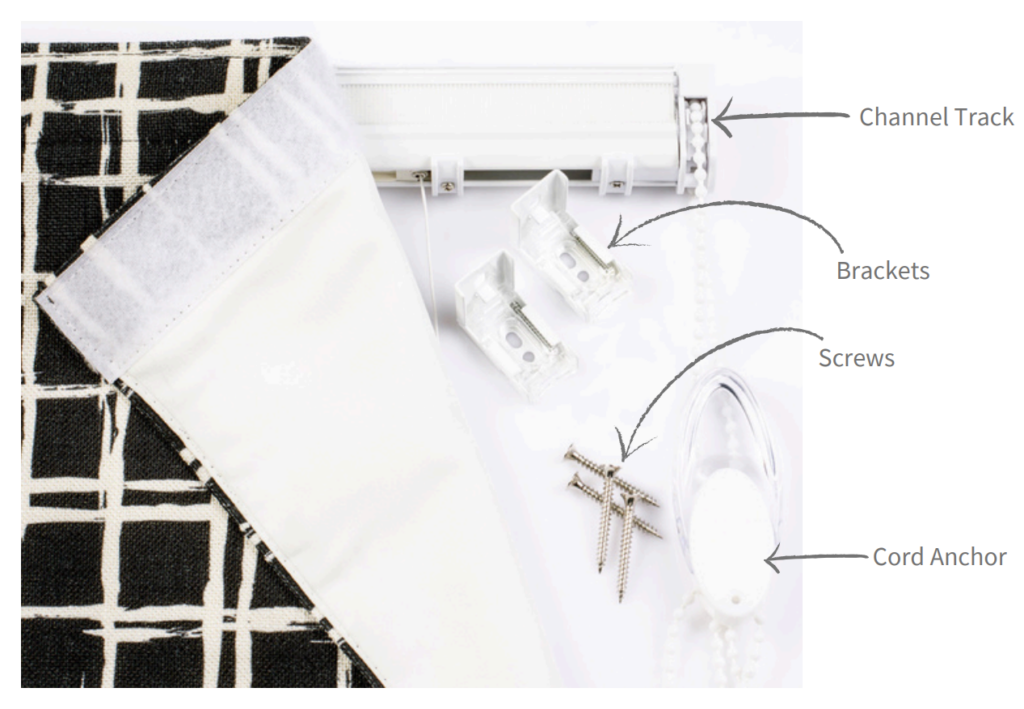
Spiffy Spools’ roman shades are shipped with all the necessary hardware, including:
CHANNEL TRACK WITH PULL CORD: Our roman shades come fully assembled to make the installation process as easy and simple as possible. You’ll find your roman shades pre-mounted on the channel track with Velcro, and the pull cord already in place. Whichever cord finish you select—silver or white—while placing your order, will be provided with your blinds.
PULL CORD ANCHOR: The anchor secures any dangling cord and negates the risk of strangulation accidents, making it safe for use in homes bursting with the cutesy chaotic energy of children and furry friends.
BRACKETS & ANCHORS: Your kit will also include brackets and screws to affix the track. A shade of width up to 36 inches can be securely mounted using two brackets. The kit will include extras in case you’d like to use more, and if a higher-width shade deems necessary. For wider shades, we generally recommend one bracket per 20 inches. This is a general thumb rule and can vary based on the overall weight/size of the blind.
Inside Vs. Outside Mount: The Key Hardware Difference
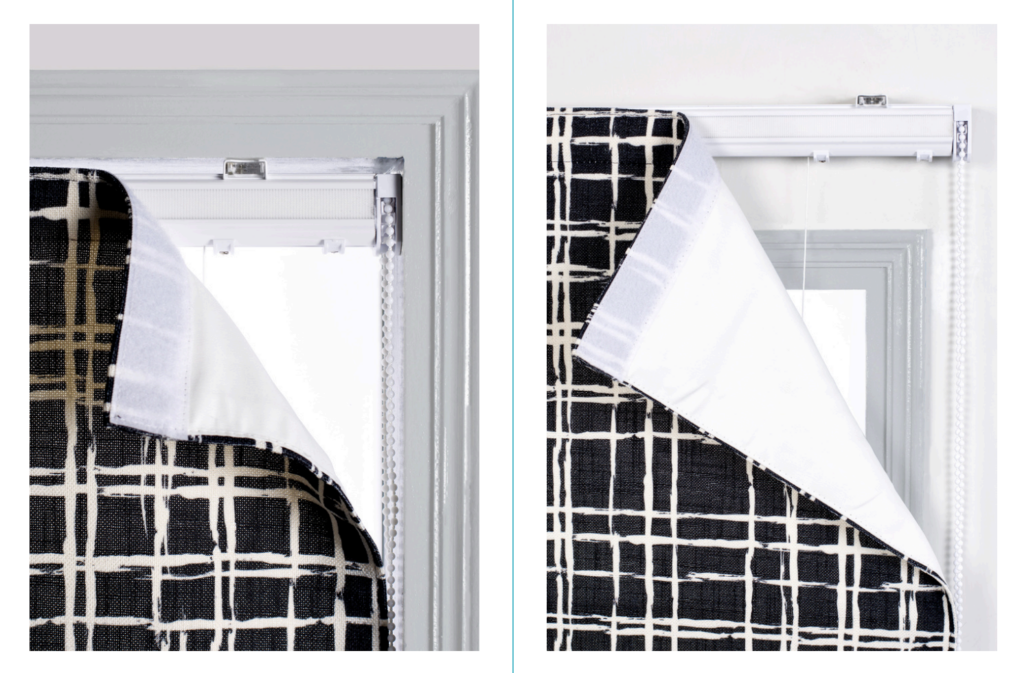
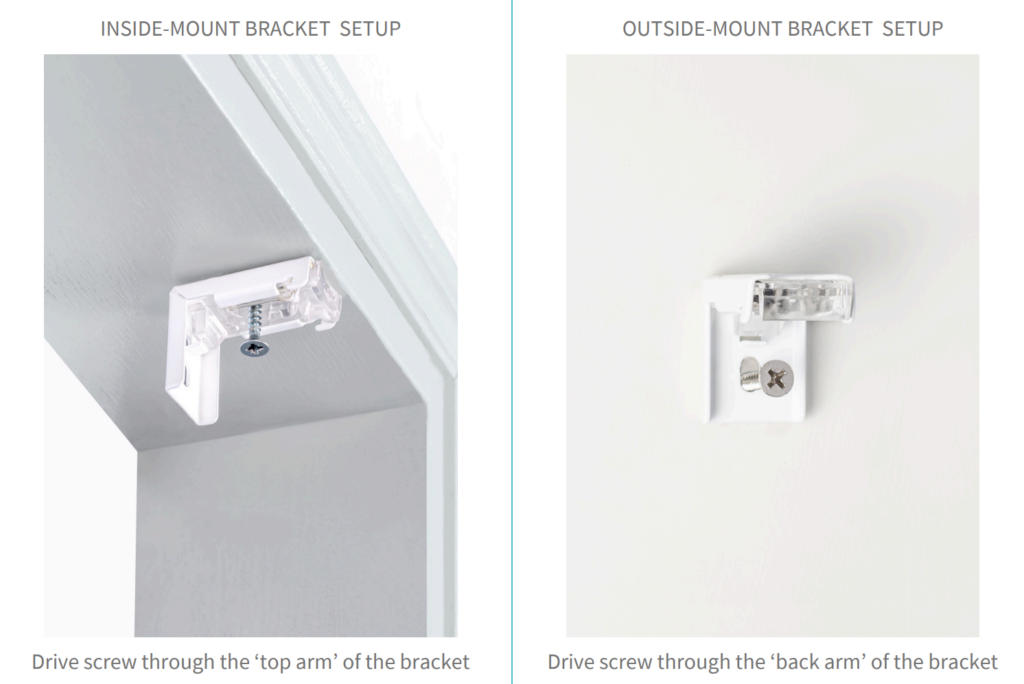
While specifying your order on our site, you’d have indicated if your roman shades are intended for mounting inside or outside the window recess. Please note that the hardware included with your order remains the same irrespective of the mounting style you have selected. The sole distinction in terms of installation is the positioning of the brackets, as seen below.
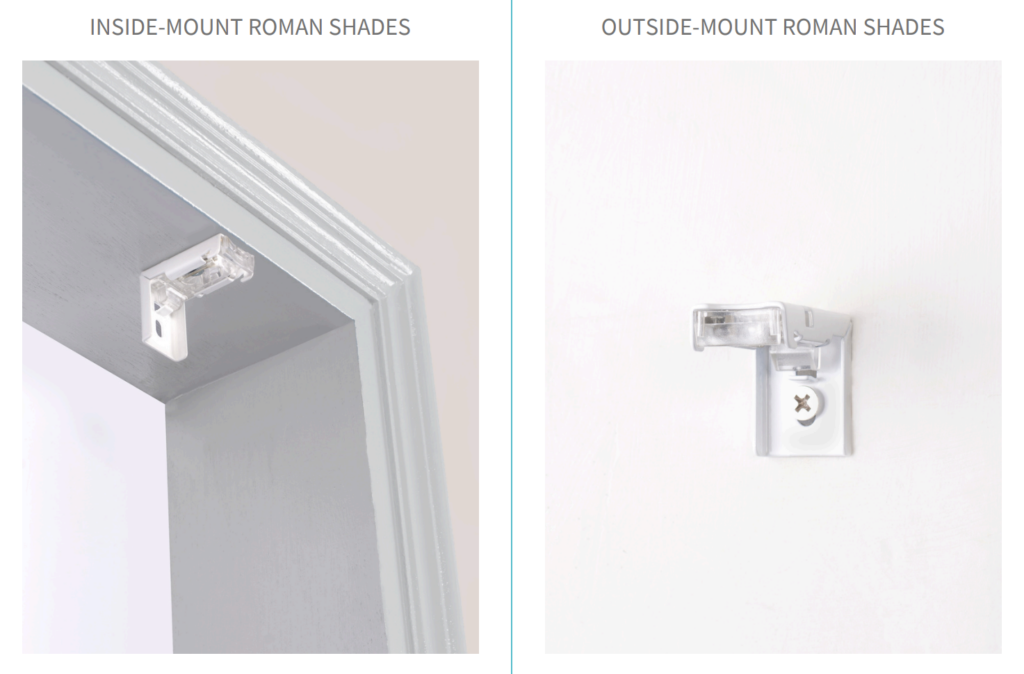
INSIDE-MOUNT: For inside-mounted roman shades, drive the screw into the ‘top arm’ of the L-shaped bracket onto the ‘ceiling’ of the window frame.
OUTSIDE-MOUNT: For outside-mounted roman shades, drive the screw into the ‘back arm’ of the L-shaped bracket onto the wall above the window trim.
NOTE: In case you have planned to mount your roman shades to the ceiling of the room, use the same bracket positioning as for the inside mount roman shades i.e., affix the ‘top arm’ of the L-shaped bracket onto the ceiling of the room above the window trim.
How to Install Roman Shades
We ship our roman shades pre-mounted with Velcro on the channel track. All you have to do is mount them in these four easy-peasy steps:
STEP 1: INSTALL THE BRACKETS
Based on your chosen mounting position – inside or outside the window recess – install the brackets on the window frame ceiling or onto the wall/ ceiling above the window trim. We recommend using a pencil to first mark the points where you’ll insert the screws to ensure that all brackets sit in a straight line.
As noted above, you’d need to drive the screw into the ‘top arm’ of the bracket onto the ‘ceiling’ of the window frame for inside-mounted blinds. For outside-mounted roman shades, drive the screw into the ‘back arm’ of the bracket onto the wall above the window trim.
STEP 2: MOUNT THE CHANNEL TRACK
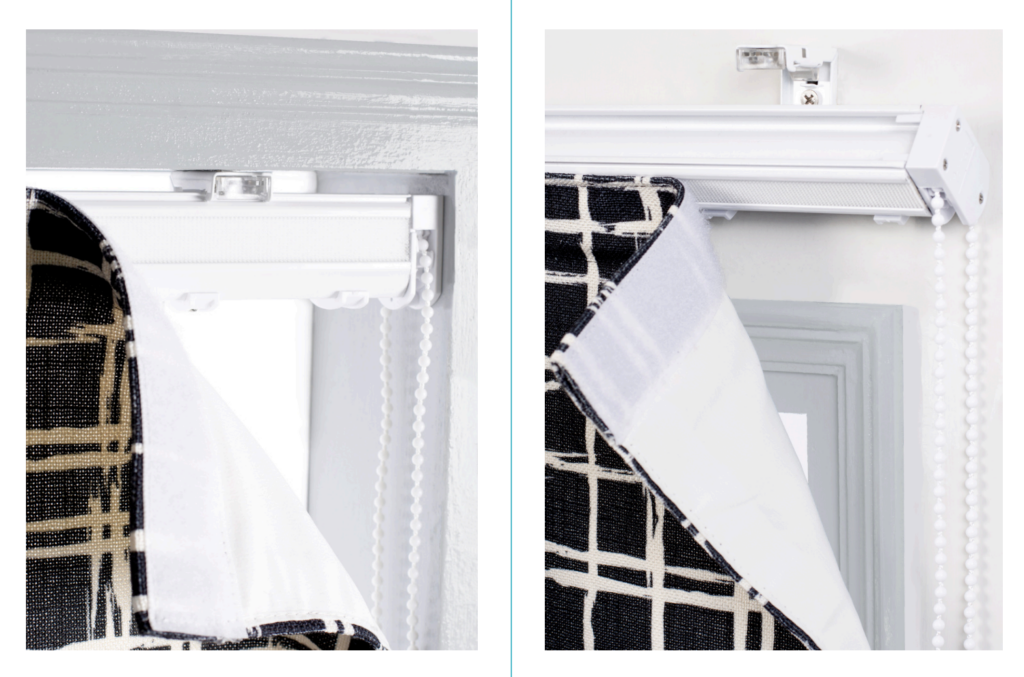
The top profile of the channel track features a groove running across its length. To attach the channel to the brackets, align the groove on the track with the bracket. And click the channel into place.
Listen for a clicking sound, indicating that the channel has snapped into the brackets. Once done, give the channel a gentle tug to ensure it’s secure.
Check out the following video for reference:
STEP 3: FIX ALIGNMENT ISSUES (IF ANY)
While many sellers provide the hardware and roman shades separately, we walk the extra mile and deliver ready-to-install pre-mounted custom roman blinds to your doorstep. However, given the long journeys our blinds make from our studios to their permanent homes, some settings may ‘move’ in transit and a rare shade may ‘skew’ when installed and operated. Panic not; this can be fixed in a jiffy.
You just need to adjust the lift lines at the back to re-align the roman shades and they’ll fall into straight folds. For further details, refer to our blog post on fixing uneven roman blinds.
STEP 4: SECURE CORD WITH ANCHOR
We strongly advise our clients to secure the pull cords with cord anchors provided in our kit. The anchor effectively ‘locks’ the pull cords in place, which is crucial for baby-proofing your home by keeping any dangling shade cords out of your little one’s reach.
Here’s how to use the cord anchor to secure your shade’s pull cords:
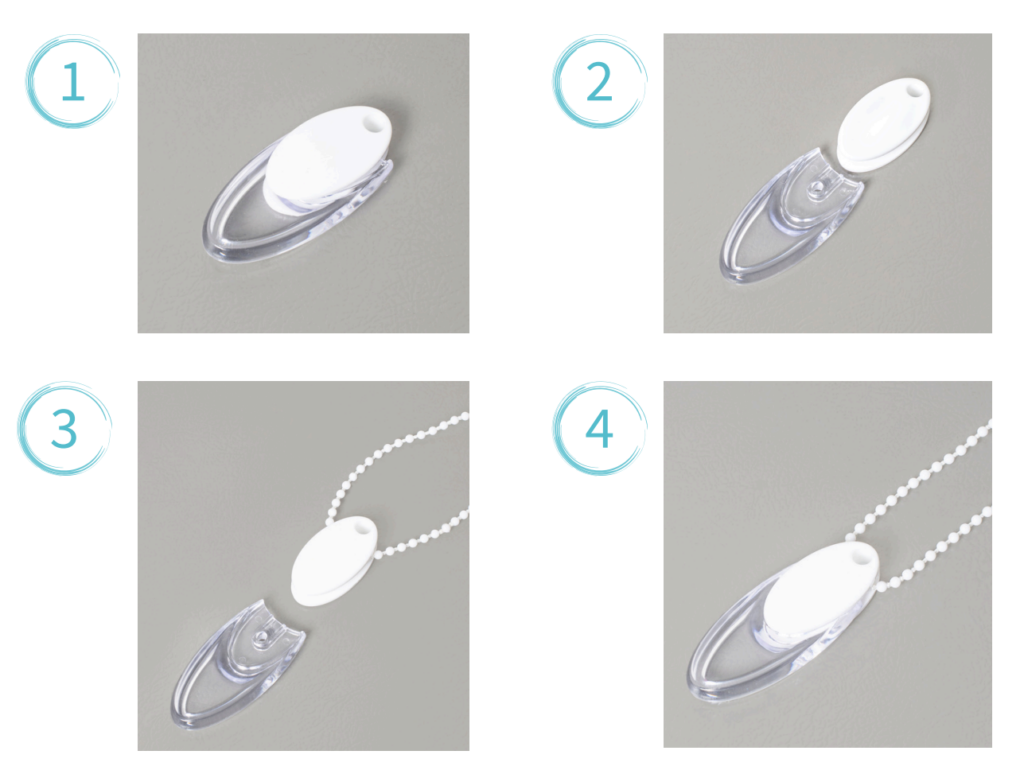
Separate the top white portion of the anchor from the bottom clear one with a gentle twist and pull. Loop the pull cord around the inner groove of the white part. Clasp the two parts of the anchor by pressing the white portion onto the clear part until it clicks into place, as shown in the following video–
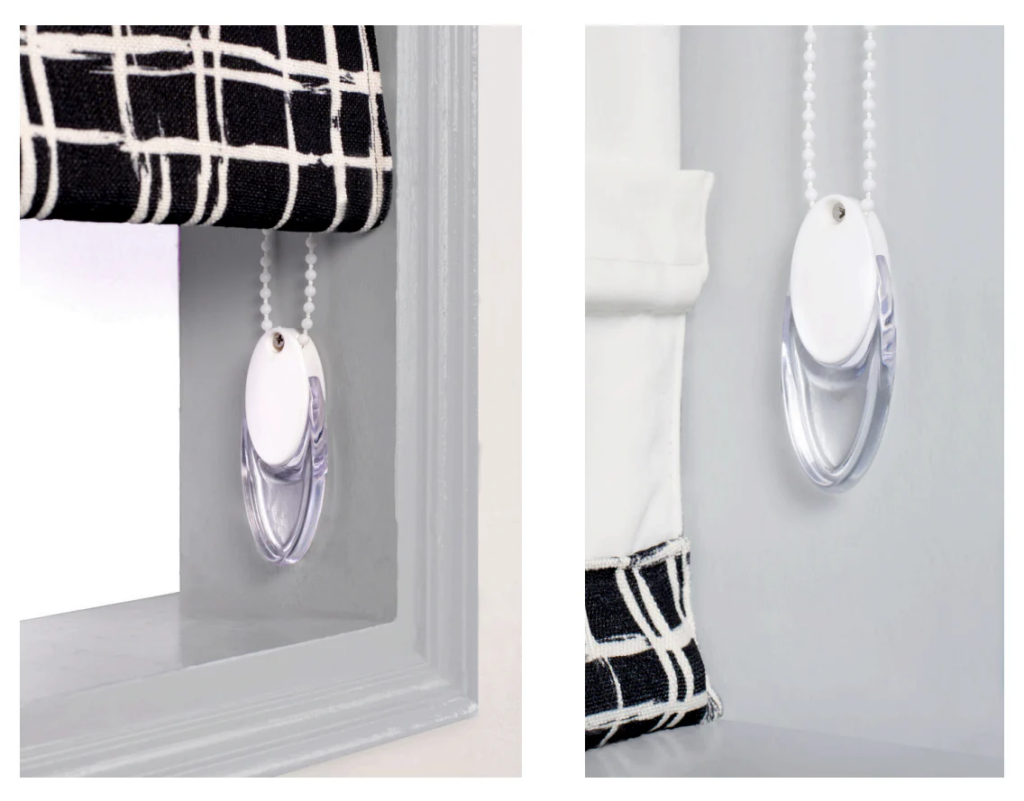
Once you have linked the anchor onto the pull cord, the next step is to decide upon the exact position to secure the anchor on the frame/wall.
For the inside mount position, your cord and the cord anchor should ideally be positioned within the window recess/ frame and remain hidden behind the shade. In the outside-mount position, the cord can be secured onto the wall beside the roman blind and might remain visible.
The cord anchor position should enable the cord to hang taut. It should not be loose – but with just enough ‘give’ to allow the cord to operate smoothly at a tug. Adjust the placement of the cord anchor accordingly to derive this desired cord tension. Once you’ve decided on the apt placement of the anchor, simply screw it in and that’s it — you’re all done!
Dismounting Your Roman Shades
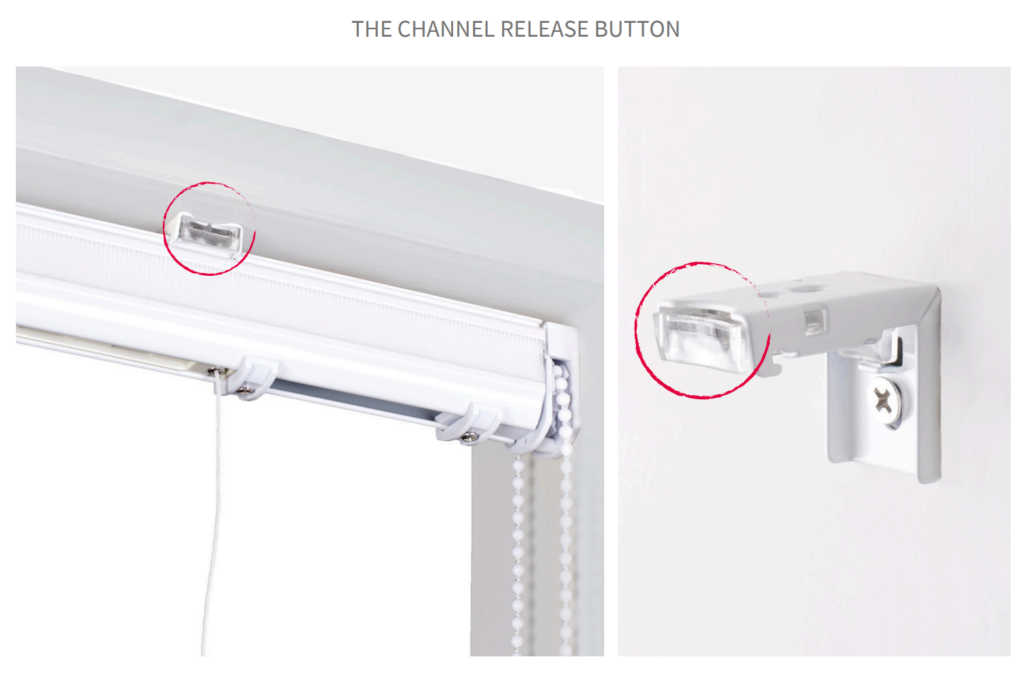
So your roman shades are snug in place and all set. However, you may now wonder how to detach them, if ever needed, for cleaning or perhaps when moving houses. For this, press the clear ‘release’ buttons on the front profile of the brackets, and the channel tracks will detach. Again, that simple!
In Closing
We hope our comprehensive guide has assisted you in installing your custom roman shades from Spiffy Spools and made the process a breeze. If, however, you have any further queries, we’re just an email away and always happy to help!
READ MORE: OUTSIDE MOUNT VS. INSIDE MOUNT ROMAN SHADES: WHAT, WHEN & WHY