Spiffy Speak
How to Fix Skewing Roman Shades
While many sellers provide the hardware and roman shades separately, we walk the extra mile and deliver ready-to-install pre-mounted custom roman shades to your doorstep. However, given the long journeys our roman shades make from our studios to their permanent homes, some settings may ‘move’ in transit and a rare shade may ‘skew’ when installed and operated. Panic not; skewing roman shades can be fixed in a jiffy.
Understanding How Roman Shades Operate
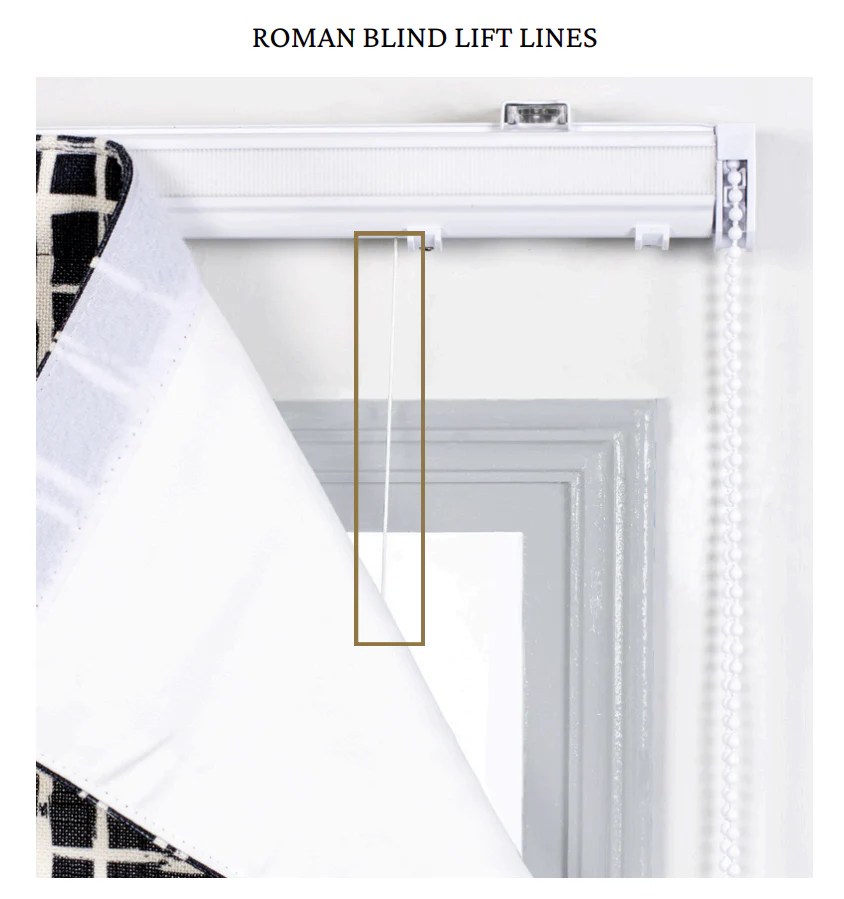
A critical part of any roman shades’ anatomy is its ‘lift lines’ – vertical cords that run from top to bottom, on the backside of the shade. A shade of up to 125 cms wide will typically have three lift lines; a wider shade may have more.
If your roman shade is skewing/hanging crooked when operated, one (or more) of the line locks has likely moved out of its position – while in transit or during installation – leading to unequal length/ tension between the lift lines.
Adjusting the Lift Lines to Fix Skewing Roman Shades
Now, the solution. Let’s explain it step by step –
- Lower your shade to fully unfold. Then stand on the rear side of the roman shade so you are in a position to see the mechanism behind your shade.
- Maneuver the pull cord until the roman shade folds up to its first fold/slat from the bottom. When the bottom bar touches the preceding slat, pause. (Refer to the video below for visual assistance). This is the moment of diagnosis where you can pinpoint the error with just a little bit of observation.
- Observe the position of the lift lines as well as the ‘line locks’ at the bottom. All line locks should ideally rest on the loop ring of the bottom-most slat at the exact same level. But, you may notice that one (or more) of the locks has slid out of its place either up or down on the lift line. The goal is to bring the line locks back to their position so that all the lines are standing at the same length and tension levels.
- Now, hold the line lock between your fingers and look for the toggle button. (Refer to the video in the previous section.) Press the button and manoeuvre it up or down until it reaches its designated position – the loop ring of the last slat, whilst being completely level with other line locks.
- If the lock has been displaced below the last slat, draw it upward until it rests on the loop ring of the last slat. Then, release your finger. If, on the other hand, the lock has moved above the last slat, draw it downward.
- When the lock has rested on the loop ring of the last slat, level with other locks, and release the finger. Now it is locked and will not move out of its position. When the last lift line is fixed and the line lock fastened, your roman shade will have assumed its correct position. The job’s done!
And that’s how you fix skewing roman shades!
READ MORE: INSTALLATION INSTRUCTIONS TO MOUNT ROMAN SHADES FROM SPIFFY SPOOLS